Application Ingestion and Replication examples of creating a task
Let's look at some examples of configuring an application ingestion and replication task in CLAIRE Copilot.
Example: Create an application ingestion task for an combined load from Salesforce to Amazon S3
You want to replicate Salesforce data changes continuously to an Amazon S3 target to make sure downstream applications get the latest customer information.
To do this, let's create an application ingestion and replication combined load task in CLAIRE Copilot
1Open CLAIRE Copilot.
2In the Ask CLAIRE box, type the prompt Create a combined load task that has a Salesforce source and Amazon S3 target. Then click the Submit icon.
A list of Amazon S3 target connections available in your organization appears:
Note:
Up to five connections are listed.
3Type the number associated with the Amazon S3 target connection you want to use, or if the connection isn't listed, you can type the name of a valid connection that you've previously tested. In this example, let's type 1 for the AIN_S3 target connection. Then click the Submit button.
A list of Salesforce source connections available in your organization appears:
4Type 2 for the salesforce_CMI source connection and then click the Submit button.
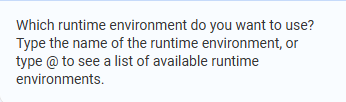
5If a request for a runtime environment appears, type @ to list runtime environments. Then click a running runtime environment and click the Submit icon.
This step is skipped if you previously set a default runtime environment for your use.
6At the request for the source objects, type "select all" to select all source objects, or enter object names or name masks with wildcards.
In this example, let's select tables with names starting with "A" and exclude any tables with names starting with "AC":
7A task summary appears. Review the summary to confirm your settings: correct:
8To create the task asset, click Yes.
The task is generated and opens in the task configuration wizard.
9Verify the task definition. You can edit field values and set additional fields on the Task Details, Transform, and Let's Go pages. Toggle on Show Advanced Options to see all fields. However, do not change the source and target connections.
10Save the task.
11Deploy the task to create a job instance.
You can now run the job from My Jobs or another monitoring interface.
Example: Create an application ingestion task for an incremental load from Salesforce to Kafka
You want to replicate change data from a Salesforce source to a Kafka messaging system in real time. Kafka can then stream the data with low latency to downstream consumer applications.
To do this, let's create an application ingestion and replication incremental load task in CLAIRE Copilot. Since we know the source and target connection names, we'll include them in the first prompt to streamline the process.
1Open CLAIRE Copilot.
2In the Ask CLAIRE box, type the prompt Create an incremental load task that has a Salesforce source that uses the salesforce_CMI connection and a Kafka target that uses the Kafka1 connection. Select all source objects. Then click the Submit icon.
A list of your settings is displayed:
3Because no further information is required, the task summary is displayed.
Review it to ensure the task is properly configured.
4To create the task asset, click Yes.
The task is generated and opens in the task configuration wizard.
5Verify the task definition. You can edit field values and set additional fields on the Task Details, Transform, and Let's Go pages. Toggle on Show Advanced Options to see all fields. However, do not change the source and target connections.
On the Let's Go page, you can enter a custom name and description for the task and your project location so that you can find the task again easily.