1From the Explore page, open a profiling task.
Note: Ensure that the profiling task contains a rule specification that can identify exceptions.
2Select the Create Exception Task option from the Menu.
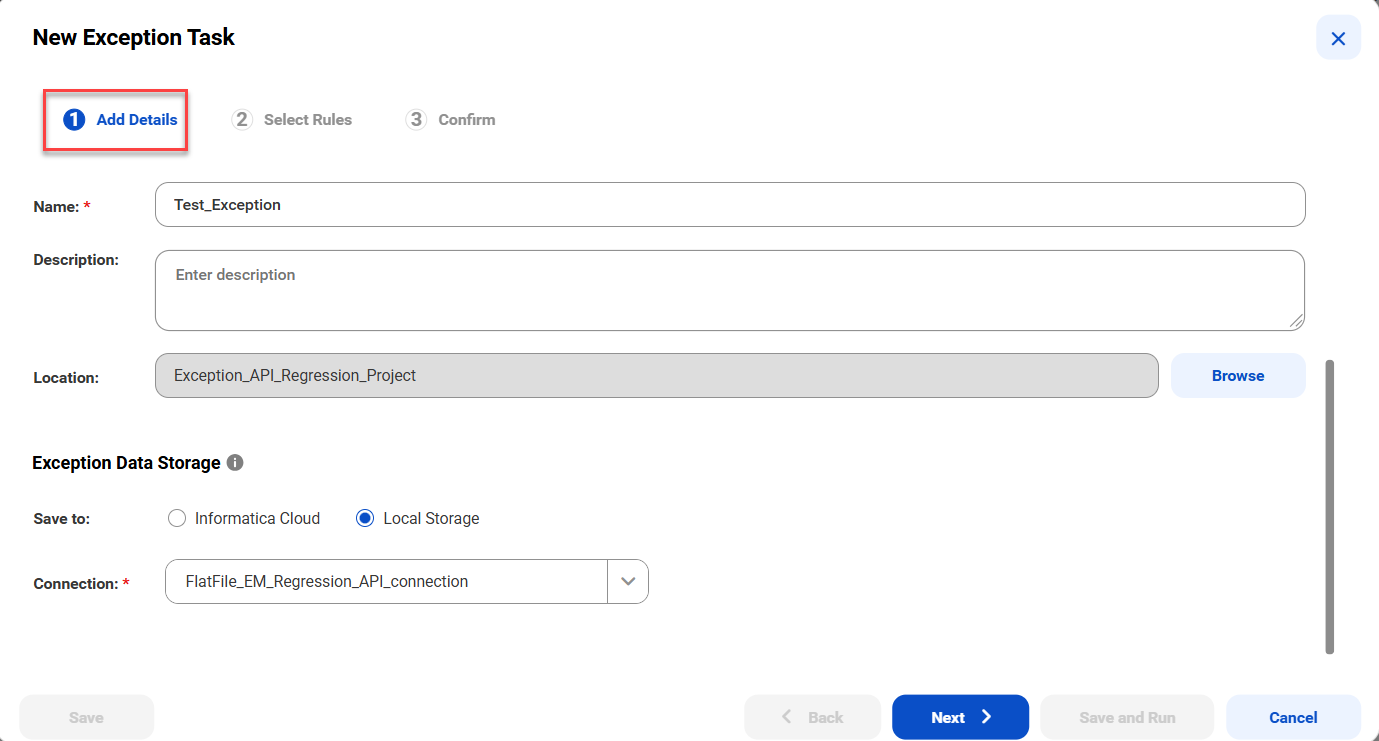
The New Exception Task dialog box appears and shows the Add Details tab. 

3On the Add Details tab, configure the following fields:
Field | Description |
|---|---|
Name | The name of the exception task. |
Description | A description of the exception task. |
Location | The location where you want to save the exception task. |
Exception Data Storage | Determines whether the exception task writes the results of the task job to your local system or to Informatica's cloud storage. If you select Local Storage, choose a flat file connection that the Secure Agent can access. |
4Click Next.

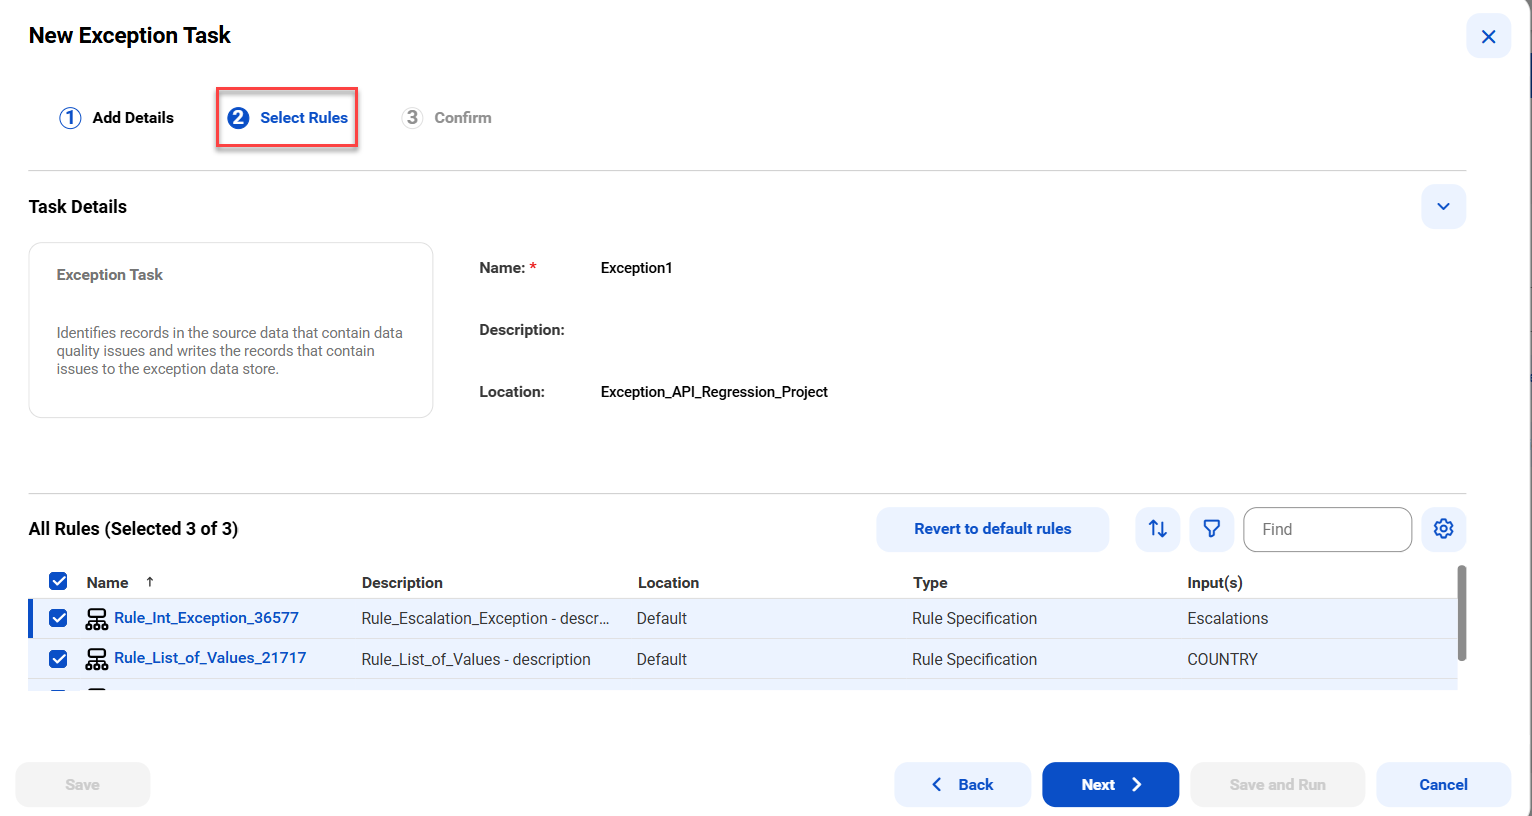
5On the Select Rules tab, select one or more rule specifications from the profiling task. Select at least one rule specification that can identify exceptions.
By default, the Select Rules tab displays and selects all the rules. You can expand the Task Details section to view the details of the task. Select Revert to default rules if you want to select all rule specifications from the profiling task.
6Click Next.
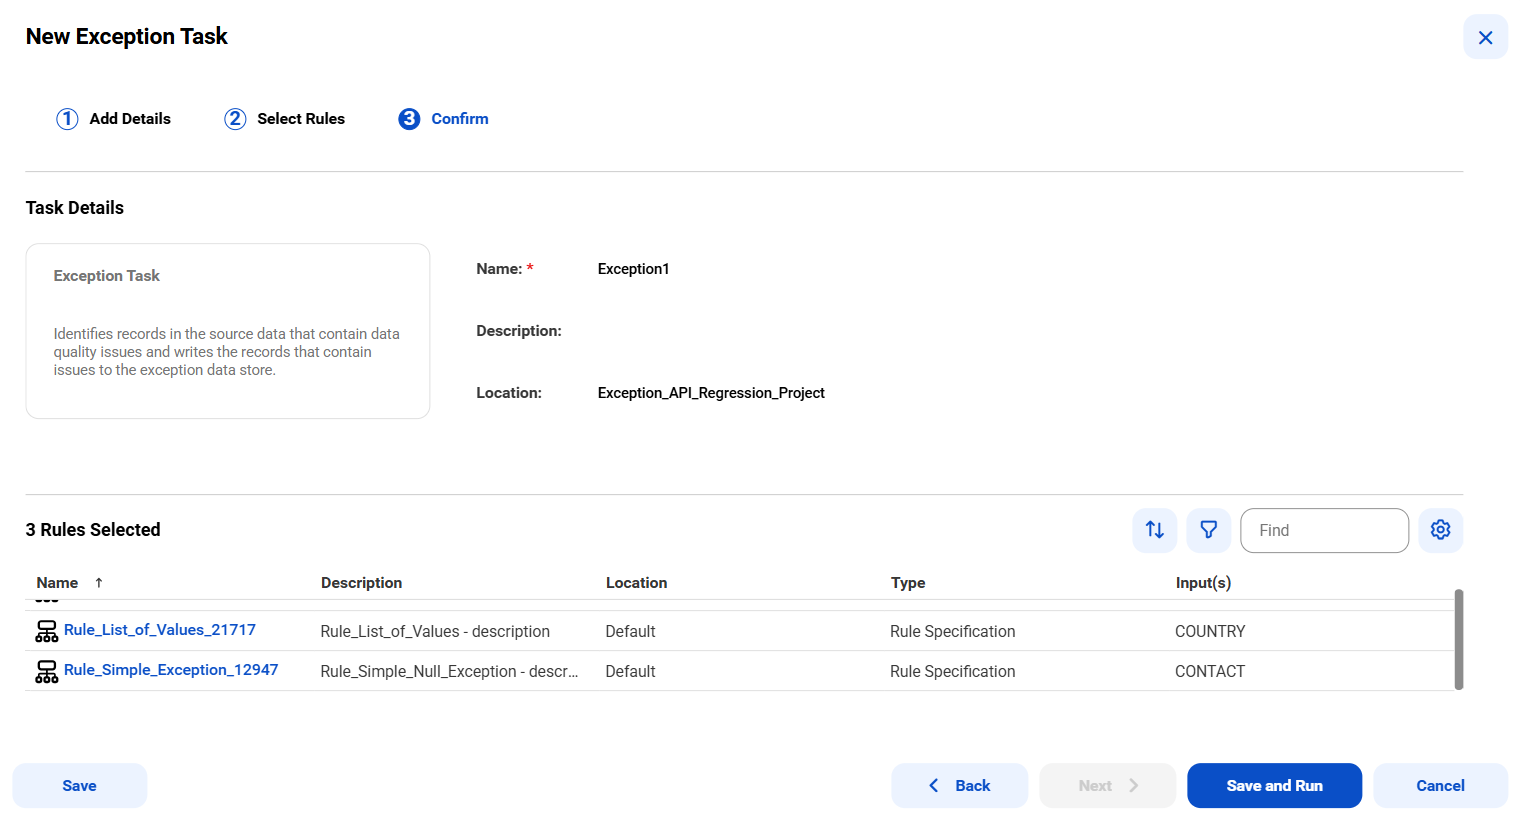
7On the Confirm page, review the task details and the rules you selected.

8Click Save to save the exception task. Click Save and Run to save the task and run it.