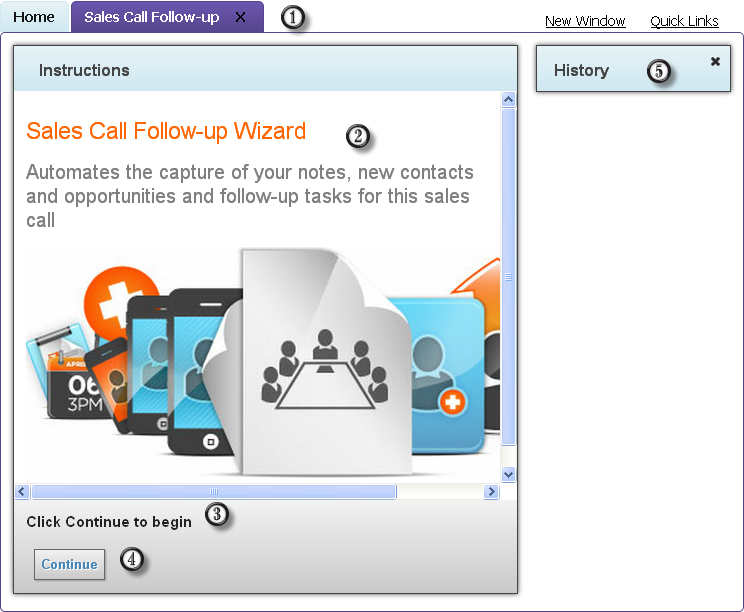


 | A tab for your wizard and others wizards that you are using. |
 | The step's main area. This area can contain instructions, information, areas into which you will be able to type text, select check boxes, and so on. The step shown here only has text as it describes what the wizard does. |
 | A prompt area. This text tells you which button to press so to select the step that the wizard next executes. This step has only one button. |
 | Pressing a button in this area tells the wizard what the next step will be. In many cases, a step has more buttons than are shown here. Each button tells the wizard what the next step will be. For example, a step that asks a question might have Yes and No buttons, and the step that follows depends upon which you select. |
 | The history of the steps you've executed. A new item is added after you press a button within the prompt area. Each step in the history is actually a link. Clicking on it reverts the wizard back to a previously executed step. This also undoes any of the changes made to Salesforce since the step you're going back to executed. This could, for example, delete a lead that another step created. Note that you can close the history window to make more room for the main wizard window by clicking on the "x". |

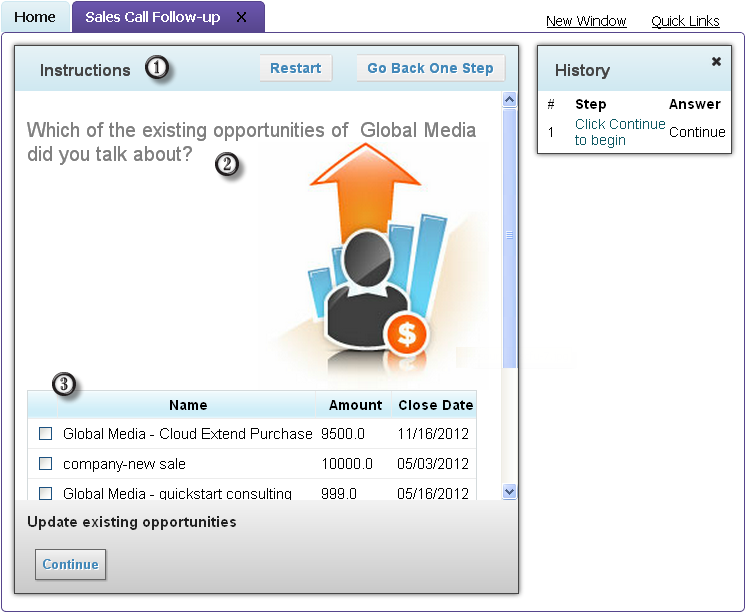
 | The "Instructions" label is in all steps. |
 | A question. Most steps begin with a question or instructions. A form into which you'll enter information usually follows. |
 | Here, the wizard displays all of the opportunities with this company. The wizard uses the contact's company name to locate and display this Opportunity information. |

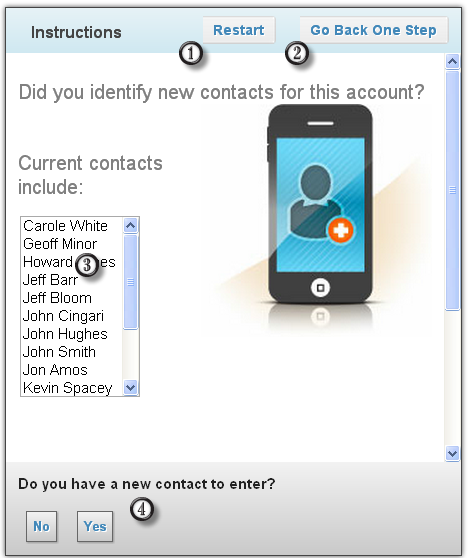
 | The Restart button tells the wizard to return to its first step. Unlike using the history to go back to the first step, clicking restarts will not undo any of the changes made by the wizard (such as deleting objects). |
 | While you can return the wizard to any of its previously executed steps by clicking on the step in the History list, it is often more convenient to press the Go Back One Step button if all you want to do is return back to the step just executed. |
 | This table, automatically generated by Guide Designer, contains a list of your contacts for this account. |
 | Unlike the two previous steps shown in this topic, this step contains two buttons. Other steps can contain more (or perhaps many more). |