1Log in to Application Integration in the modern view and click Recipes on the left navigation bar.
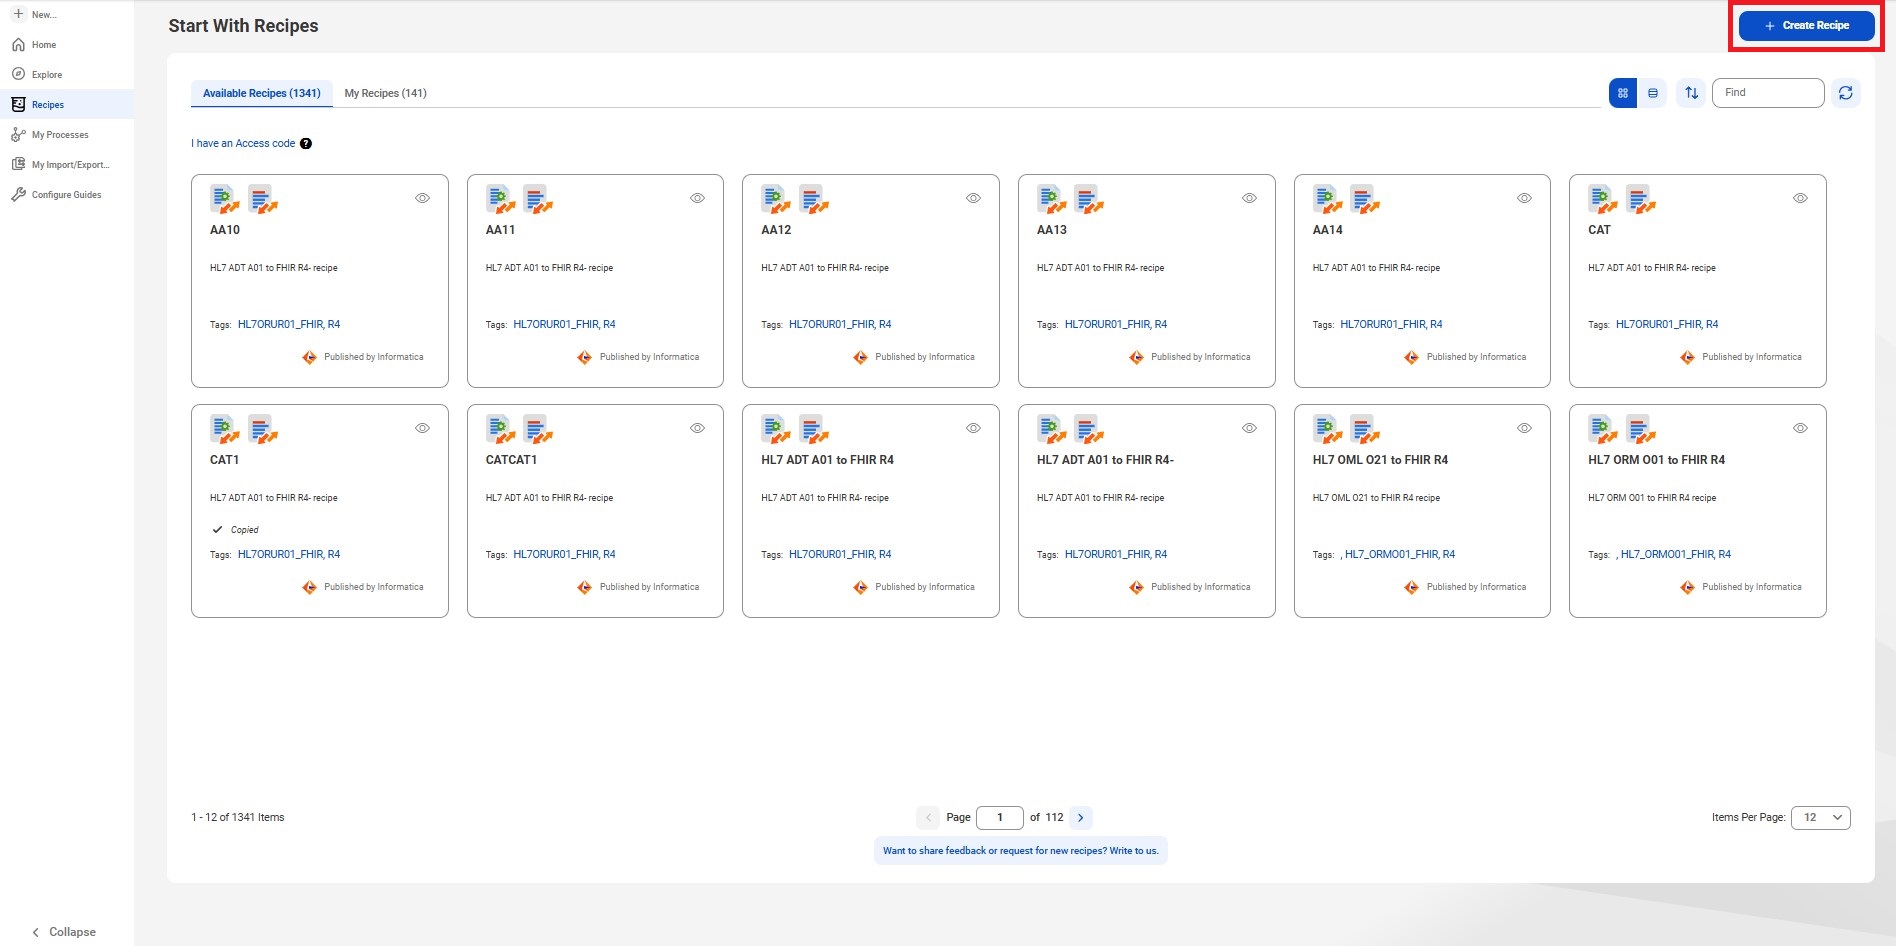
2On the Start with Recipes page, click Create Recipe on the top right corner of the page.
The following image shows the Create Recipe button to create a recipe:

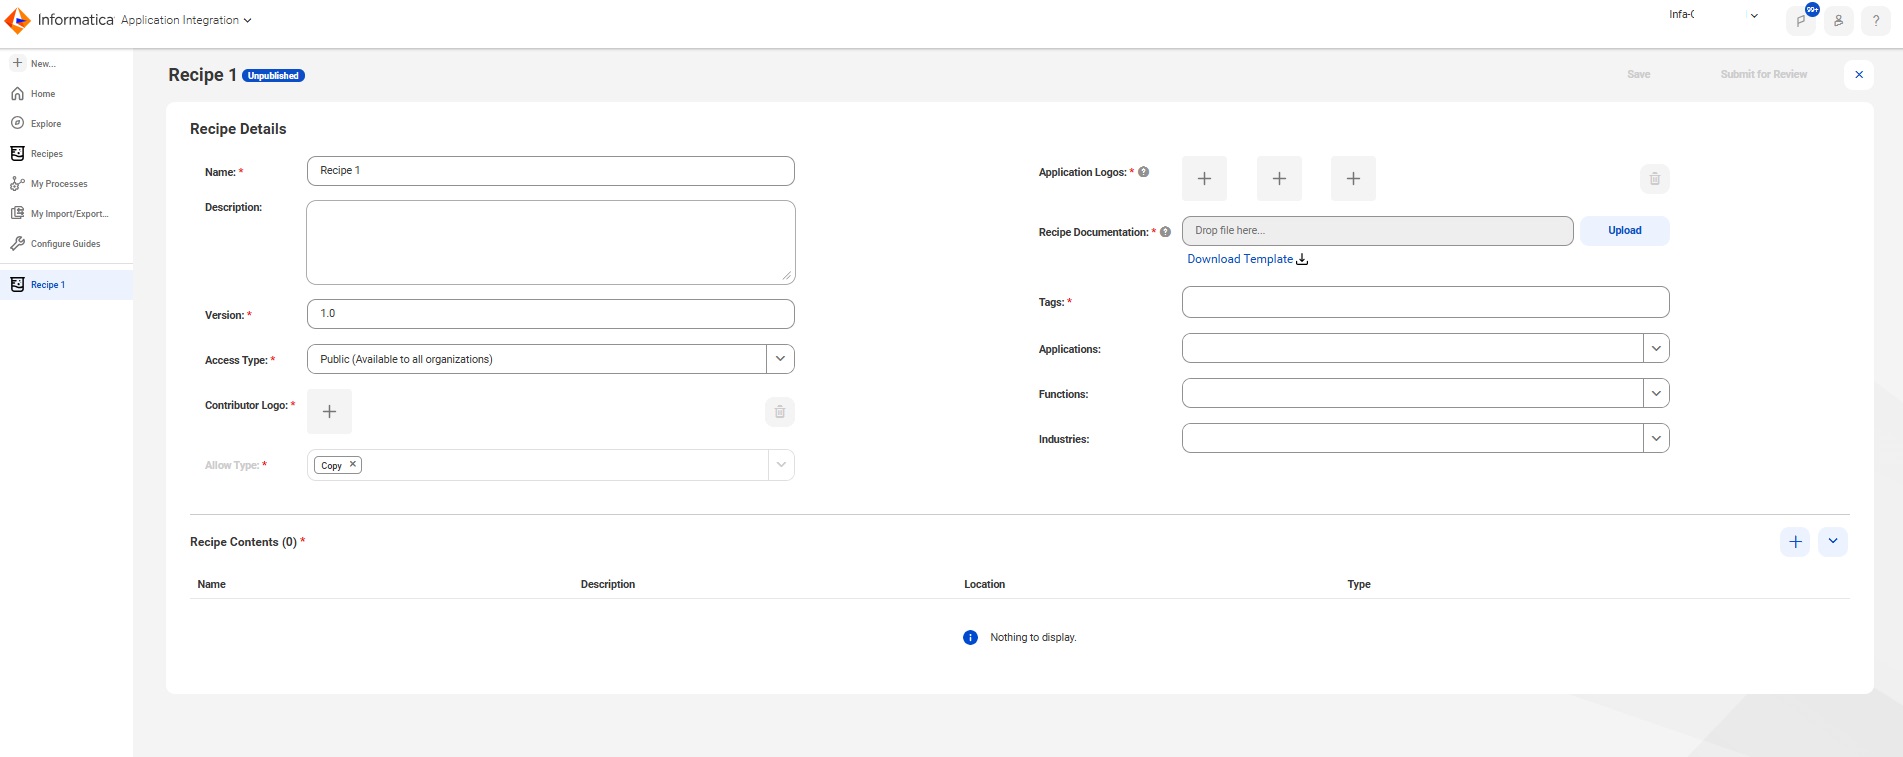
3Enter the recipe details on the new recipe page.
The following image shows the sections in the new recipe page:

The create new recipe page contains the following sections:
- Recipe Details
- The Recipe Details section displays the following properties:
- - Public. Available to all users across organizations
- - Private. Available only to your organization and its sub-organizations
- - Unlisted. Available only through an access code provided by the recipe owner
- - Ensure each logo size is less than 1MB.
- - Use different file names for each logo you upload.
- - To upload a logo, delete the existing one first, then add the new logo.
- Recipe Contents
- You can add multiple assets to a recipe depending on your requirements.
- aClick the Add icon.
- bSelect the required asset from the list.
- cClick Select.
- aClick Explore on the left navigation bar and navigate to the project location. All assets in the recipe are listed.
- bFor the specific asset, click the Action menu and click Show Dependencies.
- cClick the Uses tab to view the list of direct dependencies.
Property | Description |
|---|---|
Name | Enter the name of the recipe. |
Description | Optional. Enter the description of the recipe. |
Version | Enter the version of the recipe. Default is 1.0. |
Access Type | Select one of the following access types for the recipe: |
Contributor Logo | Add your company logo. It appears in card view on the Recipe page after publishing the recipe. |
Allow Type | Available permissions on the recipe. This field is currently disabled. Default is Copy. |
Application Logos | Add logos of the applications integrated with the recipe assets, such as Salesforce or ServiceNow. Ensure you follow the guidelines for adding application logos: |
Recipe Documentation | Upload recipe documentation in PDF or DOC format. Click Download Template to access the recipe template and fill in the required details. Uploading documentation helps users configure the recipe, understand how it works, and learn its benefits. The file size must be less than 10 MB. |
Tags | Enter the keywords that highlight the recipe's purpose. |
Applications | Optional. Select the related applications for the recipe. |
Functions | Optional. Select the related functions for the recipe. |
Industries | Optional. Select the relevant industries for the recipe. |
When you create a recipe, passwords and encrypted data are removed automatically. However, you must manually remove any personally identifiable information (PII) from plain text fields before adding assets. This ensures sensitive information isn't exposed when the recipe is published. You can include only valid assets.
To remove PII, browse to the asset’s location from the Explore page. Open the asset and edit as needed. If removing a value makes the asset invalid, you can substitute it with a dummy value.
To add a recipe asset, perform the following steps:
When you add an asset, its dependencies are automatically included in the recipe package, even if they don’t appear on the new recipe page. To view the asset dependencies, perform the following steps:
Note: The recipe includes the complete tree of dependencies and not just the direct ones.
When you copy a recipe, all the assets and their dependencies are available in the folder you select.
Note: You must delete a recipe before you can delete any asset used in it.
4Click Save.
5For Public asses type recipes, click Submit for Review .
The Start with Recipes page shows recipes in the following two tabs:
- - Available Recipes: Displays the recipes provided by Informatica and the recipes shared by users in your organization or other organizations.
- - My Recipes. Displays the recipes you've created. It displays the recipes in card view by default.
Note: In classic view, you can only view recipes in the My Recipes tab. You can't modify them or create new recipes.