Prerequisites for using the recipe
To synchronize Salesforce accounts with Dynamics 365 accounts, the following prerequisites must be met:
- •Create a custom field in the Salesforce account entity
- •Create a custom field in the Dynamics 365 account entity
Creating a custom field in the Salesforce account entity
To create a custom field in the Salesforce account entity, perform the following steps:
- 1Log in to the Salesforce organization.
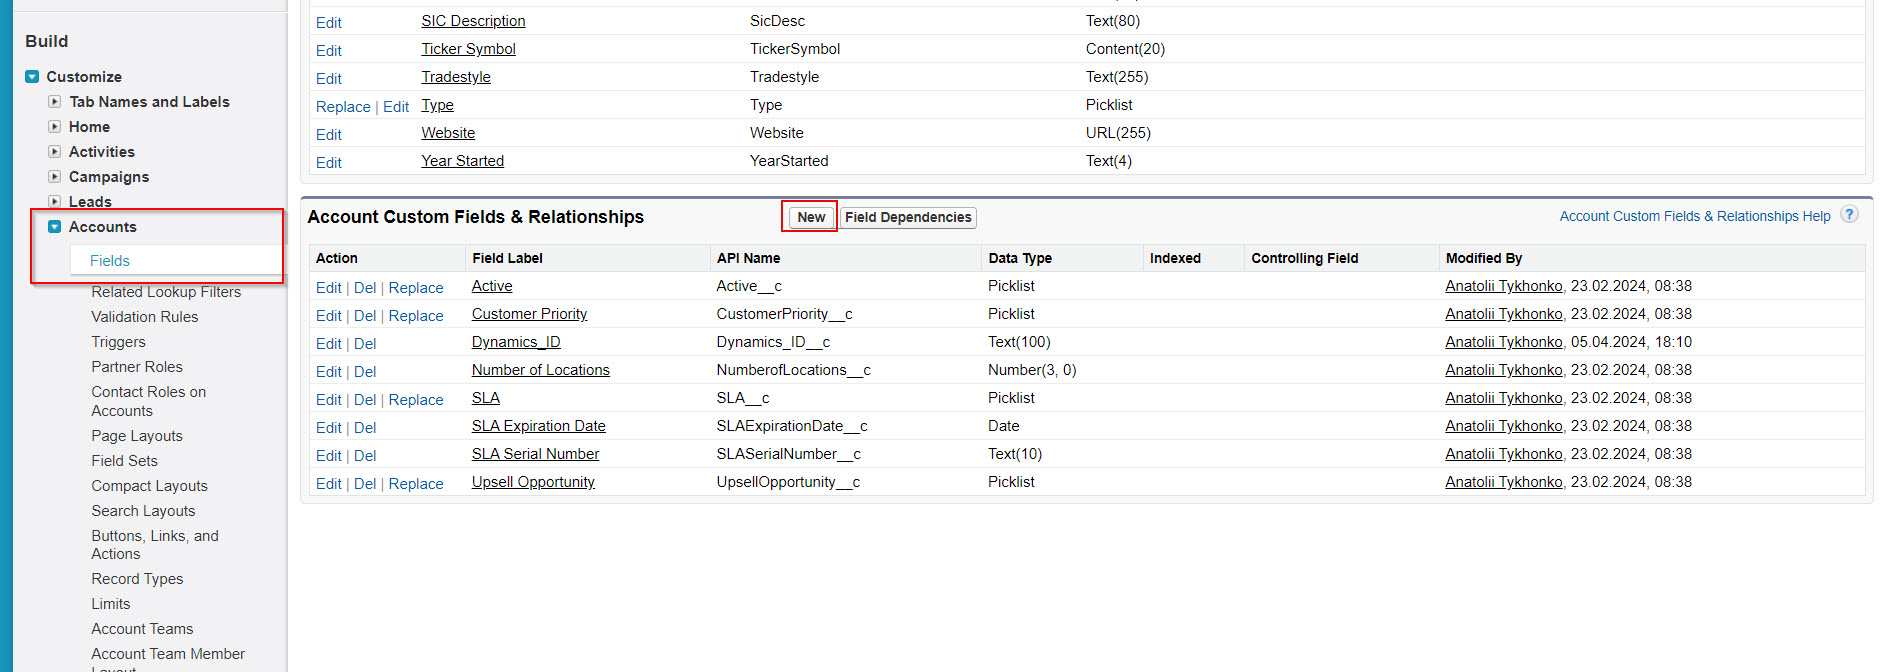
- 2Go to Setup > Build > Customize > Accounts > Fields, and then click New.
The following image shows the New button on the Accounts Fields page:
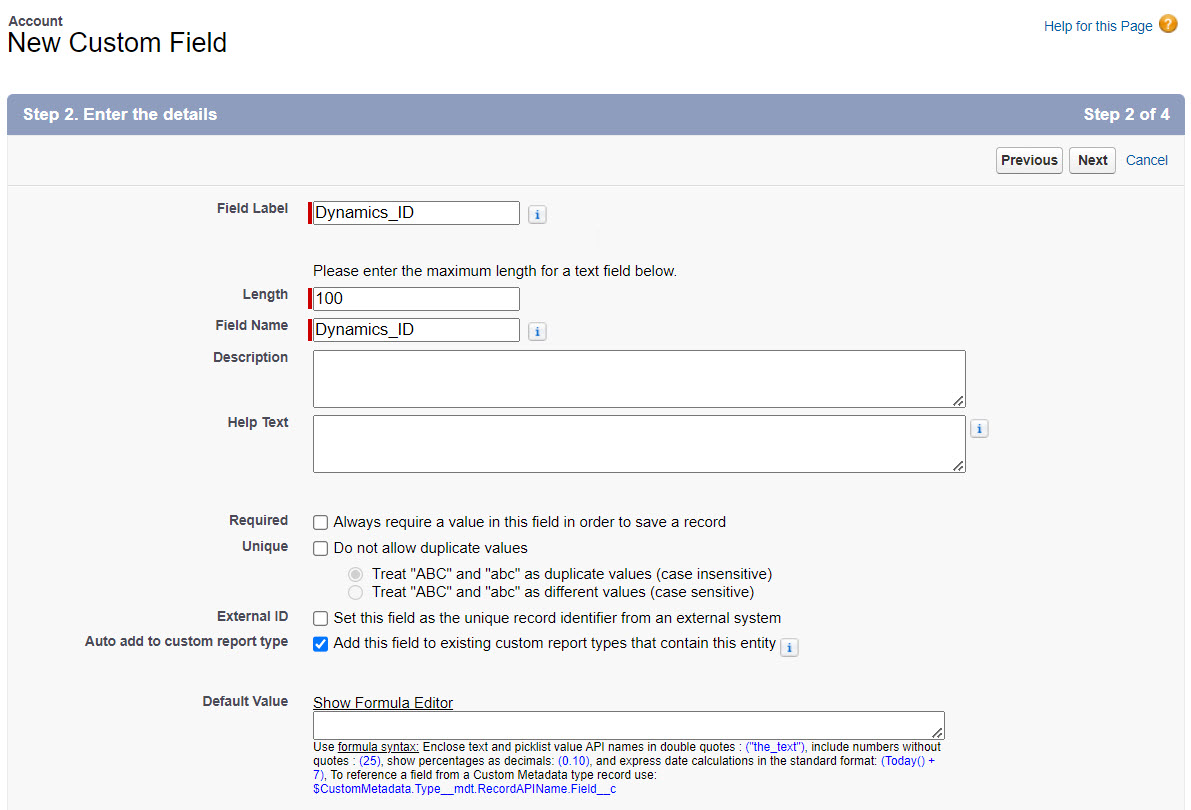
- 3In the Field Label field, enter the Dynamics_ID value and save the custom field.
The following image shows the New Custom Field page:
Creating a custom field in the Dynamics 365 account entity
To create a custom field in the Dynamics 365 account entity, perform the following steps:
- 1Log in to the Dynamics 365 organization.
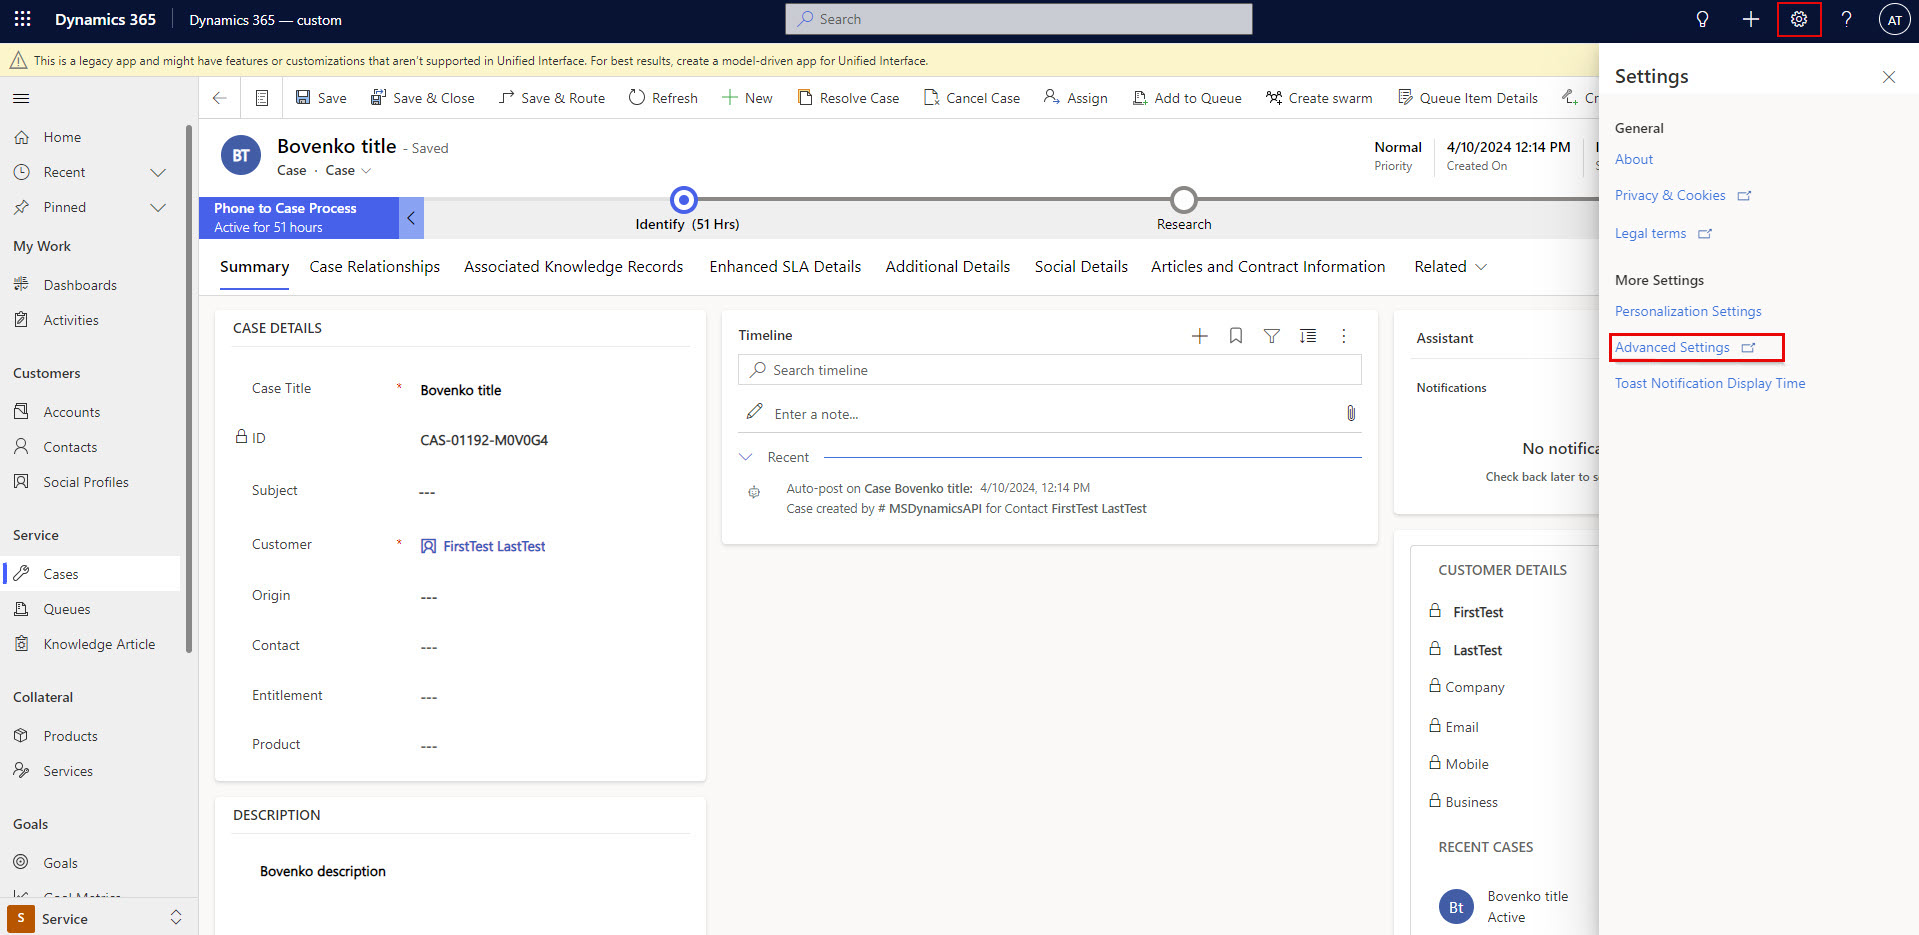
- 2Go to Settings > Advanced Settings.
The following image shows the Advanced Settings option on the Dynamics 365 page:
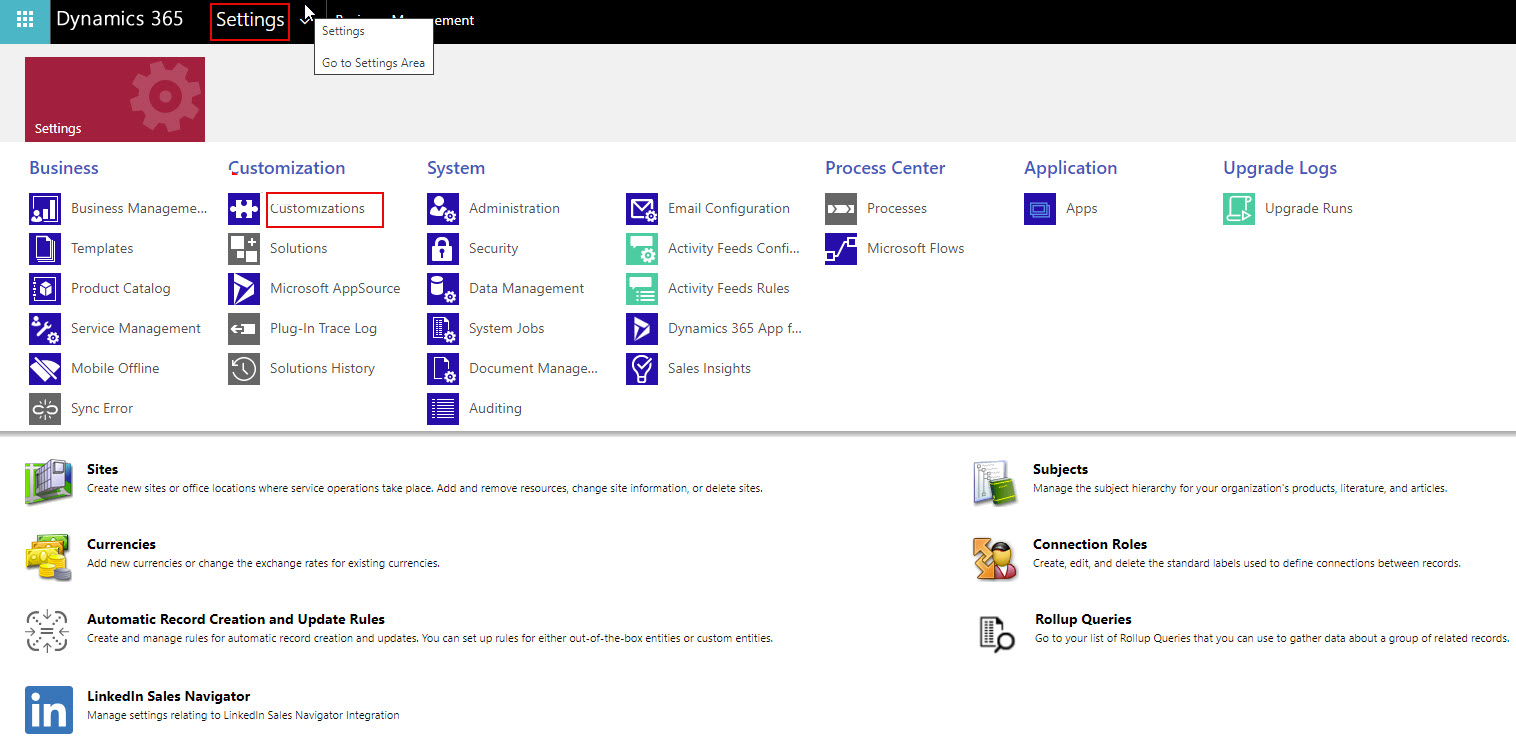
- 3Click Customizations on the Settings page.
The following image shows the Customizations option on the Settings page:
- 4Click Customize the System.
The following image shows the Customize the System option on the Customization page:
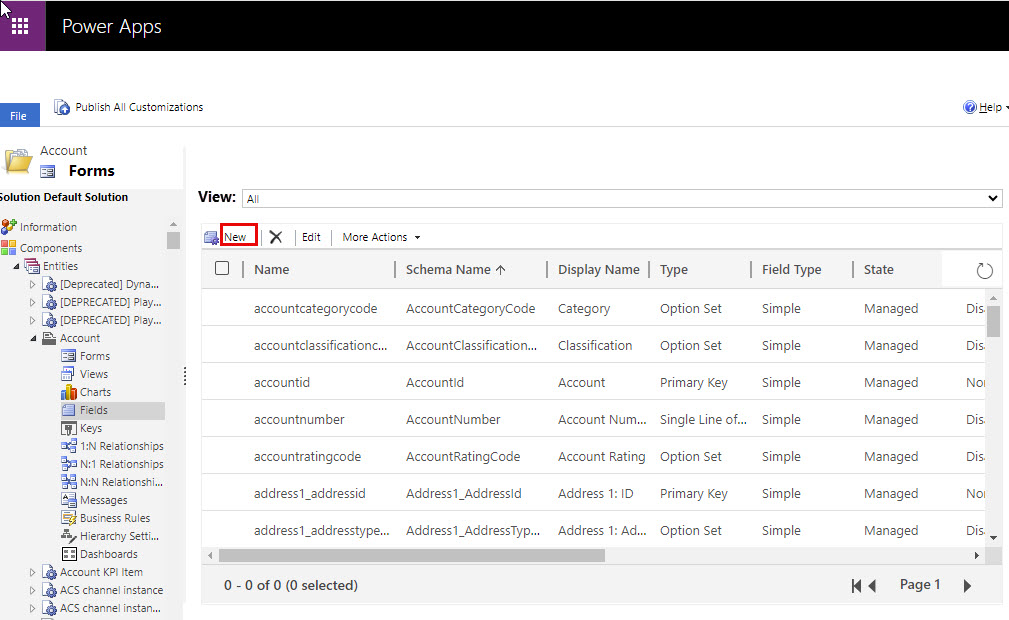
- 5Go to Components > Entities > Account > Fields, and then click New.
The following image shows the New button on the Account Fields page:
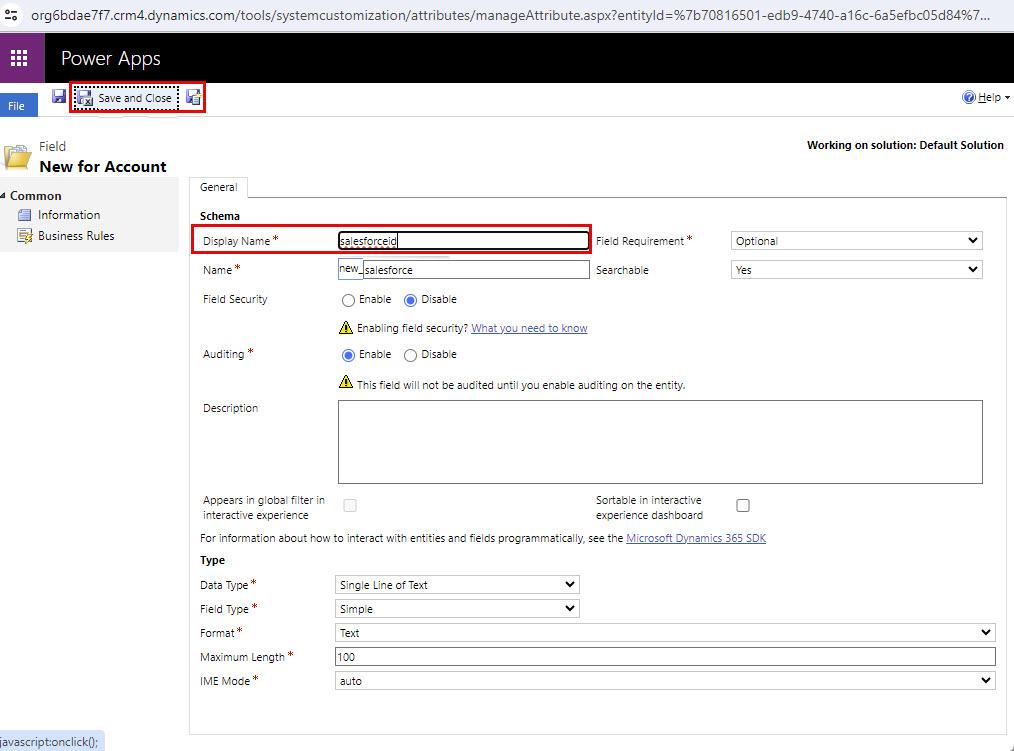
- 6In the Display Name field, enter the salesforceid value and click Save and Close.
The following image shows the New for Account page:
