1Create a Business 360 FEP connection.
2Create a connection.
3Create a mapping.
4Add a Source transformation, and specify a name and description in the general properties.
5Select the connection to the Salesforce application.
6On the Target tab, perform the following steps:
- aIn the Connection field, select the Business 360 FEP connection.
- bIn the Source Type field, select Single Object.
- cIn the Objects field, select the target object to which you want to write data.
- dIn the Operations field, select the type of operation that you want to perform.
- eTo view the list of supported assets, on the left pane, expand Home.
- fTo view the list of available assets, expand the asset type under an application. For example, if you select Customer 360 and Business Entities on the left pane, you can view the list of available business entities on the left pane from which you can choose the required business entity. The root fields and field groups that belong to the selected business entity appear as individual objects on the right pane from which you can select the required target object.
- gTo view the list of custom assets, on the left pane, expand Custom Assets, and select an asset type.
- hTo select relationships in hierarchies, expand Custom Assets, and then click Hierarchies. Select the required relationship from the right pane.
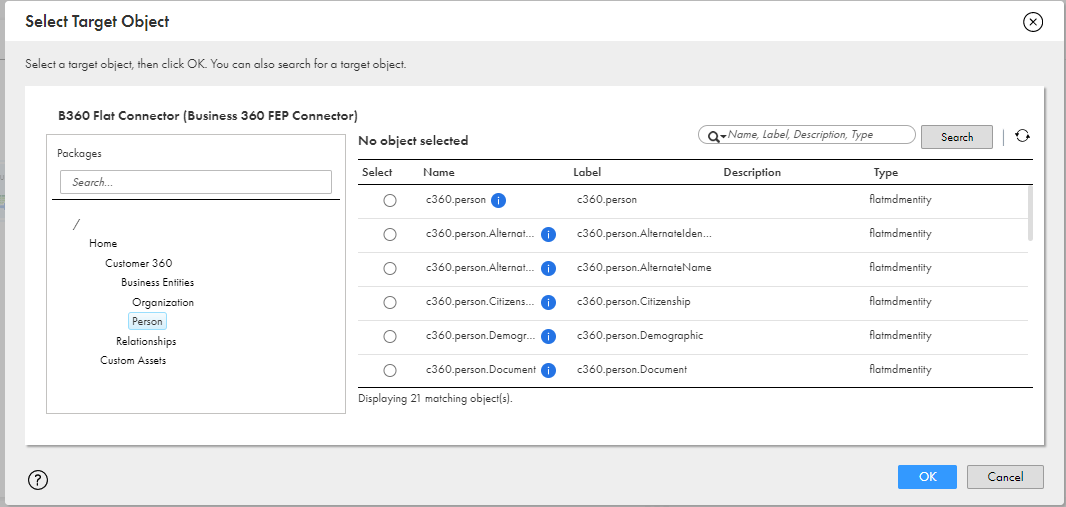
The following image shows the target assets:

For example, to update the date of birth value of a record, you can select the operation as update for the Target transformation of the root field. To delete the billing address of a record, you can select the operation as delete for the Target transformation of the address field group.
For more information about the different types of operation, see Target transformation in mappings.
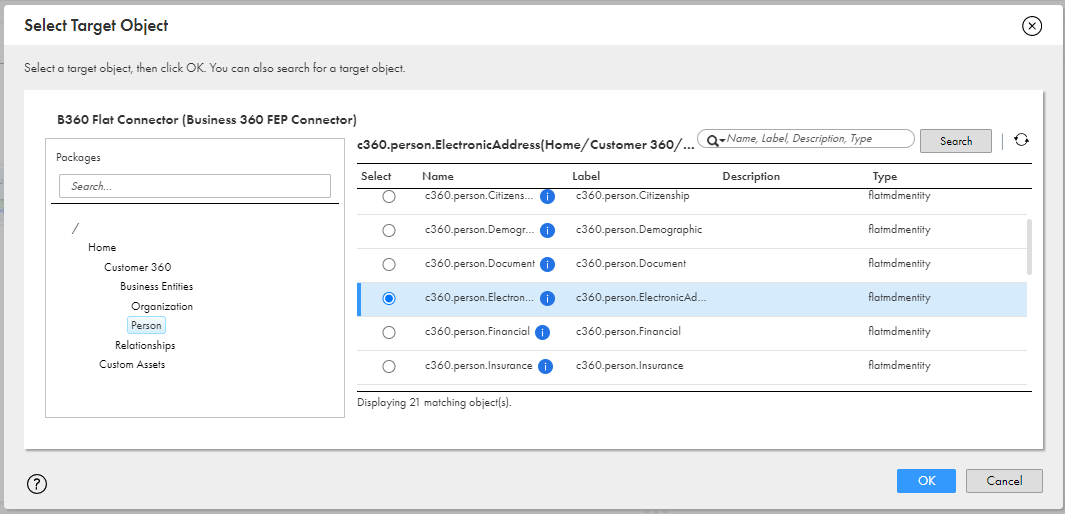
The following image shows the Person business entity selected on the left pane and the Electronic Address field group selected on the right pane:

The custom assets are grouped based on the asset type.
The list of custom assets appears on the left pane. For example, if you choose Hierarchies, the list of hierarchies appears on the left pane. If you choose a custom hierarchy, the business entities and relationships associated with the custom hierarchy appear as individual objects on the right pane.
Note: If you change the name of a custom business entity or delete it in the Business 360 Console, the existing mappings with references to that custom business entity will fail when you run those mappings.
Note: To specify relationships in hierarchies as the target object, ensure that you specify unique display names for each relationship within a hierarchy. Don't select the relationship from the Relationships folder under Custom Assets.
7On the Field Mapping tab, select the input fields that you want to map to the target fields.
Map the following fields from the Input Fields section to the Target Fields section based on the purpose of the fields described in the following list:
- - BusinessId. Optional. Unique identifier for the input records.
- - sourceLastUpdateDate. Optional. The ingress process uses the sourceLastUpdateDate field to import the updated date of a field or field group from the source system. Currently, you can map the sourceLastUpdateDate field to the required root fields and root field groups. To view the sourceLastUpdateDate fields in the Target Fields section, expand the _cm nodes within a field group. The last updated date is essential to establish the best version of the truth when you import data from multiple source systems into the MDM SaaS data store.
Note: When you ingress hierarchies or relationships, ensure that you don't map the BusinessId field.
For more information about using business IDs in the ingress process, see Ingress data with business ID in the Business 360 Console help.
For more information about establishing the best version of the truth, see Establishing the best version of the truth in the help of business applications.
If you map the sourceLastUpdateDate field but the field value isn't in the input file, then the process updates the value in one of the following ways:
- - For a root field, the mapping considers the last updated date of the root field as the value.
- - For a field group, the mapping considers the sourceLastUpdateDate field value of the root field as the value.
- - For the root field and field group, the mapping considers the last updated date of the root field as the value.
Note: You can't map the sourceLastUpdateDate field to nested field groups.
If a field group has nested field groups, the parentId field indicates the position of the field group. The parentId field of a nested field group must be the sourcePKey field of its parent field group. If you choose a nested field group as the target object, you can view the sourcePKey fields of the parent field group and all the associated parentID fields in the Target Fields section. For example, if you choose field group A nested within field group B, you can view the parentID field of the root field and also the parentID field of field group B.
Ensure that the sourcePkey field name contains only alphanumeric characters and the following special characters:
.~!/'={}|:@#$^&*()-_+,<>?`
Otherwise, the Target transformation fails. If required, correct the source primary key values in the source objects.
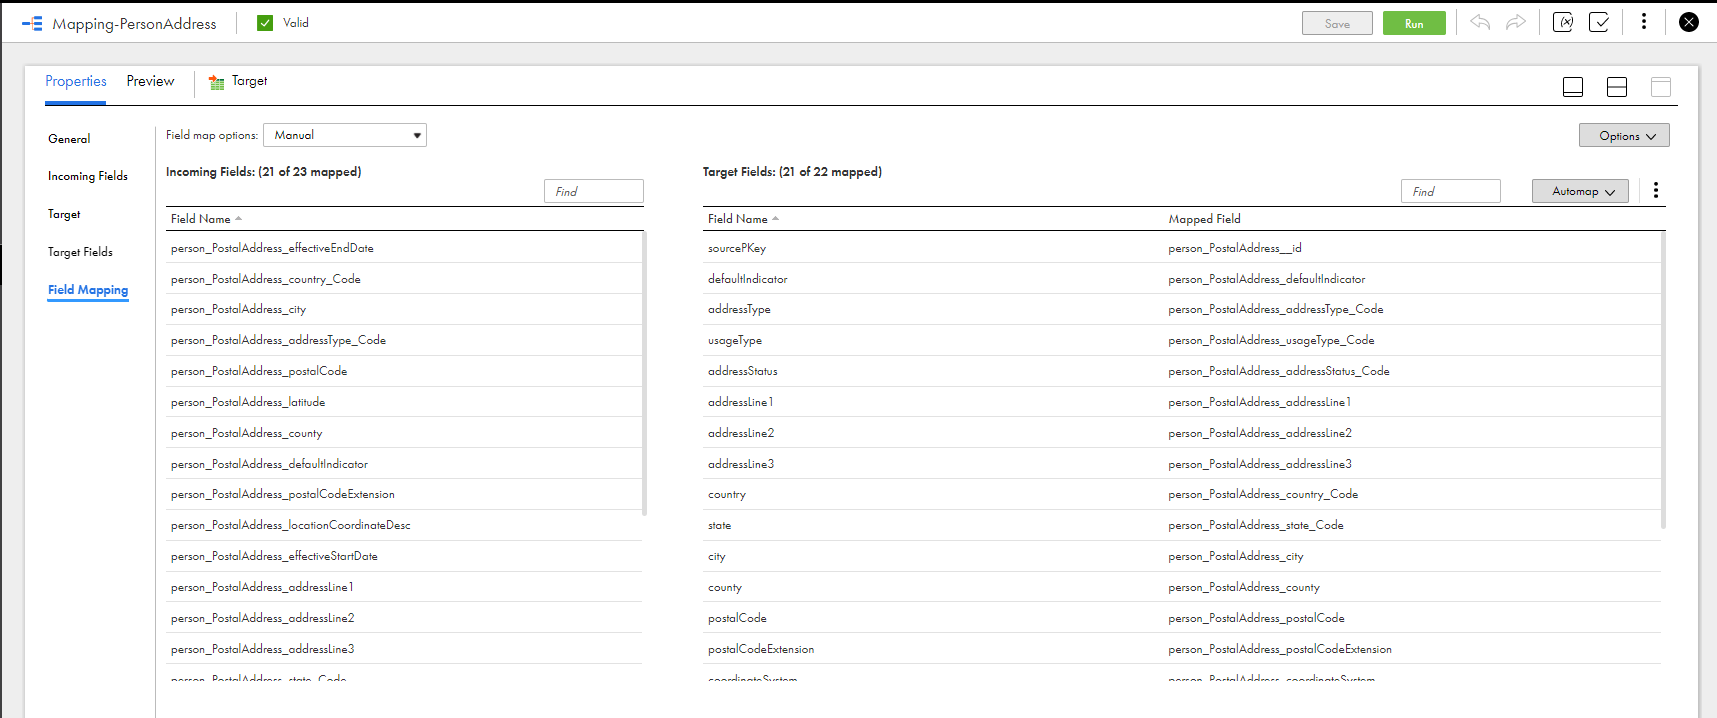
The following image shows the input fields on the left pane in a non-hierarchical format and the target fields on the right pane:

Note: If the name of a nested field group exceeds the maximum limit of 75 characters, the name is prefixed with its corresponding level instead of the parent field group names. For example, if the name of a nested field group at fourth level exceeds 75 characters, the field name format is Level4_<field group name>_<parentId>, wherein Level4 replaces the parent field group names.
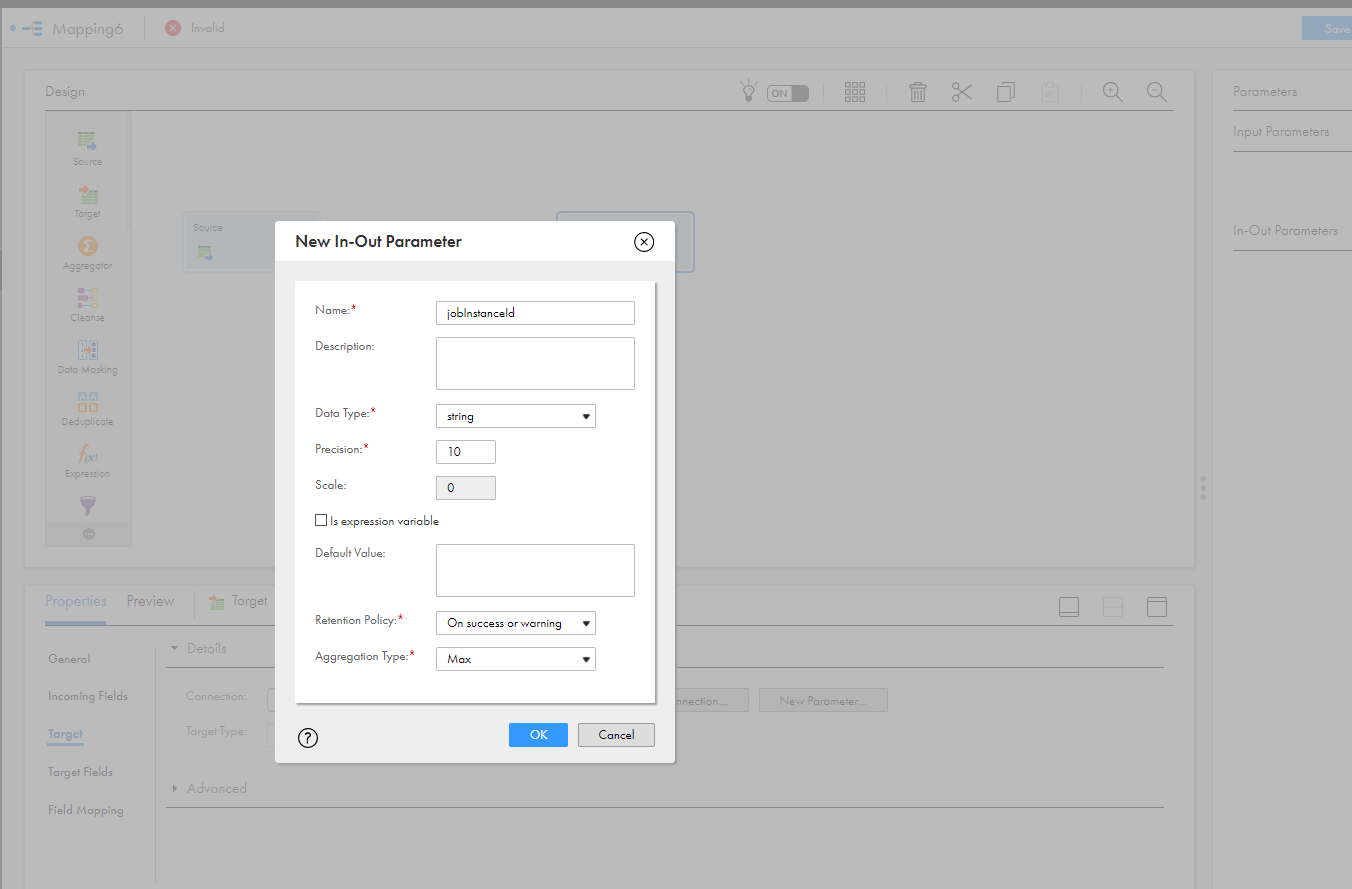
8Go to Target > Parameters Panel > Input-Output Parameters, and create a parameter.
The input-output parameter is internally mapped to the job instance ID. When you run an ingress job, Cloud Application Integration process passes the job instance ID to the input-output parameter in Cloud Data Integration. Based on the defined taskflows, the job runs. If you do not define the input-output parameter for the Target transformation in Cloud Data Integration, the job fails.
The following image shows the input-output parameter dialog box:

9Draw links to connect the Source transformation to the Target transformation.
10Save the mapping.