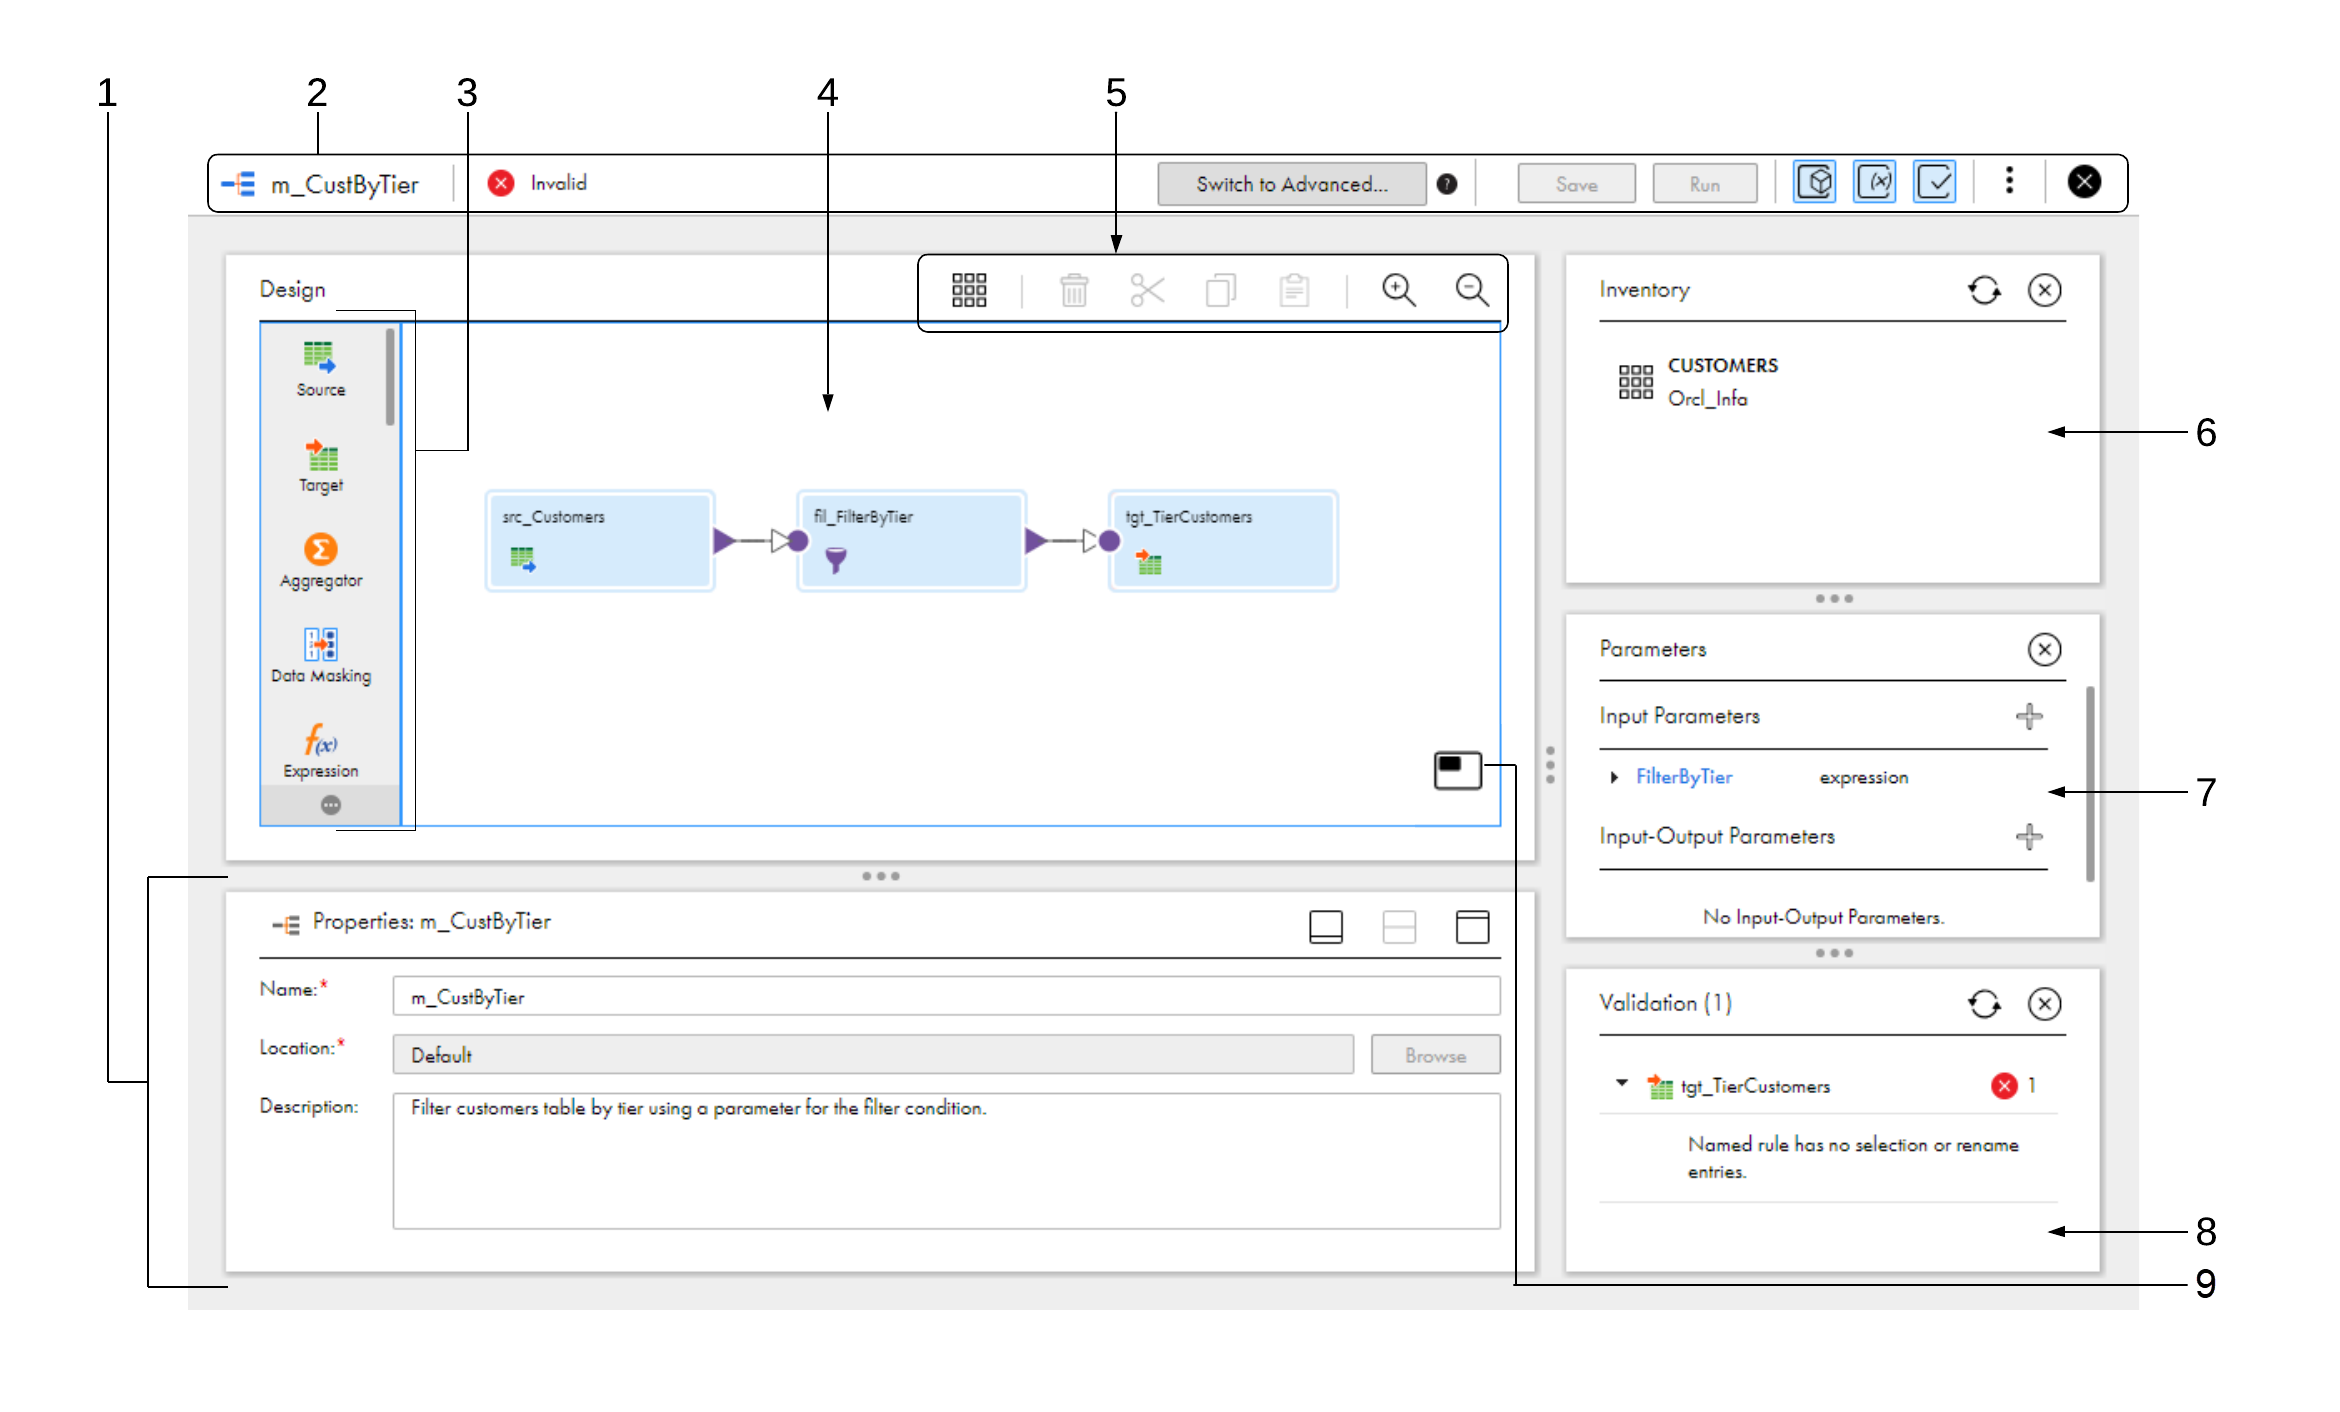

Mapping Designer Areas | Description |
|---|---|
1. Properties panel | Displays configuration options for the mapping or selected transformation. Different options display based on the transformation type. Includes icons to quickly resize the Properties panel. Use the icons to display the Properties panel, the mapping canvas, or both. You can also manually resize the Properties panel. |
2. Header | Displays the following information, buttons, and icons:
|
3. Transformation palette | Lists the transformations that you can use in the mapping. To add a transformation, drag the transformation to the mapping canvas. |
4. Mapping canvas | The canvas where you configure a mapping. When you create a mapping, a Source transformation and a Target transformation are already on the canvas for you to configure. |
5. Toolbar | Displays the following icons and buttons:
Shown when organization CLAIRE recommendation preferences are enabled. |
6. Inventory panel | Lists Enterprise Data Catalog objects that you can add to the mapping as sources, targets, or lookup objects. Note: Your organization must have the appropriate licenses in order for you to see the Inventory panel. Objects appear in the inventory when you search for objects on the Data Catalog page, select them in the search results, and add them to the mapping. To delete an object from the inventory, click "X" in the row that contains the object. Displays when you click Inventory. To hide the panel, click Inventory again. |
7. Parameters panel | Lists the parameters in the mapping. You can create, edit, and delete parameters, and see where the mapping uses parameters. Displays when you click Parameters. To hide the panel, click Parameters again. |
8. Validation panel | Lists the transformations in the mapping and displays details about mapping errors. Use to find and correct mapping errors. Displays when you click Validation. To hide the panel, click Validation again. |
9. Bird's Eye View icon | Opens the Bird's Eye View panel which displays an overview of your entire mapping and highlighted field lineage. Use the navigation pane in the panel to scroll the canvas. |

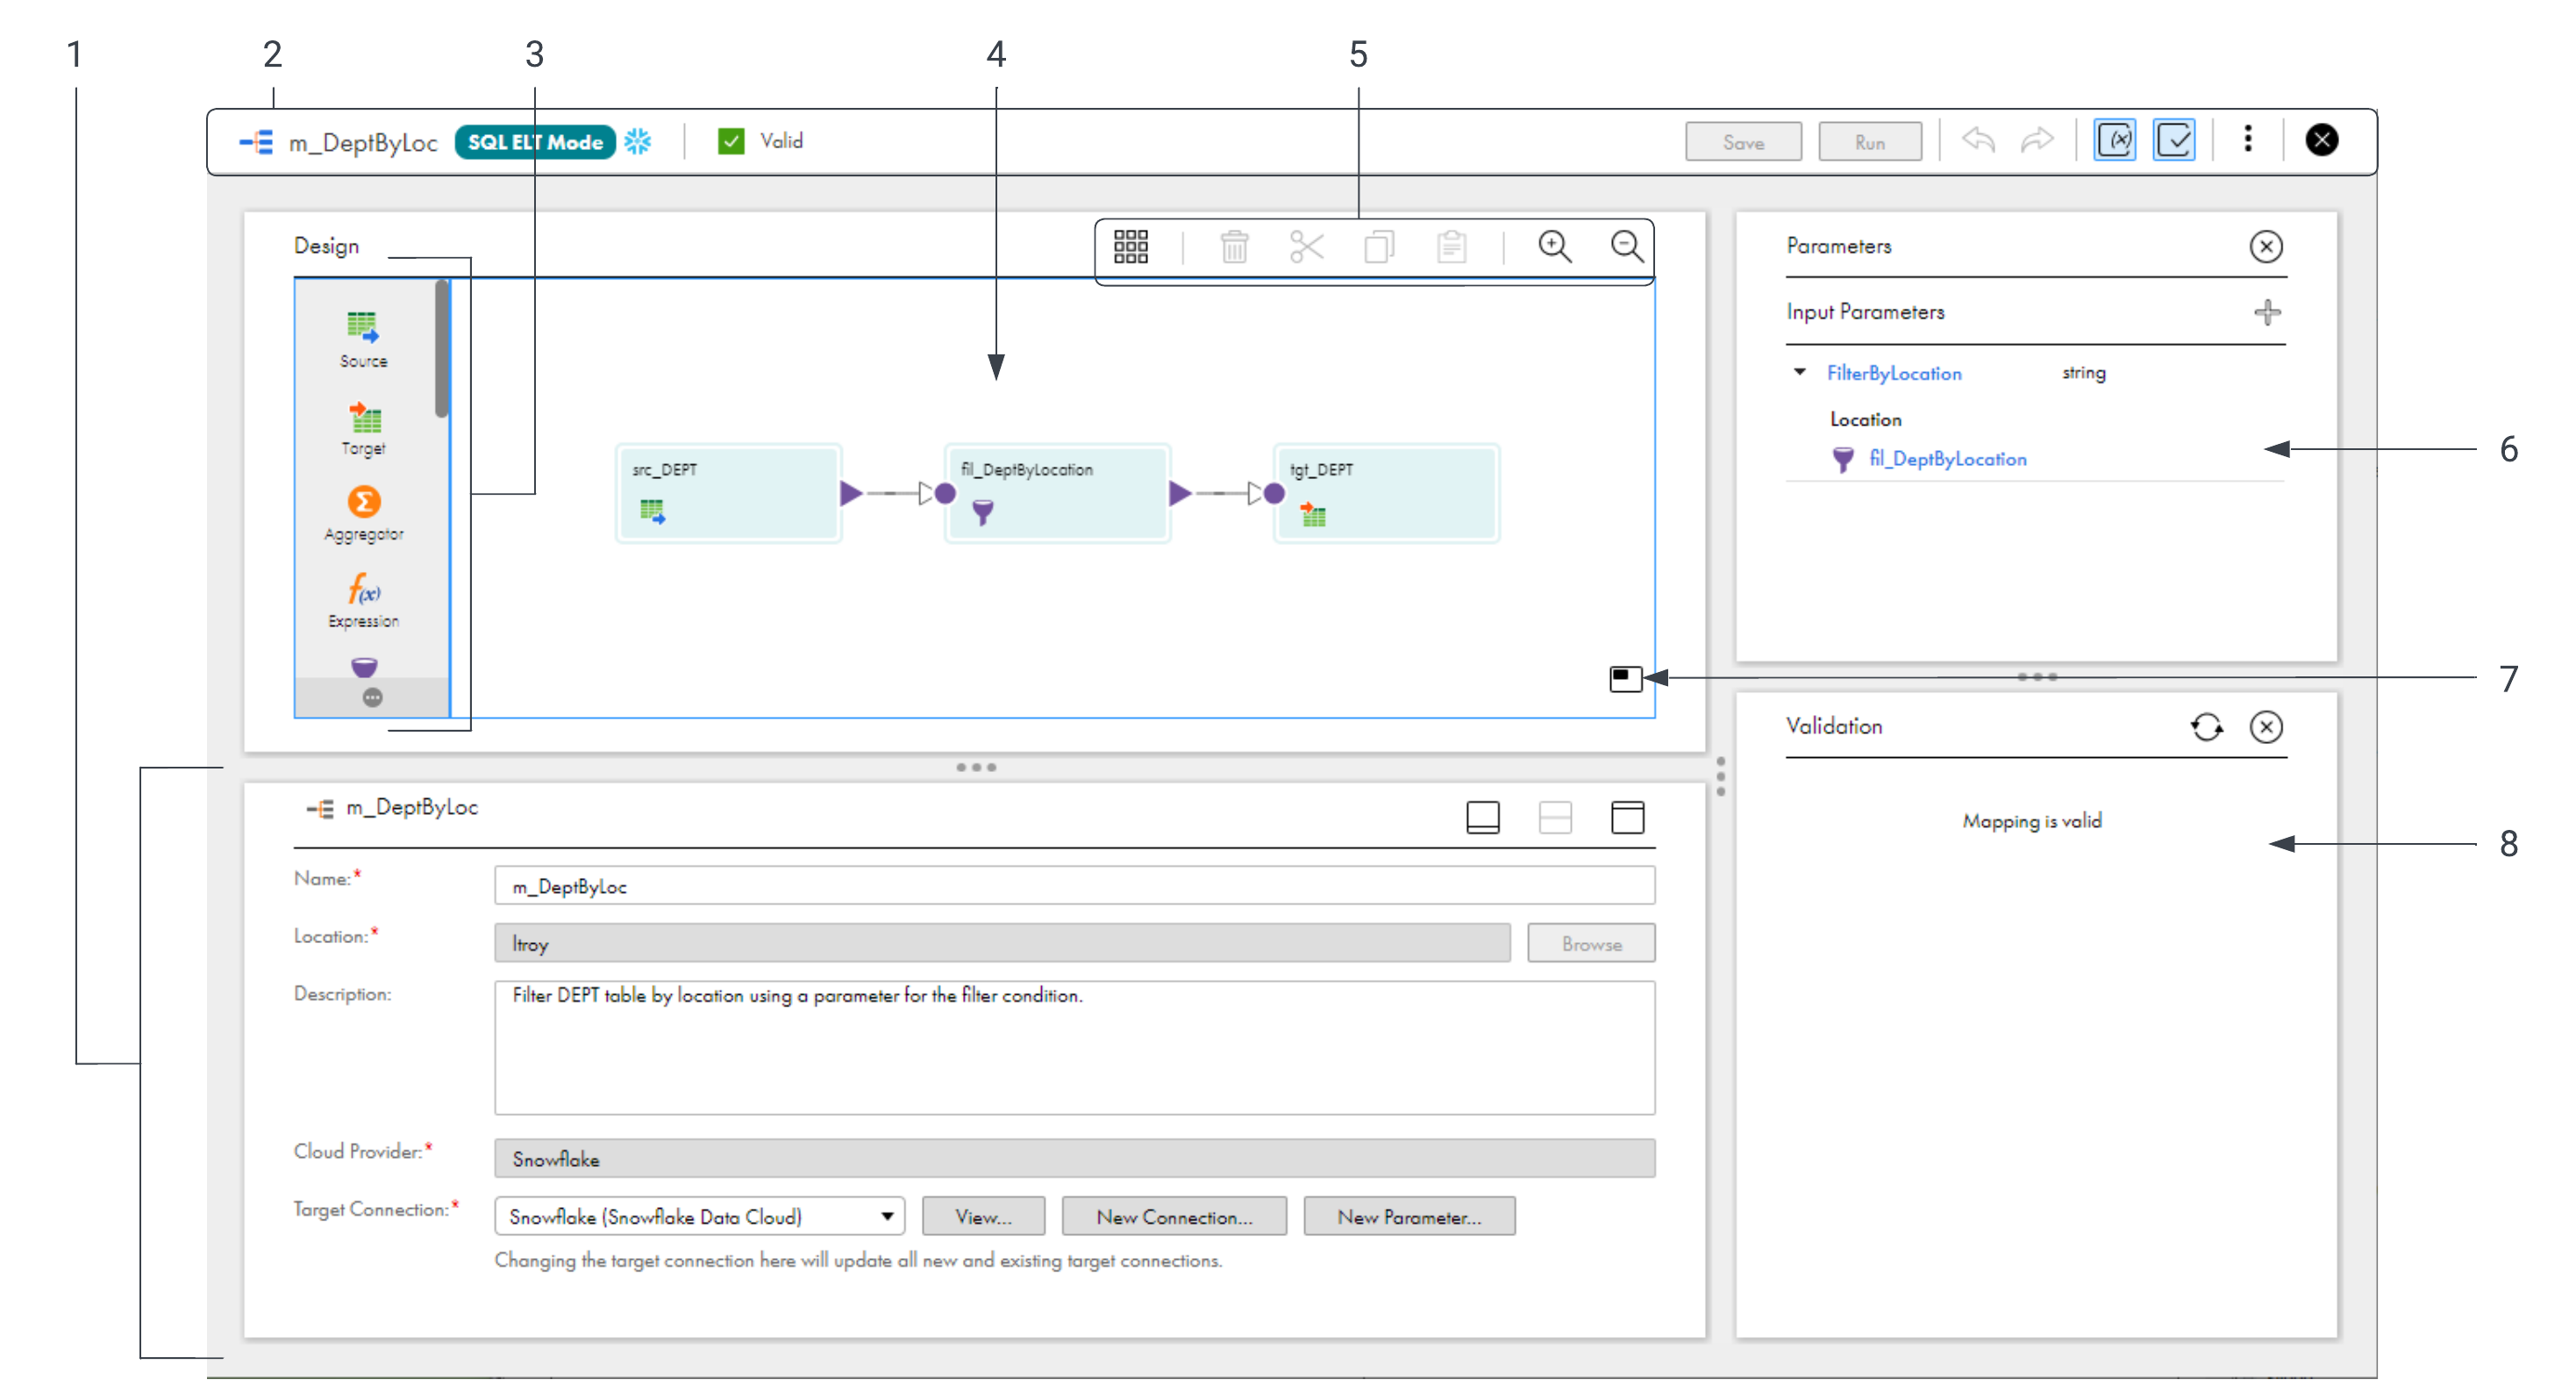
Mapping Designer Areas | Description |
|---|---|
1. Properties panel | Displays configuration options for the mapping or selected transformation. Different options display based on the transformation type. Includes icons to quickly resize the Properties panel. Use the icons to display the Properties panel, the mapping canvas, or both. You can also manually resize the Properties panel. |
2. Header | Displays the following information, buttons, and icons:
|
3. Transformation palette | Lists the transformations that you can use in the mapping. To add a transformation, drag the transformation to the mapping canvas. |
4. Mapping canvas | The canvas where you configure a mapping. When you create a mapping, a Source transformation and a Target transformation are already on the canvas for you to configure. |
5. Toolbar | Displays the following icons and buttons:
|
6. Parameters panel | Lists the parameters in the mapping. You can create, edit, and delete parameters, and see where the mapping uses parameters. Displays when you click Parameters. To hide the panel, click Parameters again. |
7. Bird's Eye View icon | Opens the Bird's Eye View panel which displays an overview of your entire mapping and highlighted field lineage. Use the navigation pane in the panel to scroll the canvas. |
8. Validation panel | Lists the transformations in the mapping and displays details about mapping errors. Use to find and correct mapping errors. Displays when you click Validation. To hide the panel, click Validation again. |