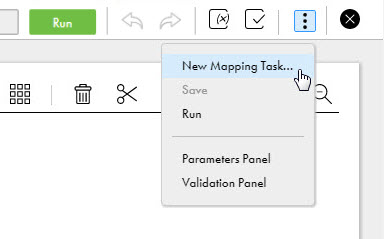
1To create a mapping task based on the mapping, while still in the Mapping Designer, click Actions and select New Mapping Task, as shown in the following image:

The mapping task wizard appears.
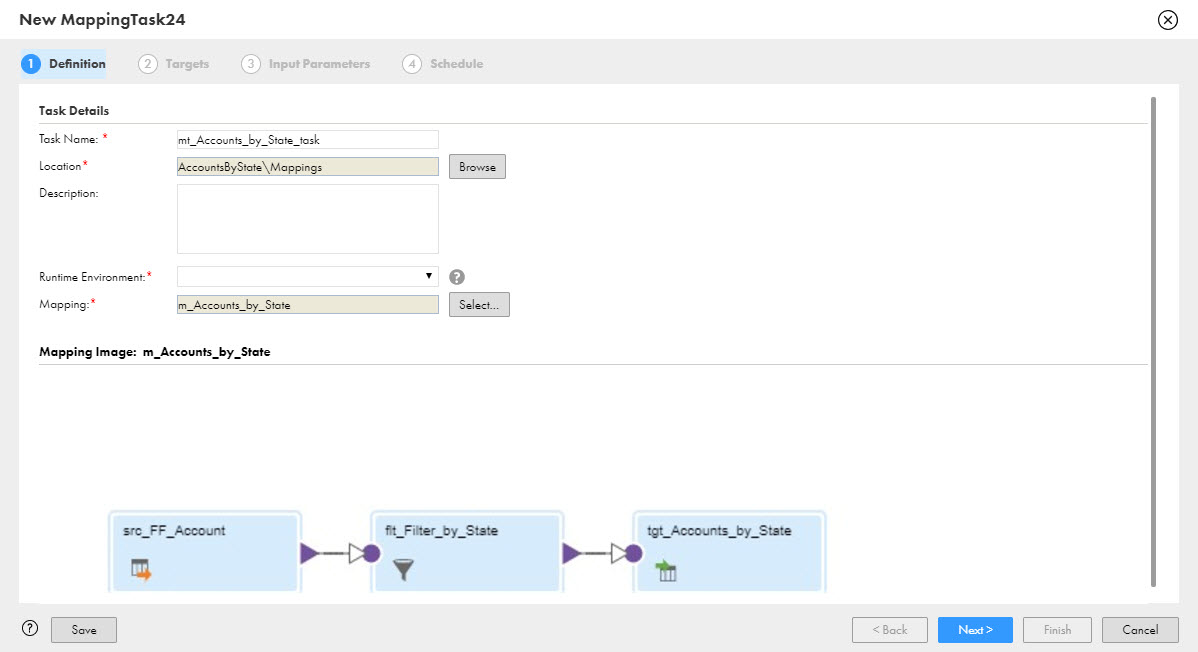
2On the Definition page, enter mt_Accounts_by_State_task for the name of the task.
3Select the runtime environment to use to run this task. It should be the same runtime environment that you used to create and test the mapping.
The following image shows the Definition page in the mapping task wizard:

4Click Next.
The Targets page appears. You can either select a target object from the list or click Create Target to create a new target.
5Click Next.
The Input Parameters page appears and displays the Filter Value for State filter condition. You can change the value of the parameter, if desired.
6Click Next.
The Schedule page appears. Because this is a tutorial and we do not want to run this mapping task on a regular basis, leave the default values.
7Click Finish to save the Accounts by State mapping task.