You can search for assets and export the results of a search to your local computer.
In Data Governance and Catalog, you can export search results of business and technical assets. The exported file format for asset types is similar to the bulk import template file for those asset types. While exporting assets, you can include the corresponding child assets, asset details, and relationships in the exported file.
You can share the exported file with your team to inform them of the assets available in the organization. Data governance users or data scientists can review the file and provide recommendations and suggest enrichments for the assets. To apply the updates, reimport the file into the catalog.
Note:
When exporting assets with images, the images are converted into Base64 format in the exported file. To preserve the image on reimport, don't modify the characters in the description field. If the Base64 characters exceed the cell limit of the exported file, the image is not exported. In this case, the description field is left empty. During re-import, the image is retained in the description field for the asset.
After exporting the search results, you can perform any of the following activities:
•Bulk enrich the technical assets with business context. You can only update technical assets but can't delete them.
•Bulk curate classifications and glossary associations, and then re-import the exported file.
For more information about bulk importing, see the Bulk Import Assets help.
Prerequisites
Before you export the results of a search, verify the following prerequisites.
You can export assets from the catalog only if your organization administrator grants you the following privileges and permissions:
•The Export privilege for your user role in Administrator.
•The Read permission on the assets that you export granted to you through access policies in Metadata Command Center
For more information about the privileges and permissions, see the Asset Management help.
Exporting assets from search results
You can search for assets and export the results of a search as a Microsoft Excel file in the .xlsx or .xls file format or as CSV file.
Note:
Data Governance and Catalog triggers a faster import if you export up to 10,000 assets and don't include their relationships.
For more information about modifying the exported file and near real-time export, see Bulk Import Assets.
1Enter a search query in the search bar.
2Optionally, apply one or more filters to your search. You can additionally sort the search results.
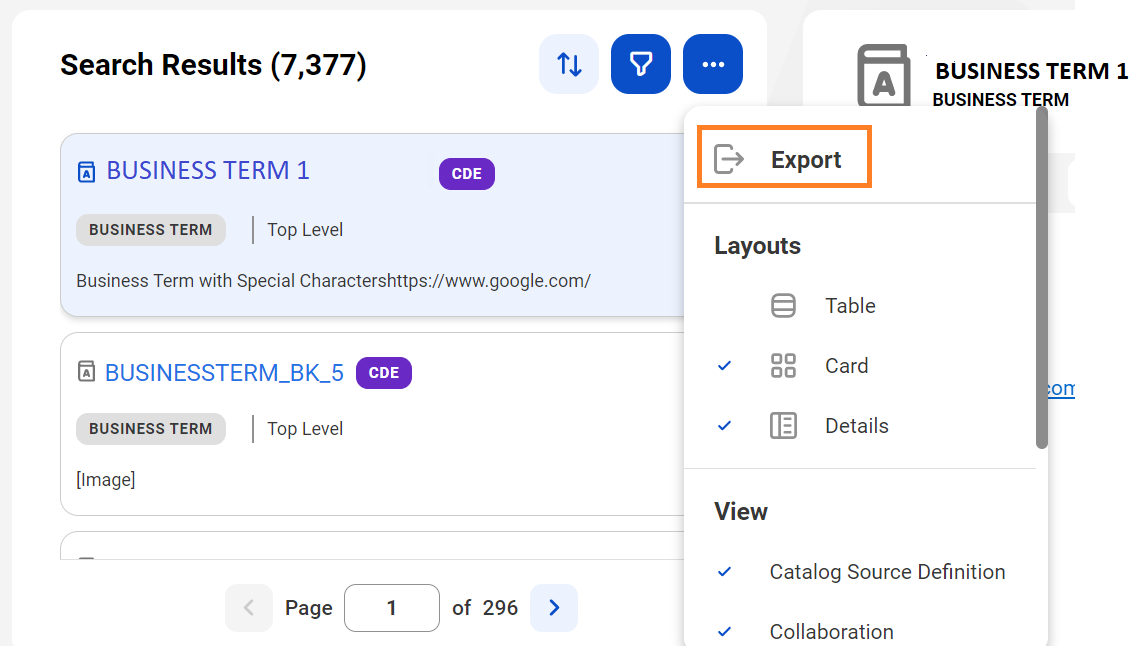
3On the Search Results page, click Action.
The Action menu appears.
4Click Export.
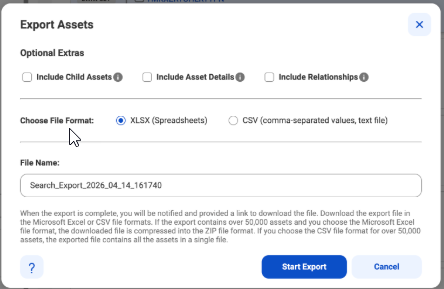
The Export Assets dialog box appears.
5On the Export Assets dialog box, enter a new file name or retain the system-generated file name.
6Optionally, select the following options:
- Include Child Assets. Export all child assets associated with parent assets.
- Include Asset Details. Export the custom attributes and stakeholder details of all assets and additional details of technical assets.
Note:
If you select the Include Asset Details option, the export file for technical assets includes sheets where changes are restricted. To curate assets, use the editable columns in the Technical Data Set and Technical Data Element sheets.
- Include Relationships. Export the relationships between business assets and between business assets and technical assets.
The Export Assets dialog box displays the Include Relationships check box if the search results contain business assets.
7Click Start Export to export the results of your search.
This triggers an export job that you can monitor on the Job Status panel.
The Job Status page appears.
Note:
A Microsoft Excel export file can contain a maximum of 50,000 assets. If the export contains over 50,000 assets and you choose the Microsoft Excel file format, the downloaded file is compressed into a ZIP file format. If you choose the CSV file format for over 50,000 assets, the downloaded file contains all the assets in a single file.
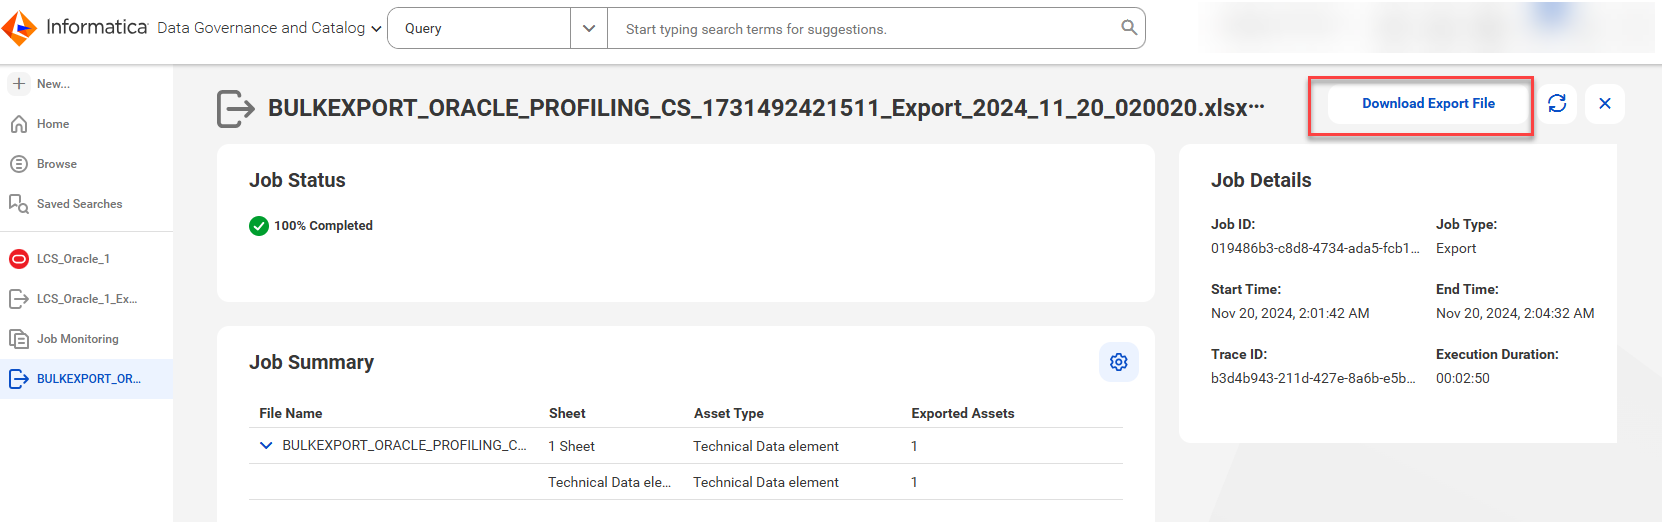
8After the export job is complete, click Download Export File.
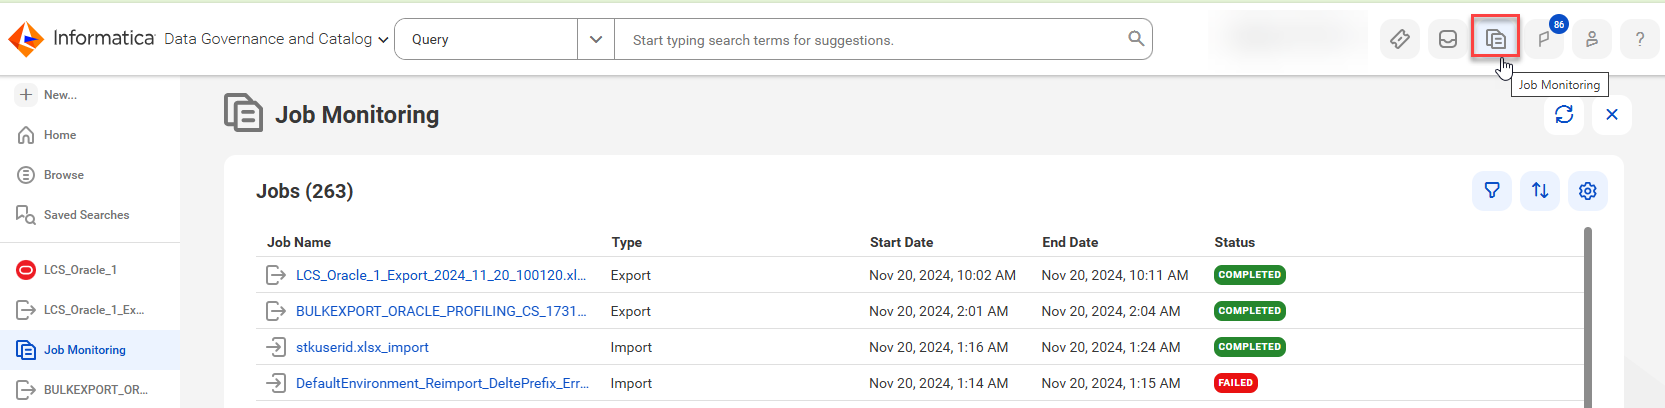
9Optionally, check the status of your export job on the Job Monitoring page.
Exporting assets from catalog source
You can export the assets that are within a catalog source as a Microsoft Excel file in the .xlsx or .xls file format or as CSV file.
To export assets from catalog source, perform the following steps:
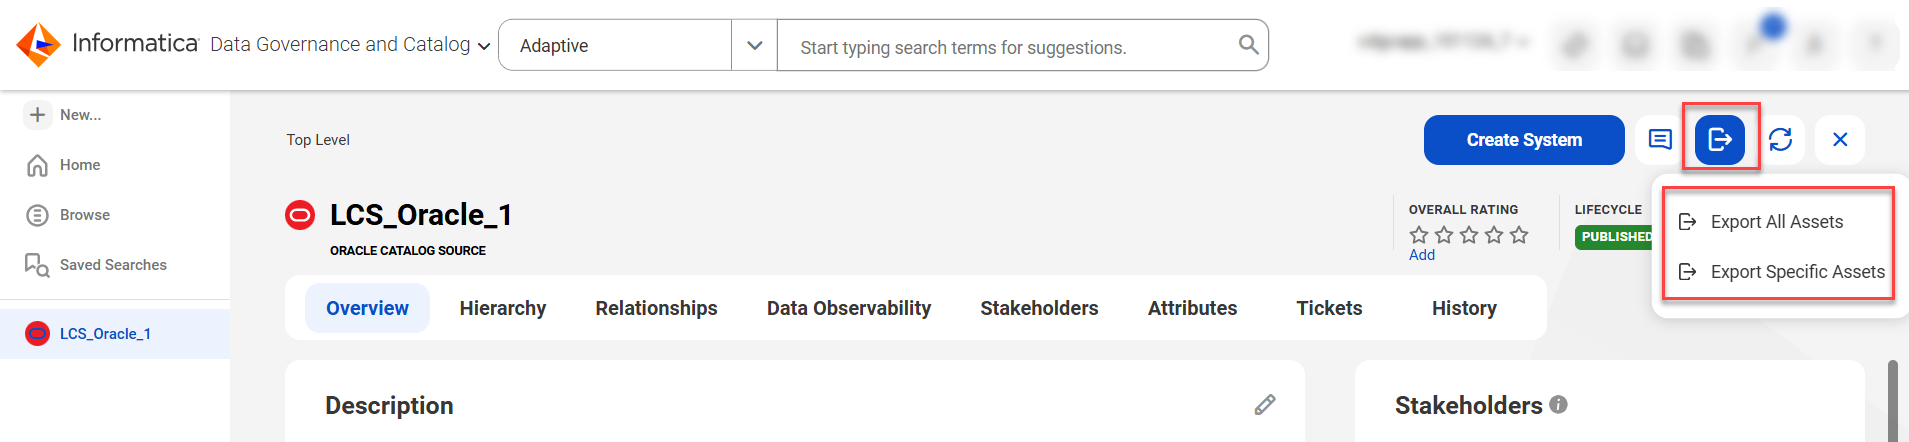
1Open a catalog source and click the Export all or specific assets icon at the top right corner.
The Export All Assets and Export Specific Assets options appear.
2To export all assets in the catalog source, select Export All Assets.
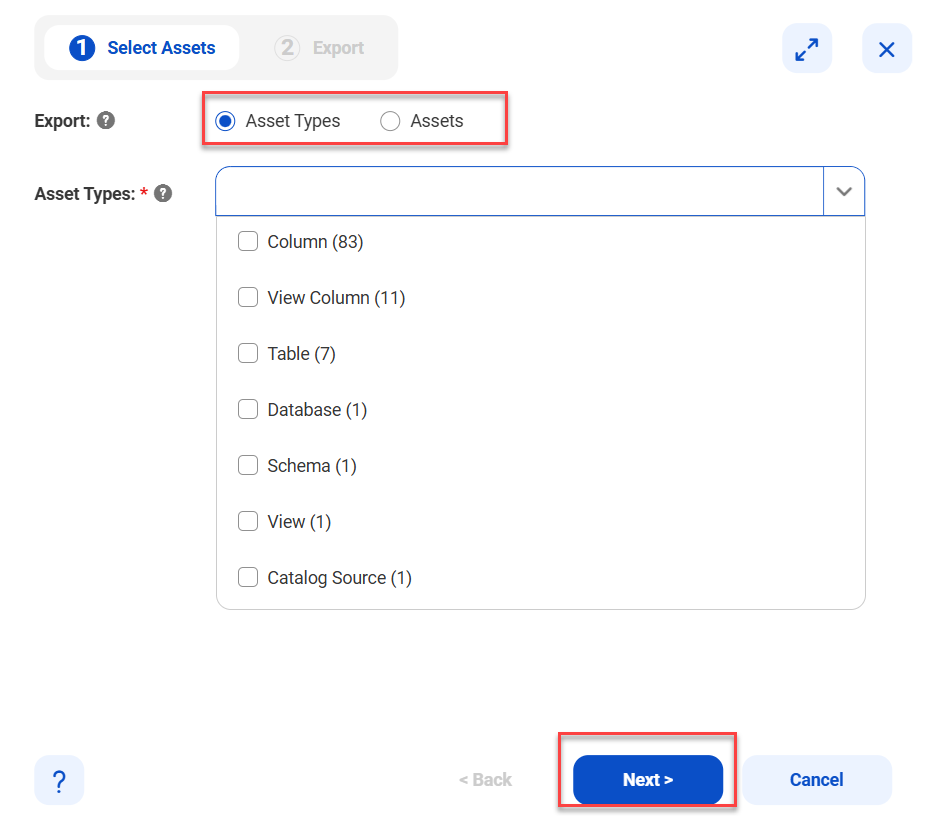
3If you select Export Specific Assets option, a dialog box appears with Select Assets and Export tabs.
4Select at least one asset type or an asset, or both, and click Next.
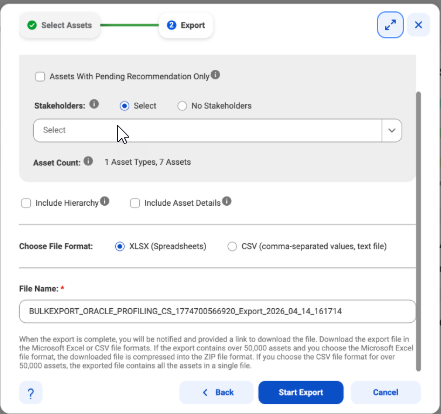
5Enter a new file name or retain the system-generated file name.
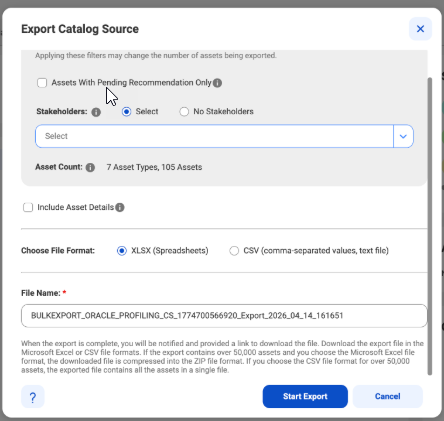
6Optionally, select the following filters:
- Assets With Pending Recommendation Only. Export assets only with pending glossary and classification recommendations that need your review.
- Stakeholders. Select one or more stakeholders who are responsible or interested in this asset. If you want to export assets without any stakeholders, select No Stakeholders.
- Include Hierarchy. Export all assets in the hierarchy of the catalog source. This option appears when you export specific assets from a catalog source.
- Include Asset Details. Export the custom attributes and stakeholder details of all assets and additional details of technical assets.
Note:
If you select the Include Asset Details option, the export file for technical assets include sheets where changes are restricted. To curate assets, use the editable columns in the Technical Data Set and Technical Data Element sheets.
7Click Start Export to export all assets from the catalog source.
This triggers an export job that you can monitor on the Job Status panel.
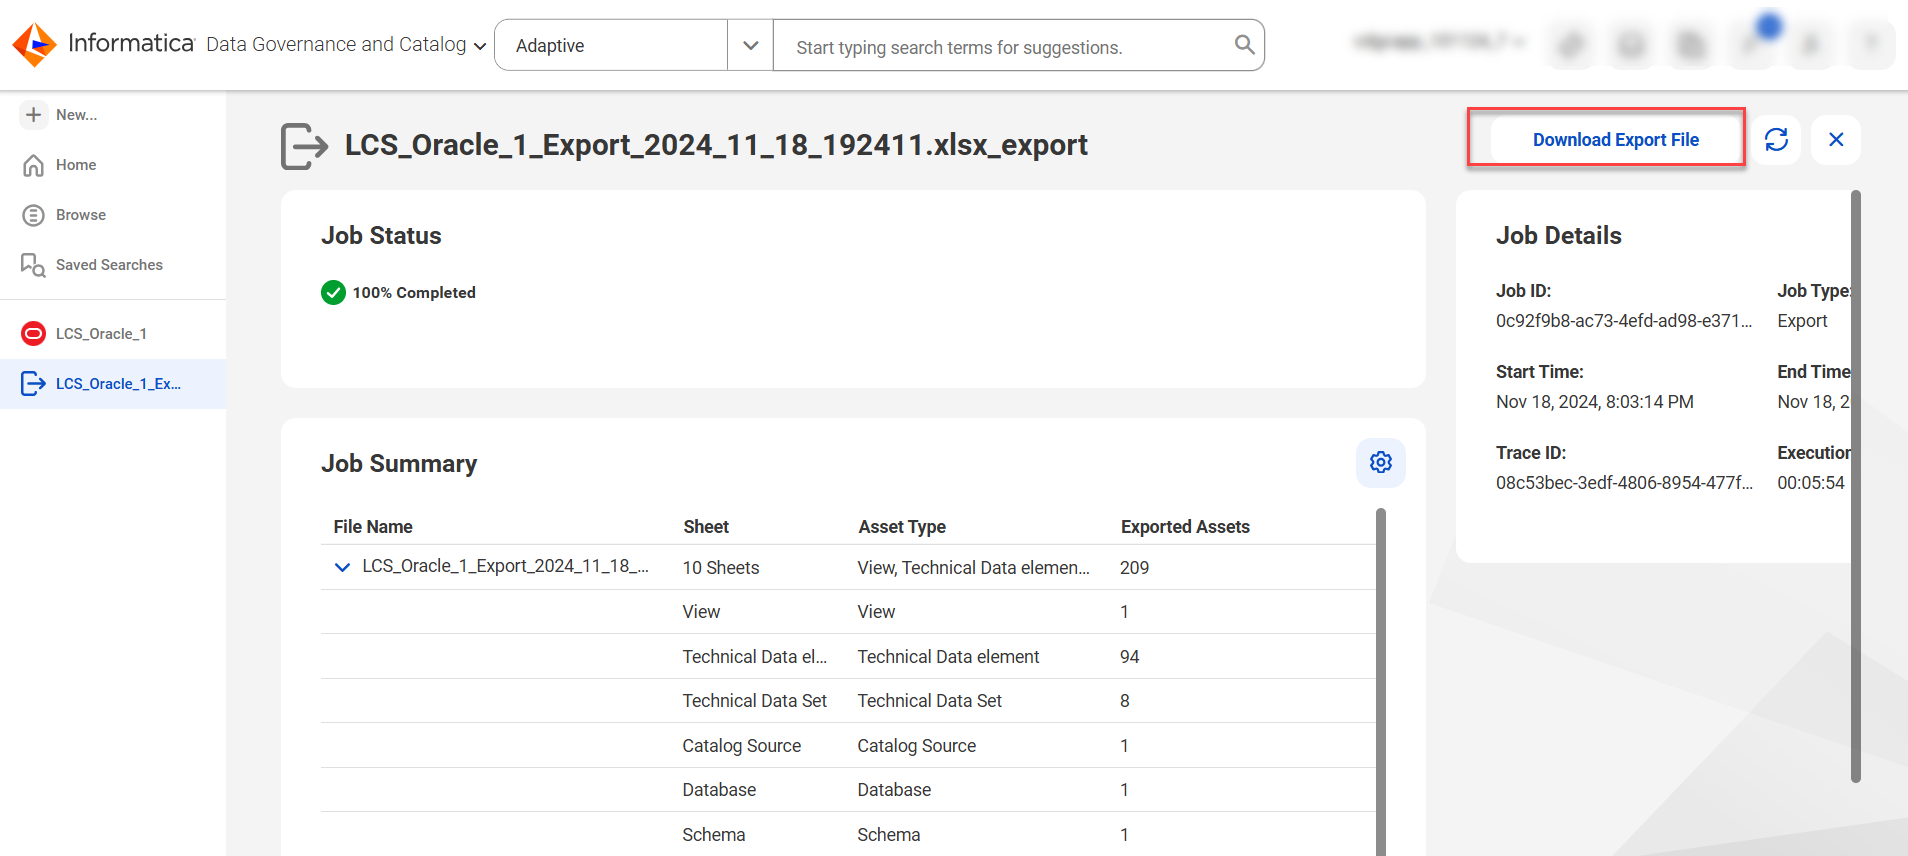
8After the export job is complete, click Download Export File on the Job Status panel to download the exported file.
The Job Status panel displays the job summary, details, and download link to export assets from the catalog source. The Job Summary section displays the list of asset types, number of sheets, and number of exported assets that are available in the downloaded Microsoft Excel file.
Note:
If the export contains over 50,000 assets and you choose the Microsoft Excel file format, the downloaded file is compressed into a ZIP file format. If you choose the CSV file format for over 50,000 assets, the downloaded file contains all the assets in a single file.
9Alternatively, you can also check the status of your export job on the Job Monitoring page.
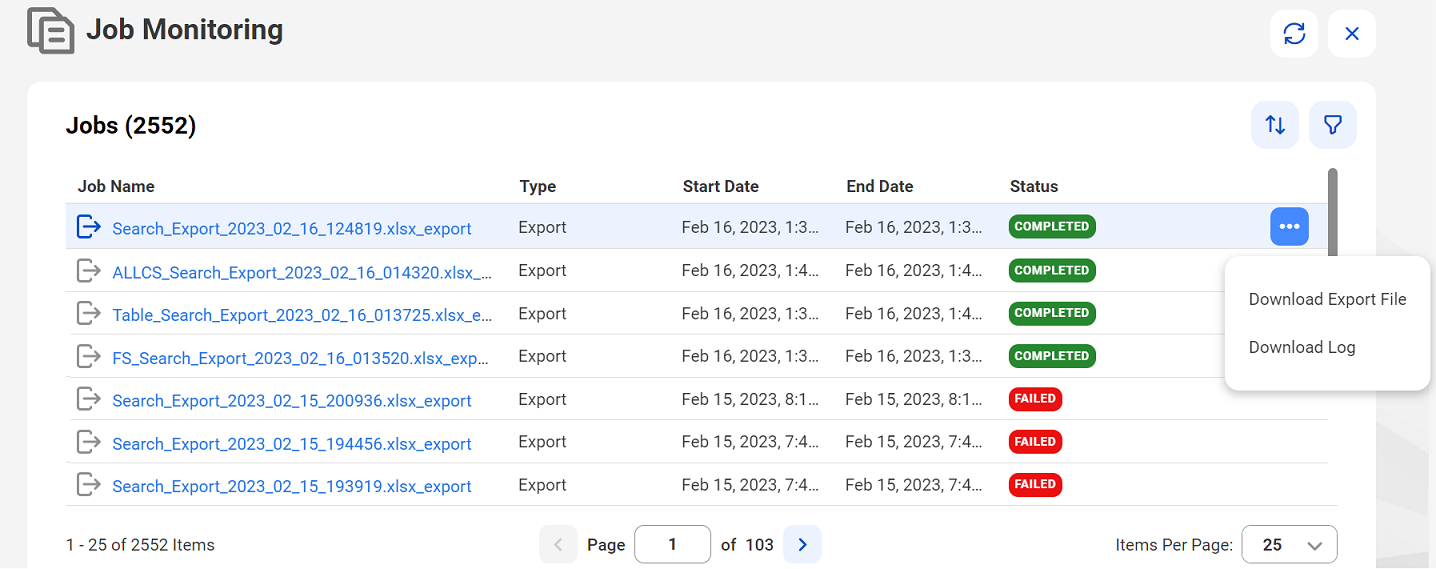
10After the export job is complete, click Action > Download Export File next to the corresponding job on the Job Monitoring page to download the exported file. Click Action > Download Log if you want to download the logs file to know the job activities.
11You can also click the Notification icon on the Home page to monitor the job status. Click the URL to open the corresponding job page to know the job status.
After the export job is complete, you receive notifications with a link to the corresponding job page in Data Governance and Catalog.