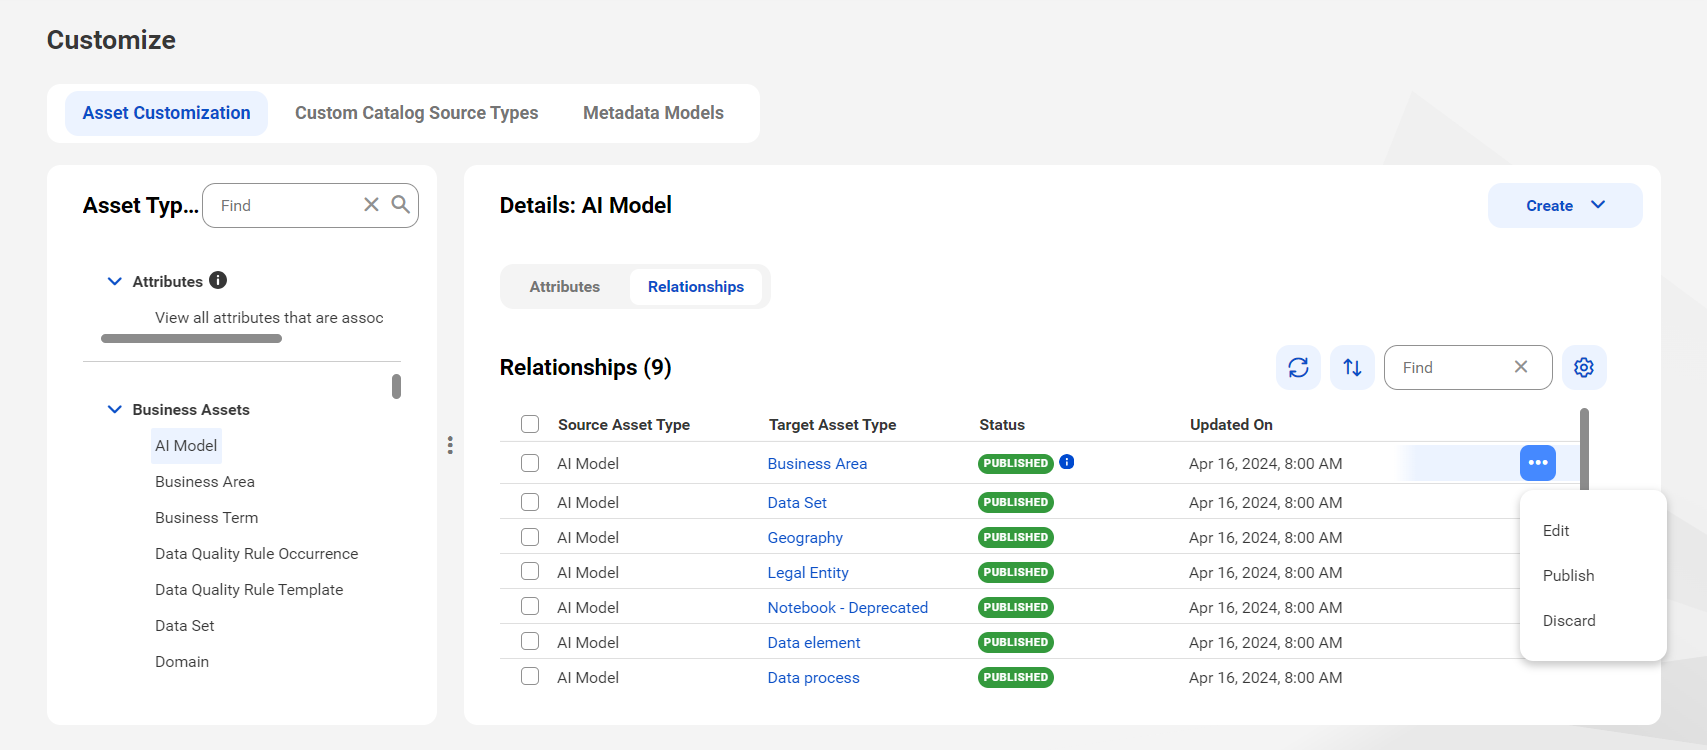
1On the Customize page in Metadata Command Center, go to the Asset Customization tab.
2In the Asset Types panel, select an asset type.
3For the selected asset type, go to the Relationships tab.
4On the Relationships tab, click the Action menu next to a relationship and select Edit.

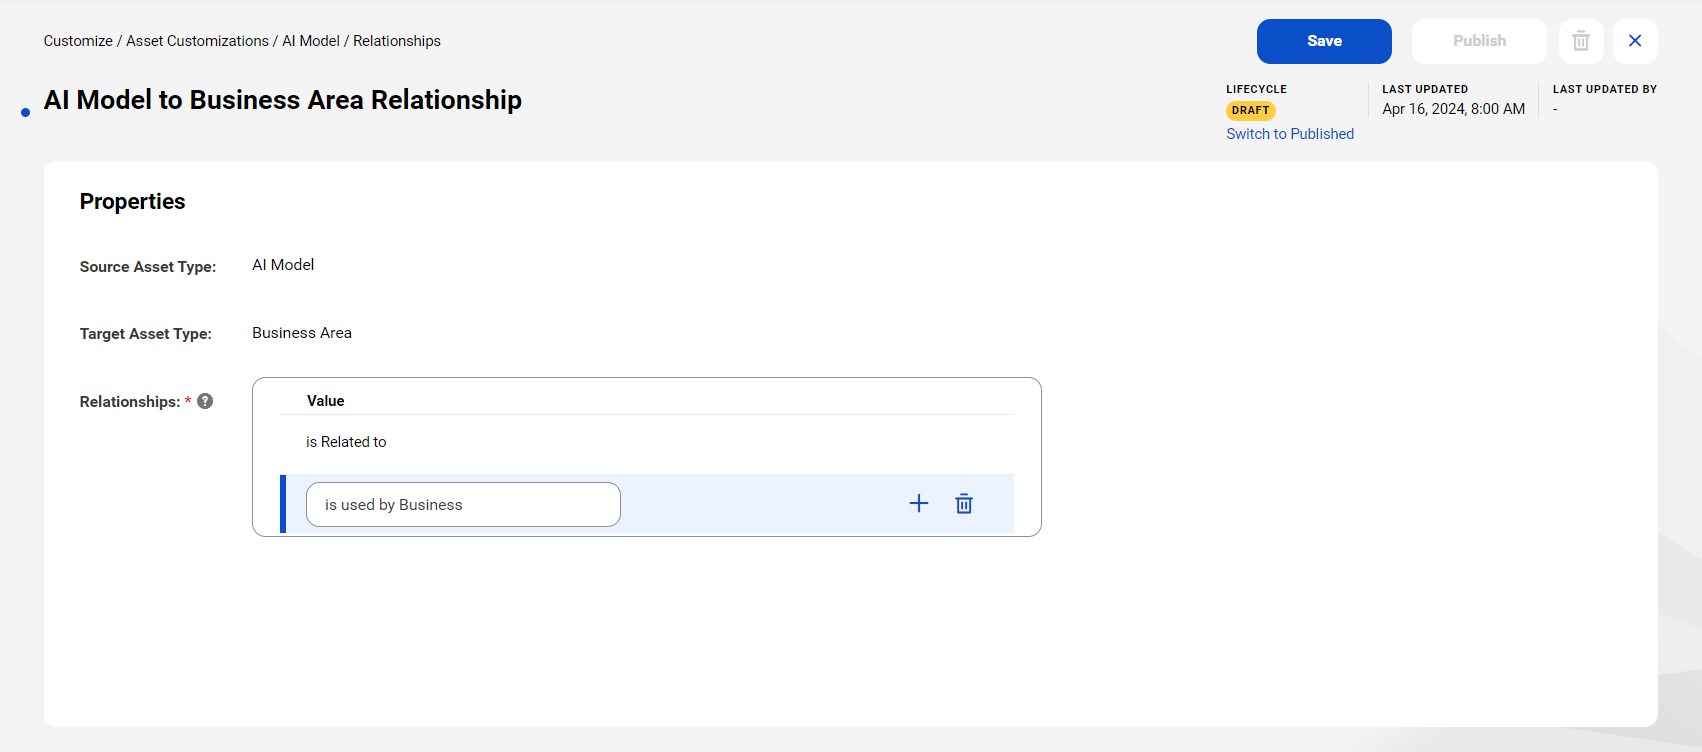
5To add a new relationship type, click the Add icon in the Relationships field and enter a new value.

6To modify an existing relationship type, click the value that you want to modify in the Relationships field .
7To remove an existing relationship type, click the Delete icon next to the value that you want to remove from the Relationships field .
Note: When you remove existing relationship types, consider the following:
- - If a relationship type is already being used in Data Governance and Catalog to describe the relationship between assets, you can't delete the relationship type until you remove the relationships.
- - If only 1 relationship exists between assets, you can't delete the relationship.
8Click Save.
The draft version appears in the Published with draft available state.
Note: If you do not want to proceed with your changes, you can use the Discard icon to discard the draft version of the relationship. You can also perform this action from the Action menu on the Asset Customization > Relationships tab of the Customize page. On the Asset Customization > Relationships tab, you can also discard the draft version of multiple relationships. To do this, select the relationships for which you want to discard the draft state and click the Discard icon from the Action menu.
9Click Publish to publish your changes.
The system initiates the Association Publish job to publish your changes. If another job to create, modify or delete an attribute or relationship is active, the system informs you of the active job. To publish your changes, you must wait for the active job to be completed. On the Job Monitoring Overview page, you can click View Status to monitor the status of the job.
Note: The system displays an error if the previous job has failed. At this stage, you must resolve the errors and reinitiate the previous job and await its completion before you can start your own job.
After the publishing is successful, the lifecycle state of the relationship changes from Draft to Published.
10After the publish job is completed, ensure that you refresh the web page on your browser to view your changes to the relationship type.
After your changes are published, all the relationship types are automatically arranged in an alphabetical order.