You can select and edit up to 10,000 records in a table. After you edit records, you can save them as drafts, submit all drafts, or discard the drafts to revert to the original values. Records in the pending or deleted state can't be edited.
You can copy and paste values into a maximum of 50 cells at a time, including values from an Excel or CSV file. Copy and paste operations are not supported on dynamic fields.
Note:
You can't copy clickable values, such as Add and n entries, in the field groups column.
If your user role has read access, you can view the fields in the table. To create, update, or delete fields, your user role requires the corresponding permissions. If you don't have the required permissions, the restricted fields retain their current values when you edit the records. You can review the records that contain restricted fields and request access from your administrator.
Note:
Effective in the July 2026 release, the ability to edit a record in a table is available for preview.
Preview functionality is supported for evaluation purposes but is unwarranted and is not supported in production environments or any environment that you plan to push to production. Informatica intends to include the preview functionality in an upcoming release for production use, but might choose not to in accordance with changing market or technical circumstances. For more information, contact Informatica Global Customer Support.
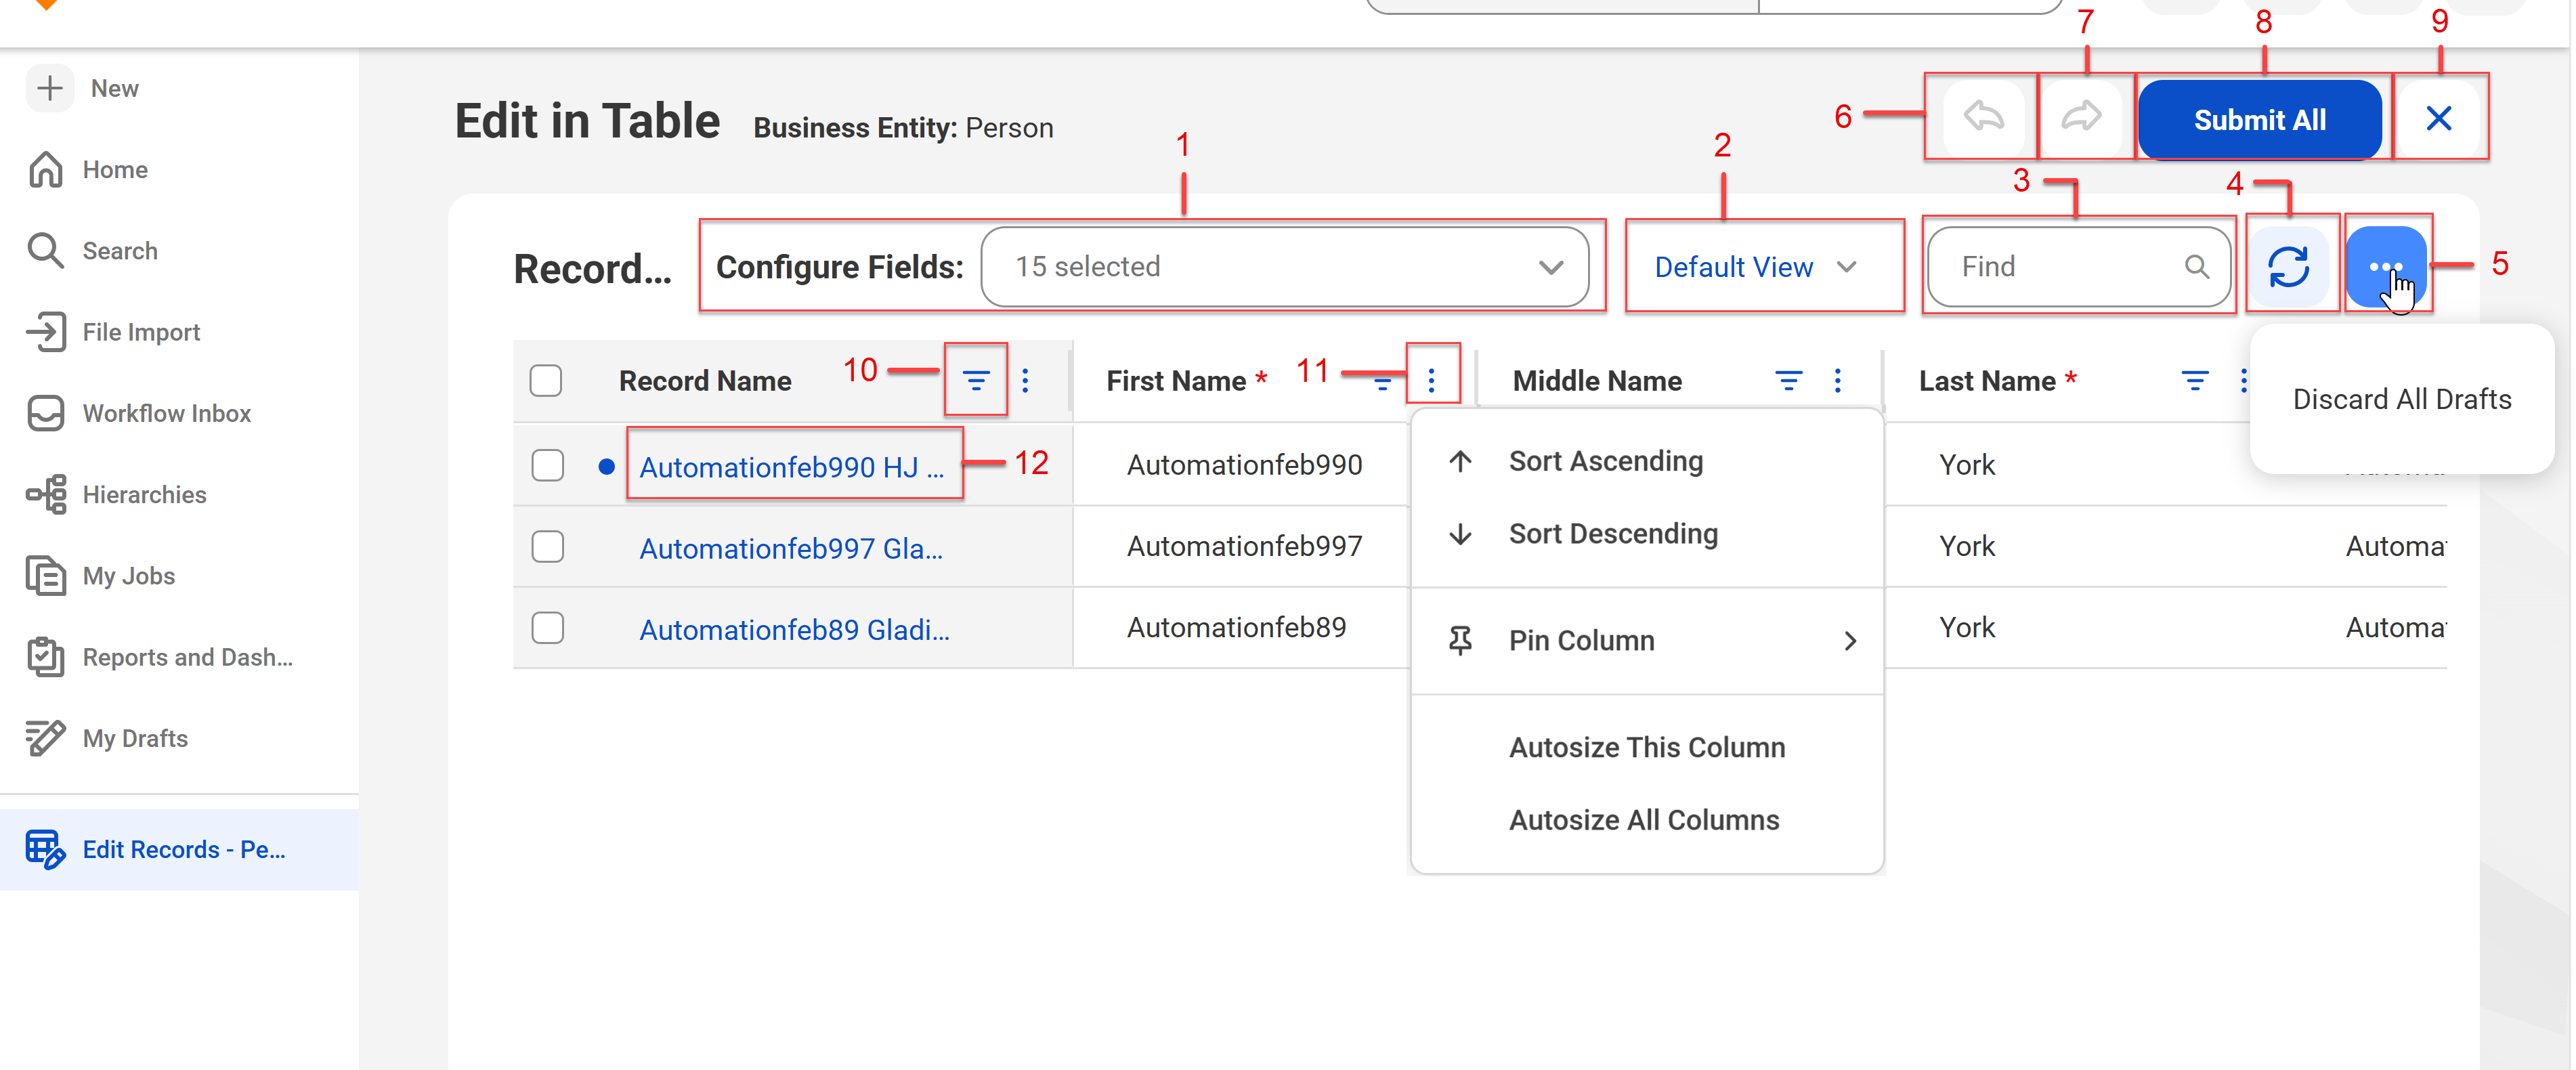
The following image shows the records selected for editing in a table:
1Configure Fields
2Default View
3Find
4Refresh
5Menu
6Undo
7Redo
8Submit All
9Close
10Filter
11Menu
12Record Name Link
The following table lists the user interface elements that you can use:
User Interface Element
Description
Configure Fields
Fields that you want to display.
By default, all root fields are selected. The fields that you configure are available for that session.
Default View
Shows all root fields.
You can create views by selecting the fields that you want to display and then saving them. You can create up to five views.
Find
Searches records based on field values.
Refresh
Refreshes the table to display the updated values after you submit changes.
Menu
Lists the actions that you can perform on the drafts:
- Discard All Drafts. Discards all the drafts to revert to the original values.
- Discard Selected Drafts. Discards only the selected drafts to revert to the original values. This option appears when you select records with drafts.
Undo
Reverses your most recent 10 actions on the root fields.
Redo
Restores your most recent 10 undo actions on the root fields.
Submit All
Submits all the drafts present in the table.
You can also select specific drafts and submit.
Close
Closes the Edit in Table page.
Filter
Filters records based on the field values. You can choose an operator, enter values, and apply the filter.
The operator changes based on the data type of the column.
Menu
Lists the following actions that you can perform in each column:
- Sort Ascending. Sorts records in ascending order based on the selected column.
- Sort Descending. Sorts records in descending order based on the selected column.
- Pin Column. Fixes the column to the left side of the Record Name column, or to the right side of the table. You can also unpin the column.
- Autosize This Column. Automatically resizes the selected column. You can also drag the column to resize.
- Autosize All Columns. Automatically resizes all the columns in the table.
Record Name Link
Displays the name of a record as clickable link.
You can click the record name to navigate to the Record Details page.
Note:
The Record Details page shows the latest values for the record but doesn't show draft values.
Editing records in a table
You can select multiple records and edit them in a table. Each record appears as a row, and each cell in a row displays a field value.
1Select a business entity and use the search box to search for the records.
The Search Results page appears.
2Select the records that you want to edit.
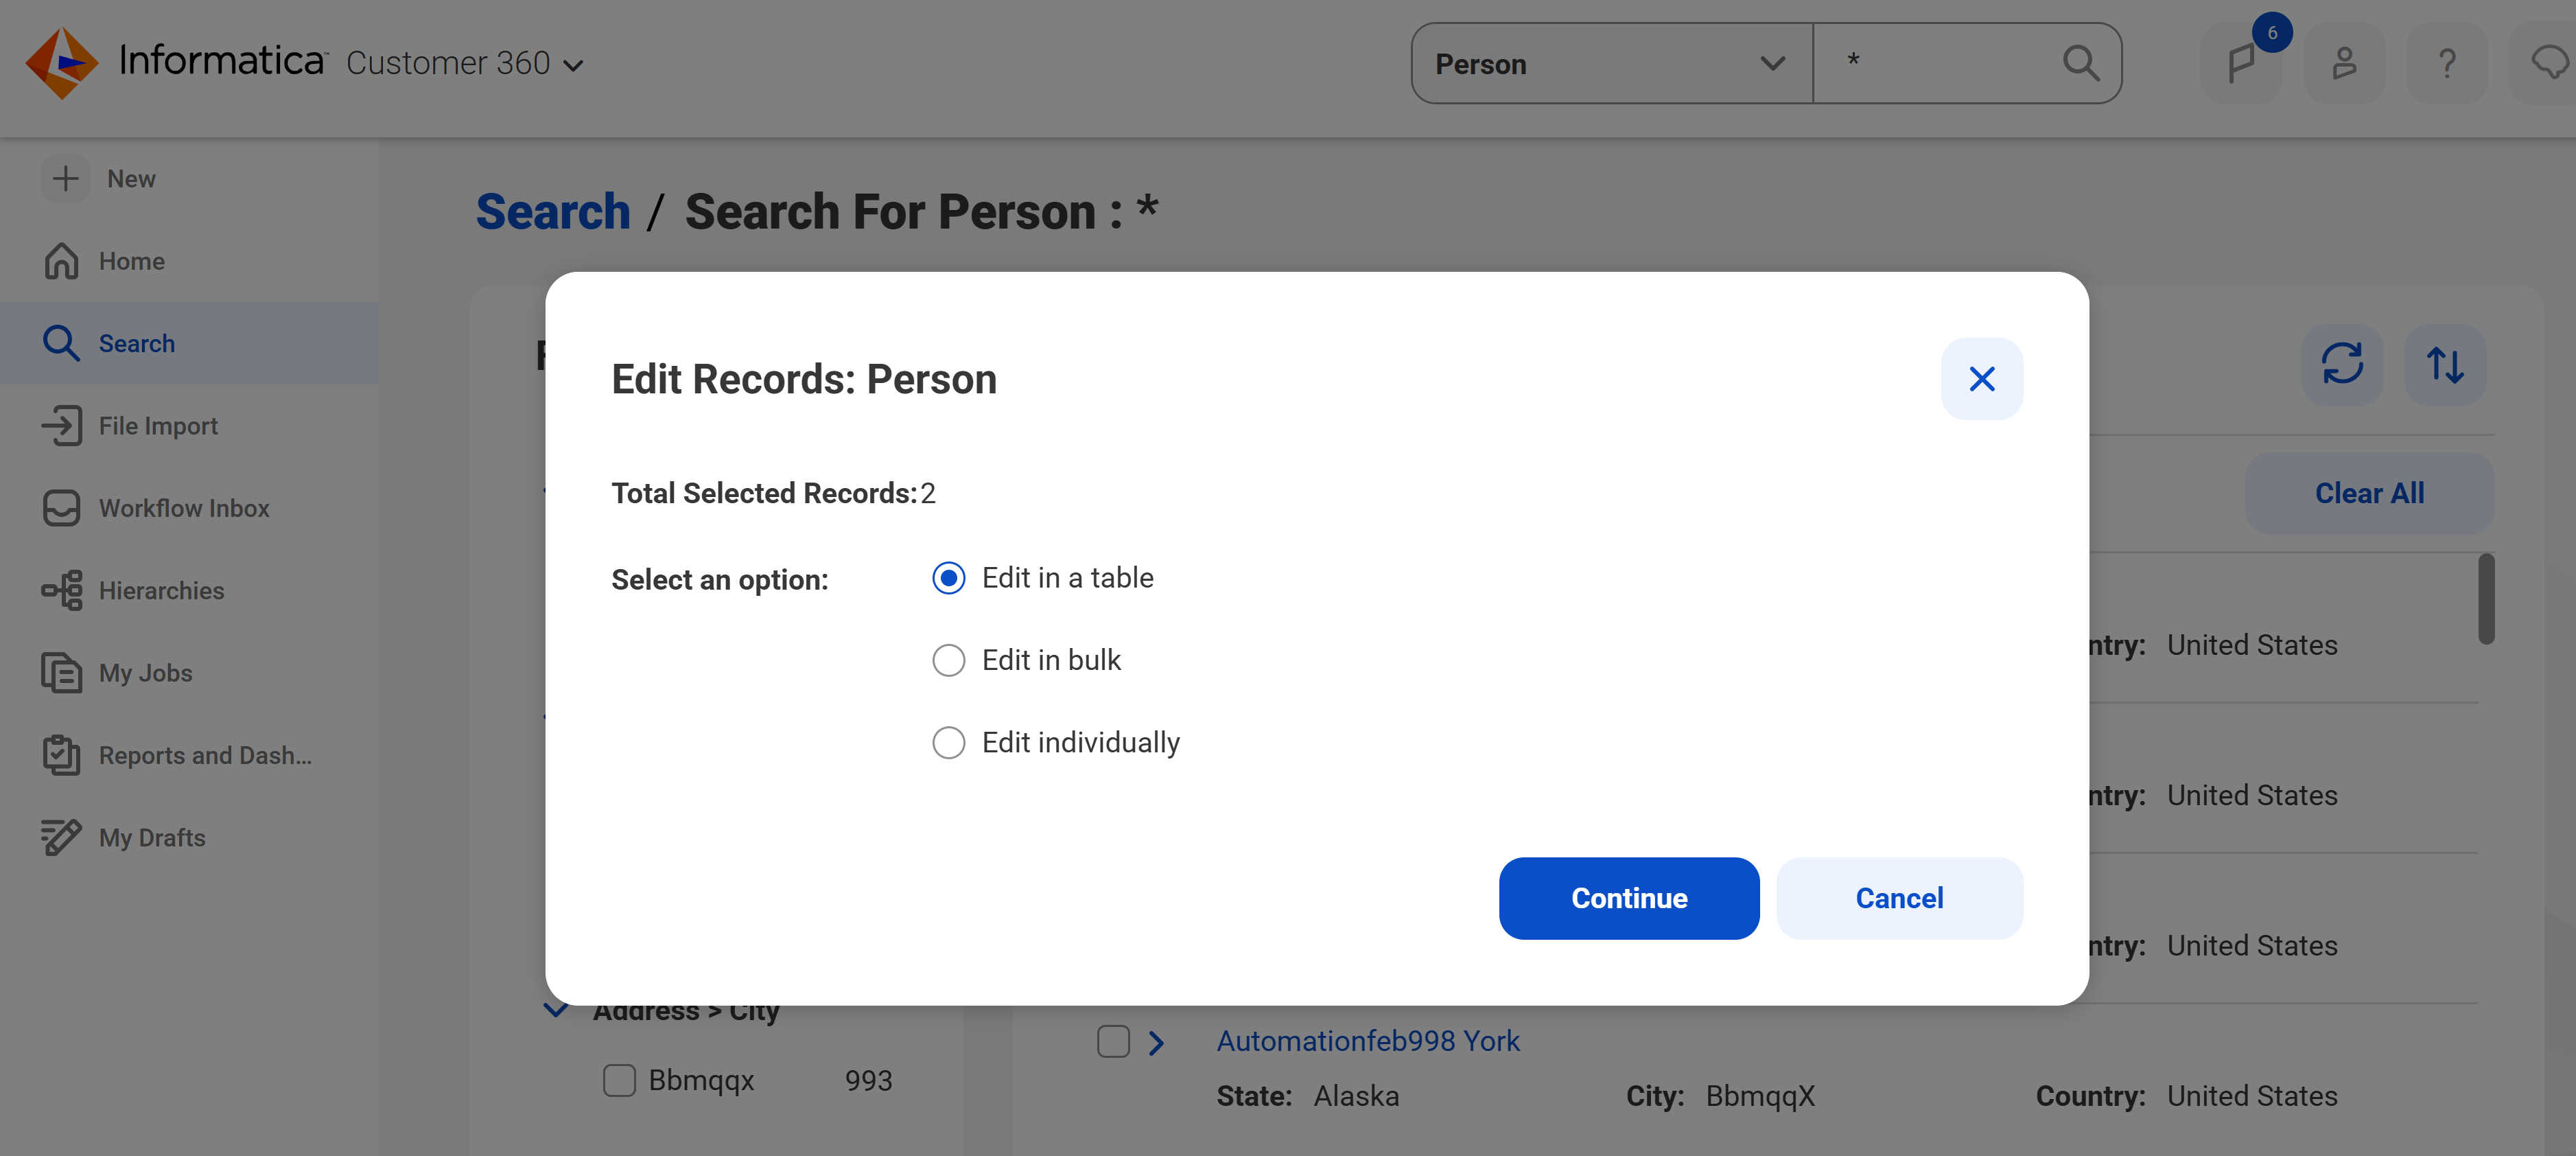
3Click Selected > Edit.
The Edit Records dialog box appears.
4Select Edit in a table, and click Continue.
The selected records appear as separate rows in a table. You can drag and drop the columns to reorder them, except for the Record Name column.
Note:
When you navigate from the Search Results page to the Edit in Table page for a different set of records, the Edit in Table page is refreshed to overwrite the existing table with those records.
5To update field values for a selected record, enter values, and then move to the next row.
The record moves to the draft state. A blue icon appears in the edited cell and the corresponding row to indicate the draft state.
6To edit multiple records at a time, you can copy a value from a cell to multiple cells. Drag the lower right corner of the cell downward or copy the cell and paste it into multiple cells.
Note:
When you edit multiple records at a time, you can update only the root fields of those records.
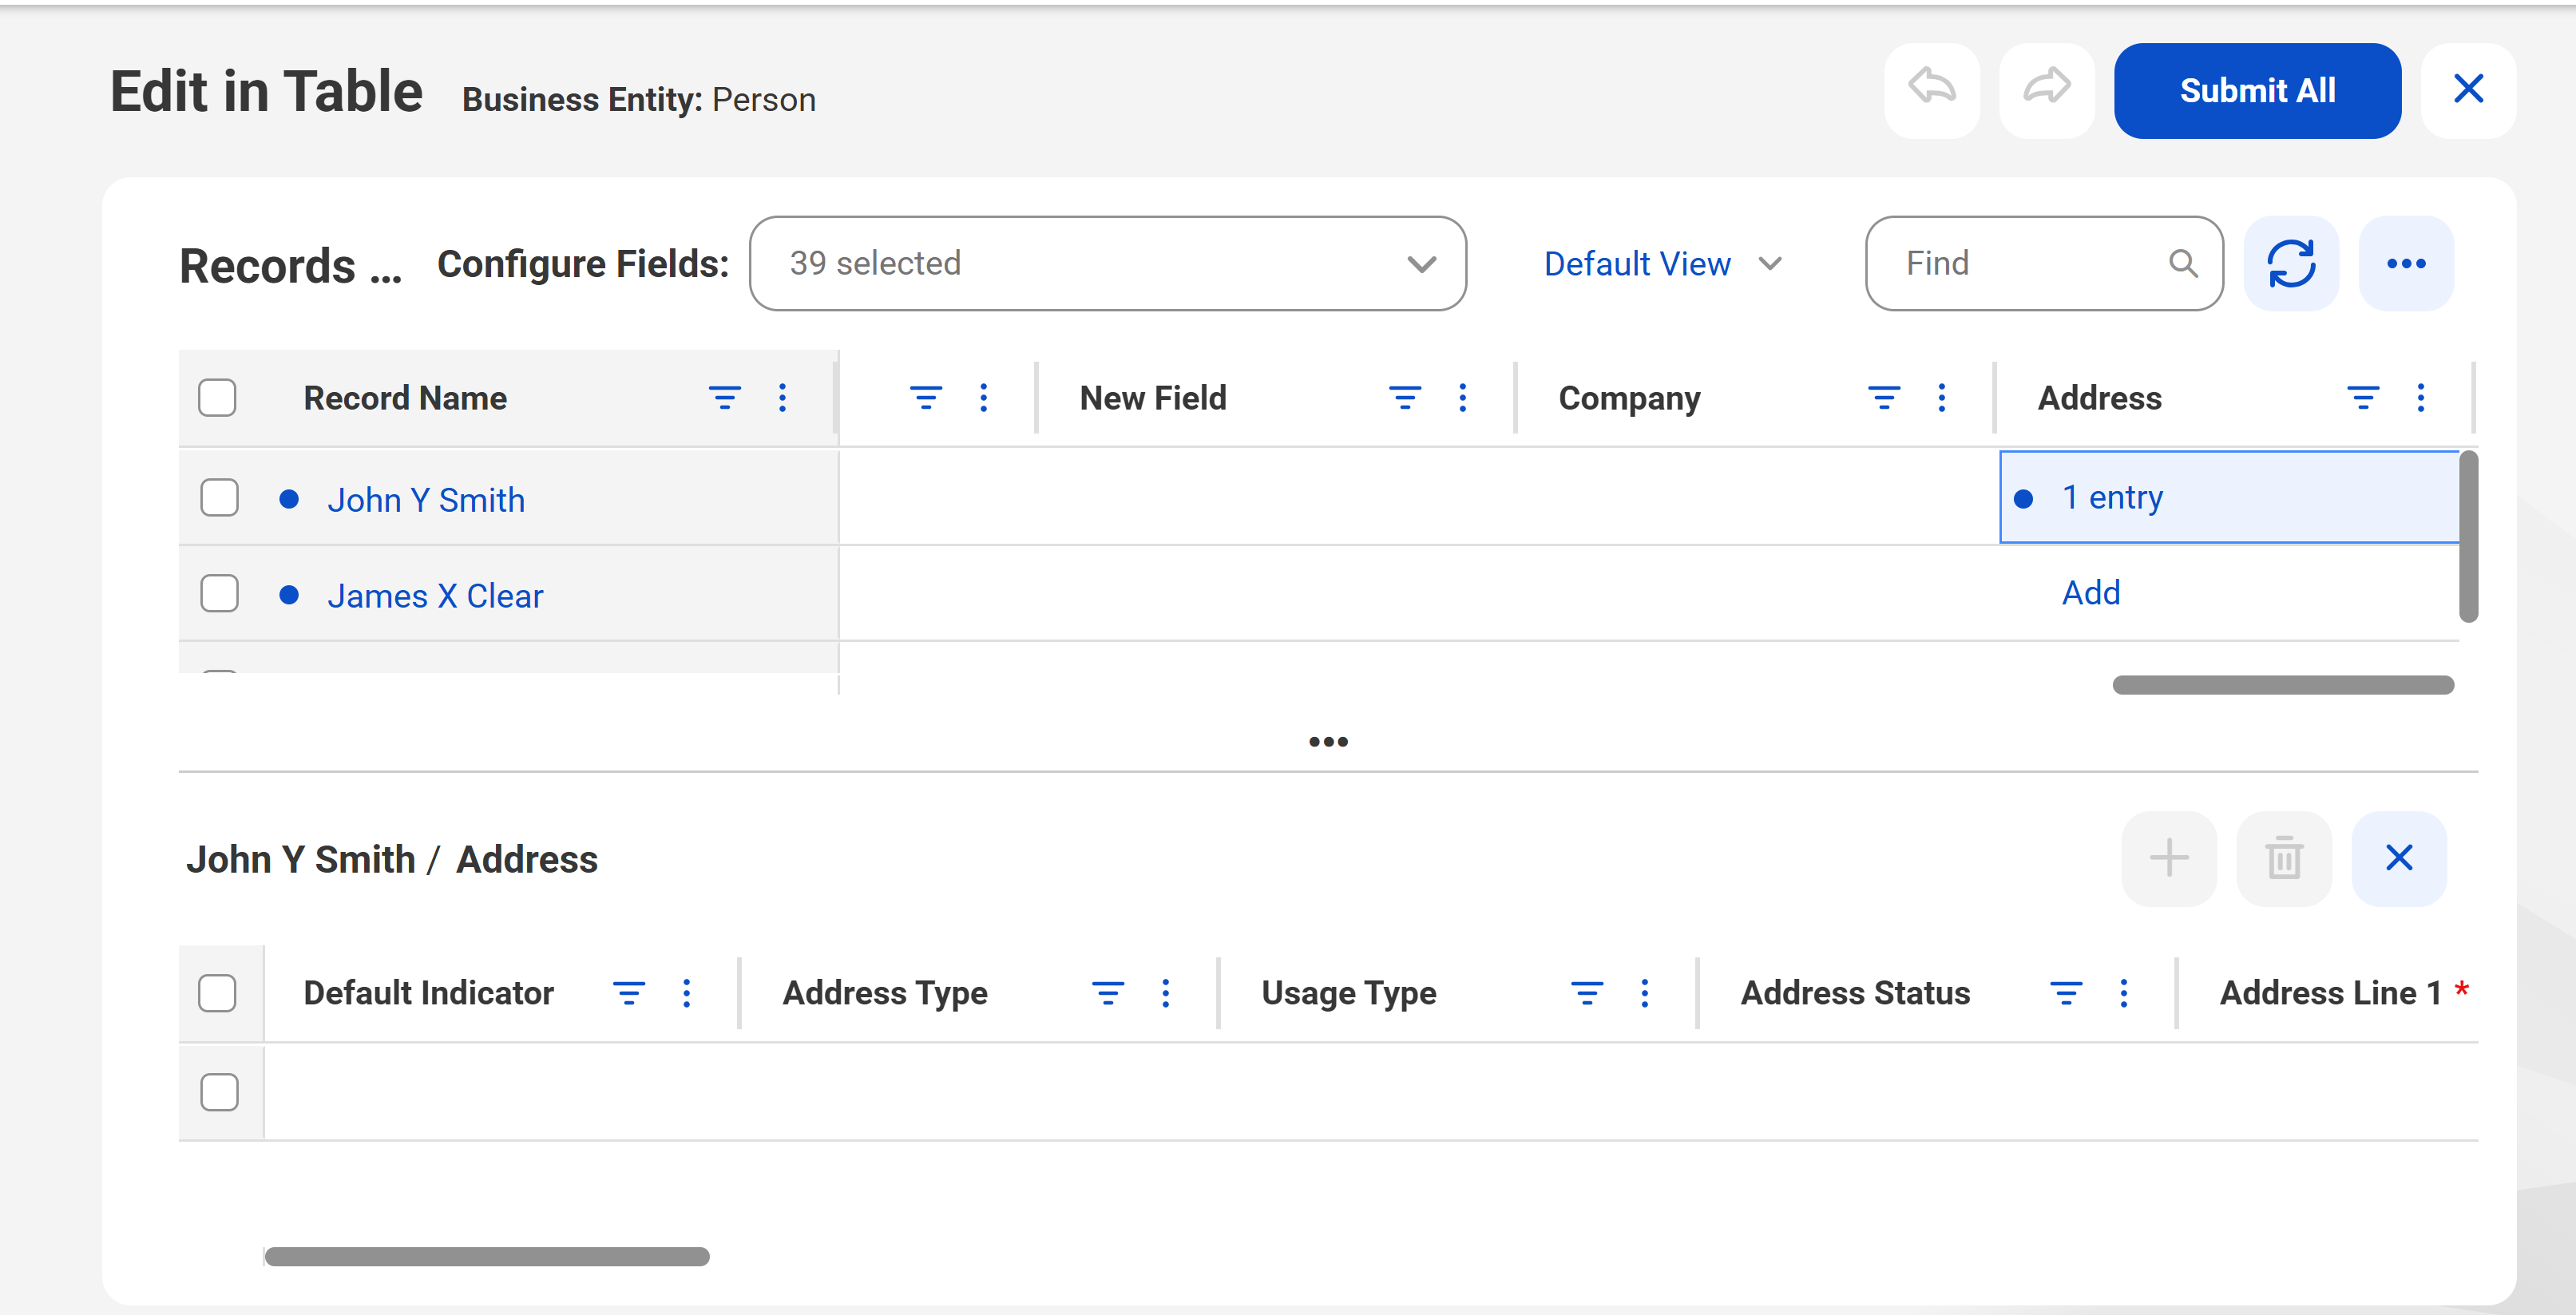
7To add values to field groups, perform the following steps:
aIn a field group cell, click Add.
The fields in the field group appear as columns in a separate table.
bEnter values.
cTo add more rows, click the Add icon and enter values.
dTo add an entry to a nested field group, click Add in the field group cell.
The fields in the field group appear as columns.
eEnter values.
fClick the breadcrumb above the table to navigate between field groups.
Note:
You can navigate up to six levels of nested field groups.
gTo reorder the columns, you can drag and drop them.
hTo add more rows, click the Add icon and enter values.
iClick the Close icon.
8To delete values in a field group, click n entries in the field group cell, where n is the number of entries that the field group contains. Select the rows that display the values you want to delete, and click the Delete icon.
9To edit values in a field group, click n entries in the field group cell, where n is the number of entries that the field group contains. Modify the values in the table and click the Close icon.
10Fix any validation errors.
If error remediation is enabled and a record contains any validation error, a validation error icon appears for that record.
If error remediation is disabled, records display the following icons based on the severity of the issues they contain:
- If the records contain errors, warnings, and information, the error icon appears.
- If the records contain warnings and information, the warning icon appears.
- If the records contain one category of issues, such as errors, warnings, or information, the icon for that category appears.
11To submit all the drafts, click Submit. To submit specific drafts, click the drafts, and click Submit Selected.
A confirmation message appears to indicate that you are about to save valid records.
Record submission depends on the following error remediation property setting:
- If enabled, records are submitted even if they contain errors.
- If disabled, records with errors aren't submitted.
12In the Confirm Submission dialog box, click Submit.
The records are updated successfully.
Note:
While submission is in progress, the records that are selected for submission are disabled and can't be edited.