When you export a profile, Informatica Intelligent Cloud Services creates an export ZIP file that contains the profiles that you selected for export. You can select individual profile to export, or you can select an entire project or folder. When you export a project or folder, the export file includes all of the profiles in the project or folder. To export a profile, you need the following privileges and permissions:
•Your user role must have privileges to export profiles.
•You must have read permission on the profile.
Export files
The export file retains the file structure of the source organization's Explore page for projects and folders. The profiles are located in the default folder or any folder from where you exported the profile. Connections and runtime environments are located in the SYS folder. The export file includes a spreadsheet that lists the objects within the file.
The following image shows a sample of an export spreadsheet:
Export file structure
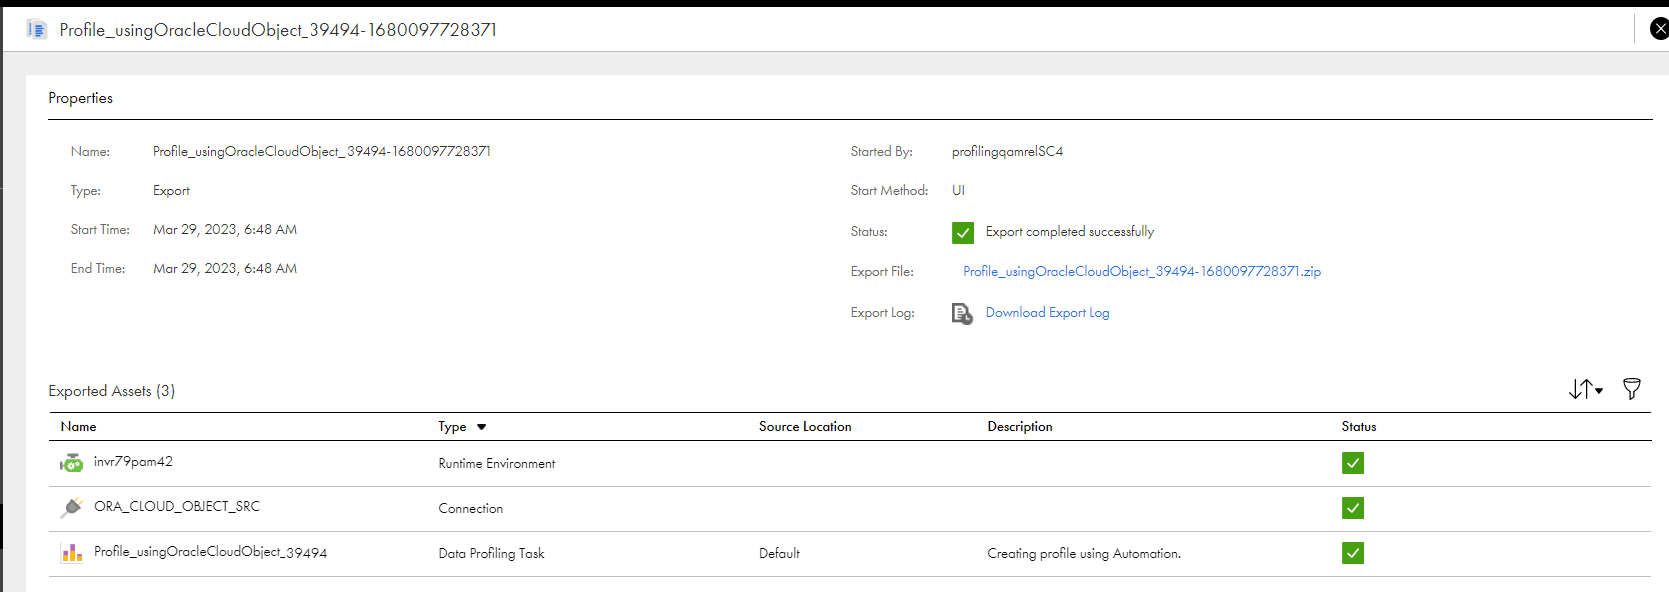
The following image shows the exported profiles in the export notification:
Object names
Each asset is contained in a ZIP file along with its associated metadata and JSON file. The zip file includes the asset name appended by the asset type.
For example, When you export a profile with the name Ora_Order_details from the organization, the export file displays the profile name as Ora_Order_details.PROFILE.
The following table lists the asset types and the associated extension appended to Data Quality and Data Integration asset names:
Asset Type
Extension
Cleanse
CLEANSE
Data Profiling Task
PROFILE
Deduplicate
DEDUPLICATE
Dictionary
DICTIONARY
Rule Specification
RULE_SPECIFICATION
Verifier
VERIFIER
Mapping
DTEMPLATE
Labeler
LABELER
Parse
PARSE
Mapplet
CUSTOM_FUNC
Exporting profiles
You can select a single profile, multiple profiles, or a project to export. To include multiple profiles, you can either select each profile within a folder or select a project or folder to export all of its profiles. If you export a project, during import you can import the entire project or import only the profiles that you select.
1On the Explore page, navigate to the profiles that you want to export.
2 Select the profiles that you want to export.
- To export a single profile or project, select the profile or project, and then click Actions and select Export.
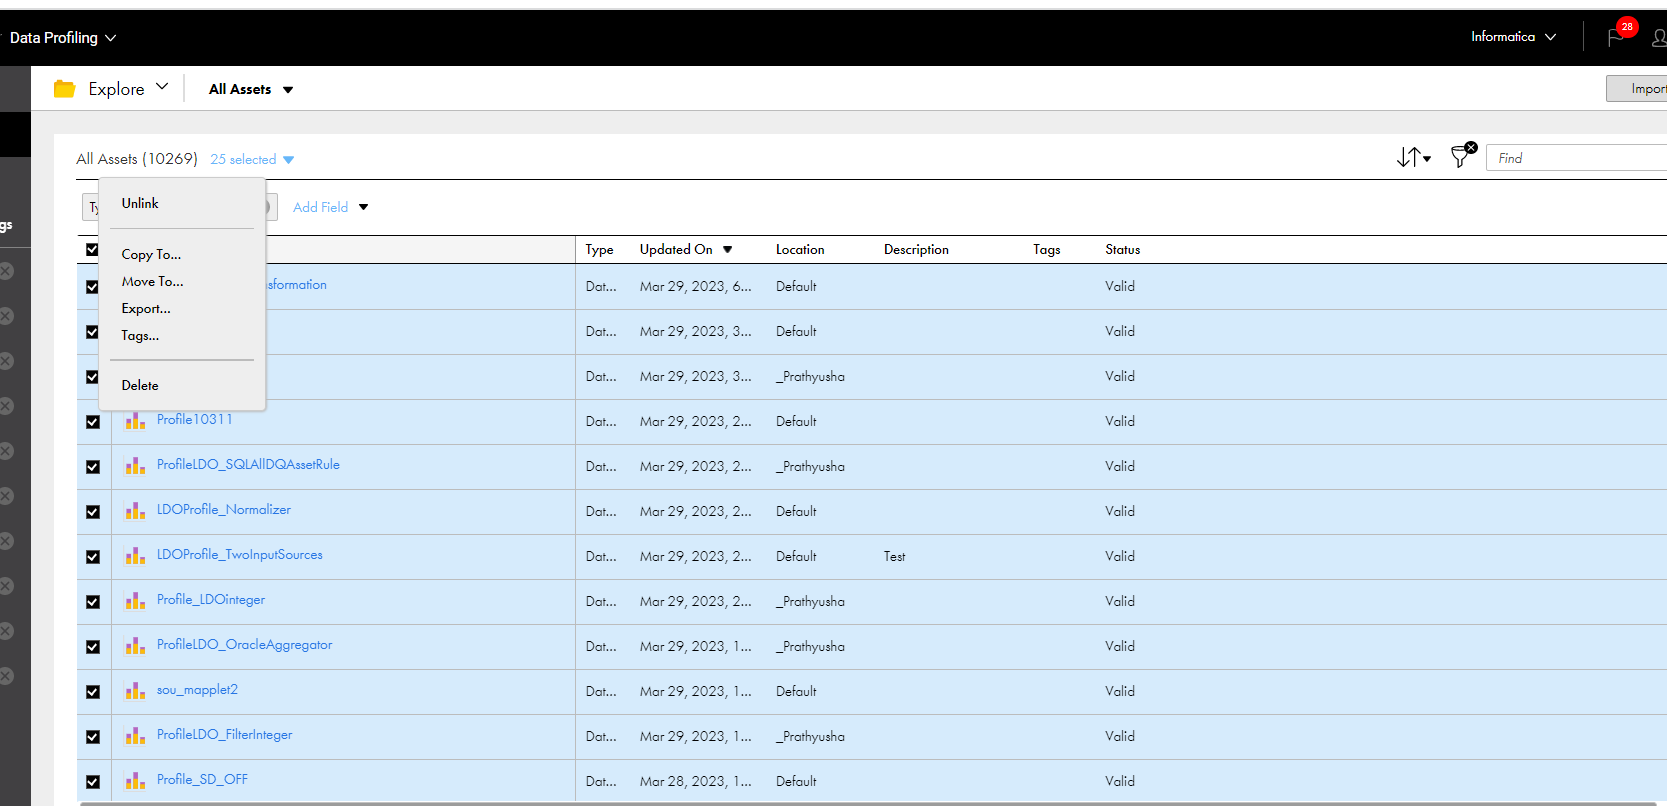
- To export multiple profiles, select the check box to the left of each profile to export. Or, select the check box for each project or folder that contains the profiles to export. From the Actions menu, select Export.
3The following image shows the selection menu with multiple profiles selected:
4On the Export Assets page, change the job name or retain the default.
5 Select whether to include dependent objects for the assets.
6Click Export.
7To see the progress of the job, select My Import/Export Logs from the navigation bar, and then select Export from the menu at the top of the page. Click the name of the log to open the log details page.
8 To download the export file when the job completes, on the log details page, click the export file name.
Tip: You can quickly open the log details page for a completed export job in Notifications . When the export process is complete, a message appears in Notifications. Click the link in the message to open the log details page.