Using Screenflow User Tasks
You may create two kinds of user tasks within Designer:
- •A Screenflow user task. The way in which you insert and define a Screenflow is discussed in this chapter. What you won’t find here is how to create Screenflow guide trees. For this information, see “Screenflow” within the “Central and ActiveVOS Screenflow” topics within help. If you need to create infrastructure for a guide, see “ActiveVOS Screenflow Programming”, which is also within the “Central and ActiveVOS Screenflow” topic.
- •A People Activity user task. Creating a people activity user task is similar to the way in which you create other tasks within the Designer. For more information, see Using the People Activity.
Note: You must have a Screenflow license to use the features described in this chapter.
What is a Screenflow
A Guide Designer is a part of Process Developer and Process Designer that lets you rapidly create applications for your users that interact with a project. These applications, which are also called guides, run from within Process Central.
An interactive guide is a set of screens (they are called steps) that your users will execute. Each step contains an action. It could contain information that your user needs, a form that needs to be filled out, and so on. Behind the scenes, steps interact with your application both extracting and storing data.
Using Guide Designer, you and others can create and modify interactive guides that automate processes. Creating and modifying guides requires no technical expertise or formal training.
When a user is assigned a Guide Designer task, it appears in the user's task list in the same way as any other task. However, when the user clicks on the task, the guide appears in Process Central instead of an HTML form. Guide field inputs can be filled in with process data and process data can be filled with guide field outputs. This data was declared in the guide's Guide Properties dialog as input data and the source for the data declared in the task's Property tab within Designer. (See Input and Output Tabs for more information.)
The action of the user completing the guide also completes the user task and updates process data.
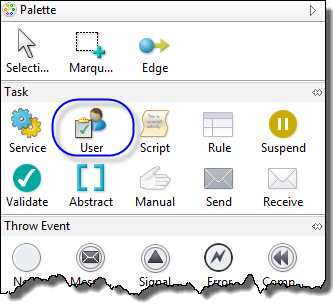
Adding a Guide Designer User Task to the Canvas
If the guide does not exist, you can create one by dragging a User task onto the canvas.
After dragging it to the canvas and selecting it, you can begin creating its properties.
The tabs that you see on the left are the same as the tabs that you will see when defining a people activity. However, the contents of most are unique to the kind of activity being created.
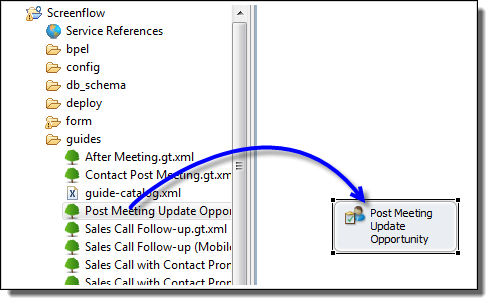
If the guide already exists, you can add it to the canvas by dragging it from the Project Explorer.
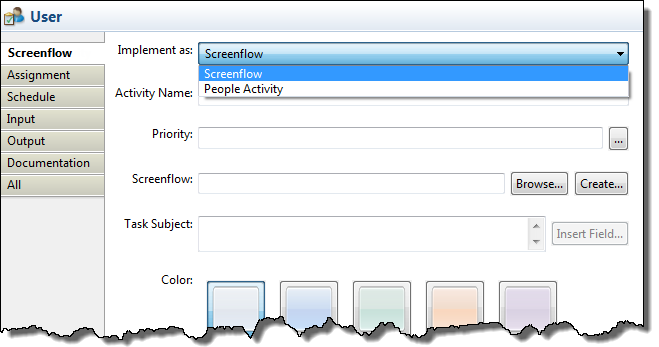
The Guide Designer Tab and Starting the Guide Designer
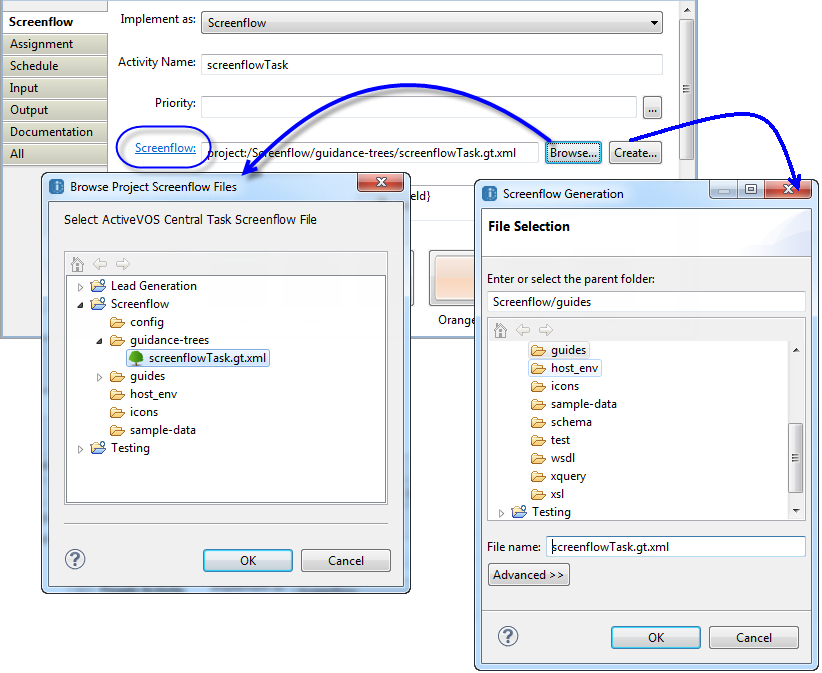
The only field that is unique within the Guide Designer tab (the top-most of the six property tabs on the left) is the Guide Designer control. (The "People Activity" label changes to "Guide Designer" when you select a Guide Designer implementation.) Use this tab to either associate an existing guide (by using the Browse button) or create a new guide (by using the Create button).
Notice the hyperlinked Guide Designer label. It only appears as a hyperlink when a guide is associated with the task. When you click on the hyperlink, a new tab appears in the Process Developer's canvas area that contains the guide designer. If the guide previously existed, this tab has all of the guide's steps. If this is a new guide, it will have a start step followed by an unnamed task.
If the guide exists, its name will be in the Project Explorer. Double-clicking its name there also launches a guide designer tab.
Note: The Guide Designer editor running within Process Developer can only be used when running Microsoft Windows, and it requires that Internet Explorer 9 or greater be installed on your computer. While other browsers can be used to display guides in the Process Console, the Guide Designer requires Internet Explorer. If you are creating guides in Process Designer, you can use any modern browser.
Double-clicking on a Guide Designer user task within the canvas does not open Guide Designer. However, if you right-click on the Guide Designer user task, you can select Open Rendering within the context menu.
Input and Output Tabs
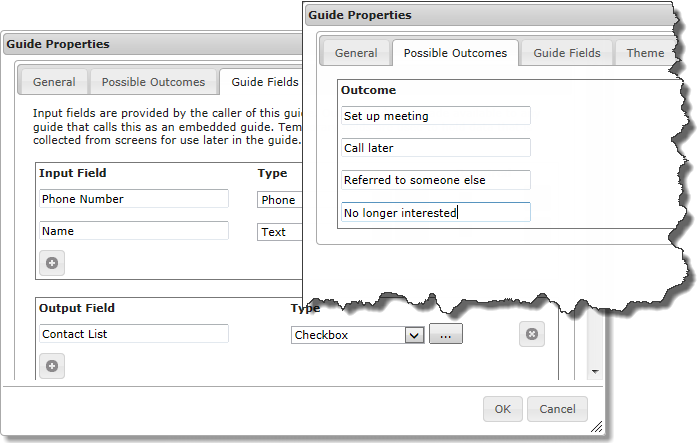
The Input and Output Property tabs within Process Developer resemble the Input and Output tabs used by other tasks. However, behind the scenes, they also interact with the guide. Here are two tabs within a guide’s Guide Properties dialog:
The Guide Fields tab lets you define input, output, and temporary fields. (Temporary fields are only used within a guide.) The Possible Outcomes tab lets you name the result (or outcome) from executing the guide. For example, the first outcome is that a meeting was set up.
When a guide executes, it can receive data as inputs. When the guide finishes executing, it can have an outcome, output values, and perhaps modified values for input data.
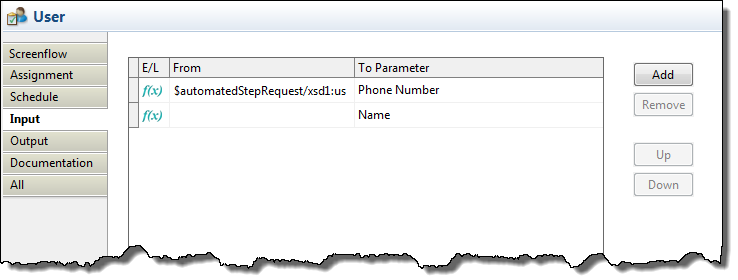
The values set as input fields within the guide are added to the Input tab. In this example, the PhoneNumber and Name fields are within the Input tab.
The Input tab will automatically have all of the input fields defined within the Guide Properties dialog. The way in which you assign a value to these parameters in this Input tab is identical to the way you assign values to input variables for other tasks.
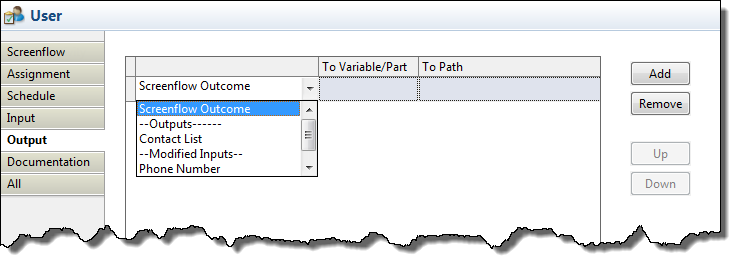
The Output tab is a bit more interesting as you can declare three kinds of data, as is shown in the following figure:
- •The outcome is a text value set to the Guide Designer Outcome variable.
- •The value for output fields can (and should) be added. Each output field declared within the Guide Properties dialog will appear in this picklist.
- •A guide could modify the value of the data it receives. If this is a possibility, you can add them by using this picklist.
After adding the name in the left column, the actions that you perform in other columns is the same as you would perform in other kinds of tasks.
Assignment Tab
The Assignment tab used from within a Guide Designer user task is slightly different than the one used from within a people activity user task. The following figure shows both of them, with the Guide Designer version on the right.
Notice that the people activity assignments have check boxes. Guide Designer activities do not. This is because Guide Designer lets you provide the assignment without having to override a default or have to go into the underlying task.
Creating Guides From Within Process Developer
Creating a guide from within Process Developer is almost exactly the same as creating a guide from within the Process Console. This section lists differences.
- •The guide editor toolbar that is used within a Process Developer tab is nearly identical to the one that appears when Guide Designer is being used within Process Central. Differences include that the toolbar does not have save and rename icons. This is because you can use the equivalent Eclipse Save and Save As commands.
- •While users can add images when using the Console, you cannot add them from within the Guide Designer. You will need to add them as contributions.
- •You may have additional service call tasks available such as "reassign", "output checkpoint", and "add attachment".
- •Search services are not available from within Process Developer.
Coordinating Guides Between Server and Process Developer
If a guide is modified using Guide Designer on the server, you can update it within designer by right-clicking on the guides folder and selecting Replace Guide Designer Guides from Server.
guide-catalog.xml
When you look at your guides within the Project Explorer, notice that Guide Designer has added the guide-catalog.xml file within the guides folder. This file is used when deploying and importing guides.
Here is a sample guide-catalog.xml file:
<cat:guideCatalog
xmlns:cat="http://schemas.active-endpoints.com/guides/
2012/09/guides.xsd"
overwrite="true">
<cat:guide name="Guide DesignerTask"
location="project:/Lead Generation/guides/
Guide DesignerTask.gt.xml" publish="true"/>
<cat:guide name="Sales Call with Contact Prompt"
location="project:/Lead Generation/guides/
Sales Call with Contact Prompt.gt.xml"
publish="true"/>
<cat:guide name="Sales Call with Contact Prompt (Mobile)"
location="project:/Lead Generation/guides/
Sales Call with Contact Prompt (Mobile).gt.xml"
publish="false"/>
</cat:guideCatalog>
The three elements you can set are as follows:
- •location: The guide's file name
- •overwrite (true/false): If set to true, guides with the same name that are already deployed are overwritten.
- •publish (true/false): If set to true, the newly deployed guide is published; that is, it is made available for running.
Deployment and Running
When you deploy a project containing Guide Designer user tasks, the guide files become part of the contribution and are automatically imported into the Guide Designer environment within Process Designer.
When a guide is being running from within Process Console, normal task management features can be used; for example, claiming, assigning, reassigning, and releasing.