Creating a Request Form
Before deploying the process, you must create a request form that you can use to invoke the process on the server. Two steps are required here:
- 1. Create the Request form.
- 2. Create a Process Central Configuration (.avcconfig) file that defines the structure and contents of the application.
Step 1: Create the Request Form
- 1. In the Project Explorer, create a sub-folder under the form folder called request.
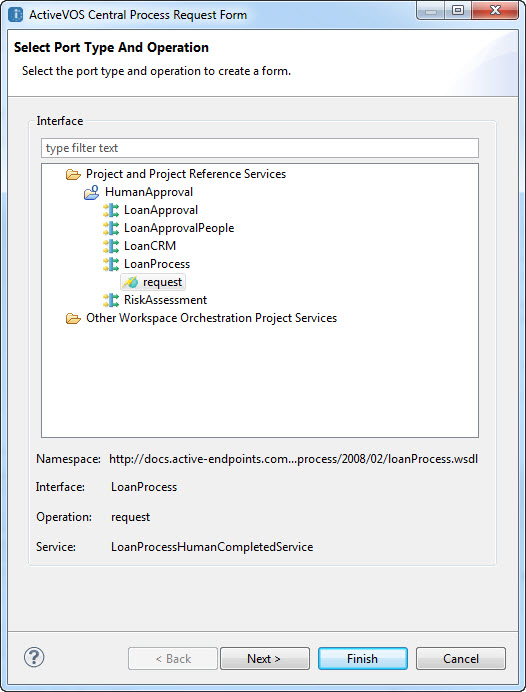
- 2. In the Project Explorer, right-click on the form folder and select New > Process Request Form.
- 3. Expand the LoanProcess port type and select the request operation as shown here:
- 4. Press Next.
- 5. Name the form HumanApproval.html.
- 6. Press Finish.
Step 2: Create the Process Central Configuration
- 1. In the Project Explorer, right-click on the deploy folder and select New > Central Configuration. Enter a value of HumanApproval.avcconfig for the file name and press Finish.
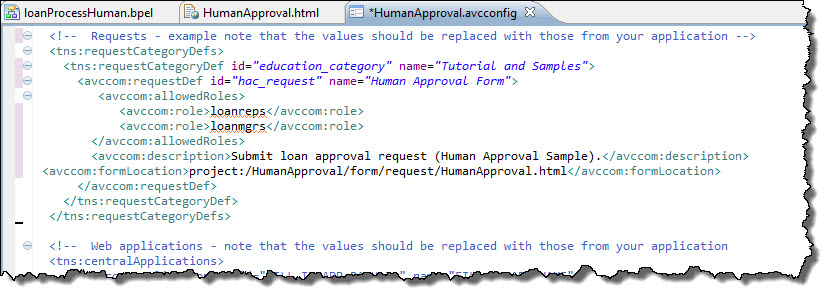
- 2. In the Source tab, scroll down to the Requests section and replace the <tns:requestCategoryDefs> with this code:
<!-- Requests - example note that the values should be replaced with those from your application -->
<tns:requestCategoryDefs>
<tns:requestCategoryDef id="education_category" name="Tutorial and Samples">
<avccom:requestDef id="hac_request" name="Human Approval Form">
<avccom:allowedRoles>
<avccom:role>loanreps</avccom:role>
<avccom:role>loanmgrs</avccom:role>
</avccom:allowedRoles>
<avccom:description>Submit loan approval request (Human Approval Sample).</avccom:description>
<avccom:formLocation>project:/HumanApproval/form/request/HumanApproval.html</avccom:formLocation>
</avccom:requestDef>
</tns:requestCategoryDef>
</tns:requestCategoryDefs>
- 3. This will deploy the HumanApproval.html file to Process Central and allow access to anyone with the loanreps or loanmgrs role. The file should look similar to this:
- 4. Save the file.
- 5. The request form and the Process Central configuration file can now be deployed. Instructions for deploying can be found in the Human Approval Completed Orchestration Process template.
Preparing for Deployment
In this section, you'll prepare the process for deployment by creating the Process Deployment Descriptor (.pdd) file. For more information, see Deploying the Loan Process and Deploying the Partner Processes.
A Process Deployment Descriptor (.pdd) file describes the relationship between the partner links defined in the BPEL file and the implementation that interacts with partner endpoints. You create a .pdd file to add address information about your endpoint references. The .pdd file is an integral part of the deployment package for the process.
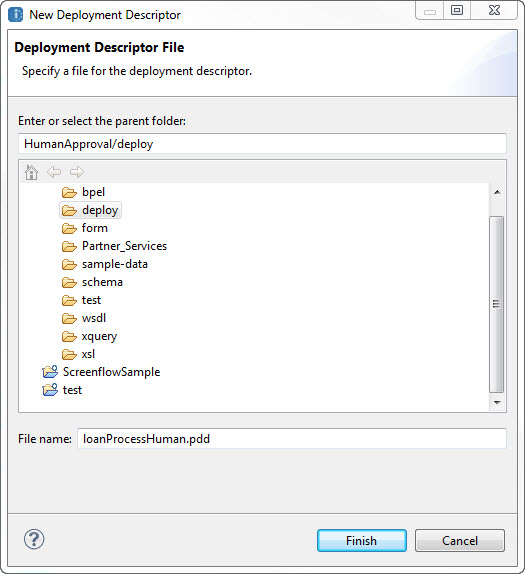
- 1. In the Project Explorer, right-click on the loanProcessHuman.bpel process and select New > Deployment Descriptor to open the New Deployment Descriptor dialog.
- 2. Select the deploy folder, and press Finish, as shown.
- 3. The loanProcessHuman.pdd file opens in the PDD editor The properties of the General tab are displayed.
- 4. Accept the defaults on the General tab and press the Partner Links tab to define the bindings to the web services called by the process.
- 5. Set the runtime bindings for the CustomerService partner link by clicking on the CustomerService row and set the following properties:
- - Invoke Handler: WSA Address
- - Endpoint type: static
- - Press the ellipses (...) button next to the textarea labeled Endpoint Reference to open the Endpoint Reference dialog
- - Select the loanCRM.wsdl file from the WSDL picklist.
- - Press OK.
Notice that the Endpoint Reference information is now filled in using the values contained in the loanCRM.wsdl file:
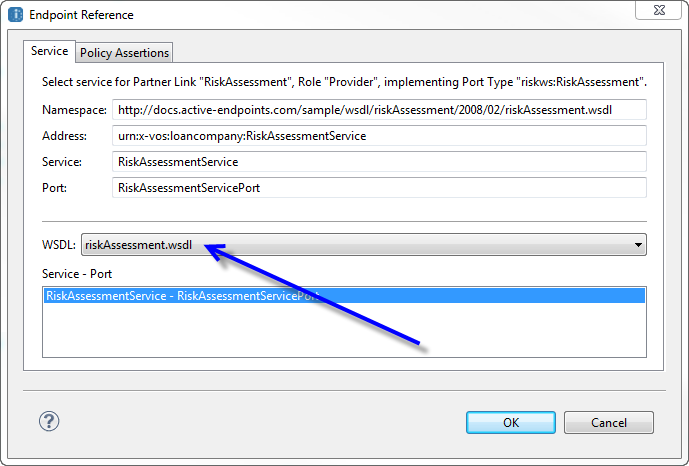
- 6. Set the runtime binding information for the RiskAssessment partner link by selecting the RiskAssessment row and set the following properties:
- - Invoke Handler: WSA Address
- - Endpoint type: static
- - Press the ellipses (...) button next to the textarea labeled Endpoint Reference to open the Endpoint Reference dialog
- - Select the riskAssessment.wsdl file from the WSDL picklist.
- - Press OK.
Notice that the Endpoint Reference information is now filled in using the values contained in the riskAssessment.wsdl file.
- 7. Next set the runtime binding information for the LoanProcess partner link by selecting the LoanProcess row and setting the following properties:
- - Binding: Document Literal
- - Service: LoanProcess Note that this name must match the Service name selected in the HumanApproval.html request form, described in Creating a Request Form above.
Notice that the Endpoint Reference information is now complete:
- 8. The final step is to bind the Logical People Groups to actual server roles. Select the People tab and notice that the Logical People Groups are already assigned to names in the tomcat-users.xml file for the Process Developer embedded server Identity Service. Because Identity Service group names are used in the People activity, they are already selected here.
- 9. Save the file.
Running the Process on the Server
Your process is now ready to be deployed. Deployment is the act of publishing your BPEL process to the Process Server where it can run.