Process Designer Tutorial
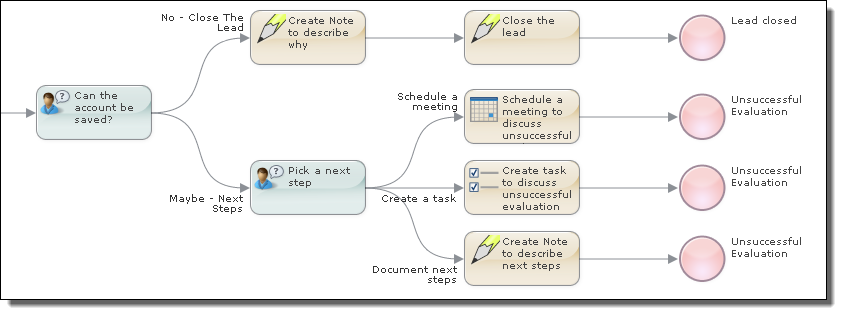
This tutorial walks you through the steps you need to use to create the basic foundation for just about any guide you want to create. The following figure shows a part of the guide you will create:
The rounded rectangles and circles represent different steps that could occur. Here, the rectangles represent actions that could occur and the circles represent the end of the interaction. The lines starting at the left side of a step and ending on the right side of another step are the paths (called branches) that users would take as they execute the guide.
Just by using the tutorial, you will understand how the different kinds of steps are used. You will be using the following:
- •Screen steps: The most fundamental of the Guide Designer steps. You will use them to display instructions, ask questions, and have the user fill in forms. It can also display information contained within a database and perhaps even update it.
- •Service Call steps: A Screen step is limited to updating information that already exists. The Service Call step can also read information from your database and update it. However, its power is that it can also create new records and perform other activities such as using your email system. Developers create Service Call steps that interact with their applications and environments. For example, a Service Call step could be created that sends mail to people.
- •Jump Steps: As you are designing a guide, there are times that you want to jump from one branch of the tree to another, which is what a jump step lets you do. One example is that the steps in one branch schedule a meeting. Other branches will also need to schedule a meeting. Rather than each have scheduling steps, you could jump to the steps in another branch. You can also use jump steps to repeat a set of steps using different data. For example, a branch could create a contact. If there are additional contacts, users could jump back to the step that lets them create it.
- •Embedded steps: While a guide can be self-contained, there are many reasons to have one guide be embedded in another. One example is the scheduling set of steps just mentioned. Instead of using a jump step to go to these steps, you could embed a guide that contains all of the scheduling steps into a branch. (If you understand programming concepts, there is an analogy to a subroutine. There are some important differences and they are described in the Guide Designer documentation.) A less obvious use for embedded steps is to repeatedly perform a set of activities. For example, you want to update all of your contacts. Here you would create a guide that updates one contact, and then send a list of contacts to it one at a time.
- •End Steps: An end step marks the place where no more processing will occur within a guide. It can also display information to the user. For example, if a guide created a contact, the end step could display the contact's information.
The Sales Call with Contact Prompt/Sales Call Follow-up Guides
This tutorial will have you recreate the Sales Call Follow-up guide that is one of the sample guides shipped with Process Developer.
The Sales Call Follow-up guide has 23 steps. Only 6 of them are shown in this figure.
Embedding one guide within another guide isn't a metaphor: it is literally true. All of the steps within the embedded guide are copied into the embedding guide. However, the embedding guide remembers where these steps came from. If the embedded guide changes, the embedding guide will let you know that it has changed so that you can republish the embedding guide.
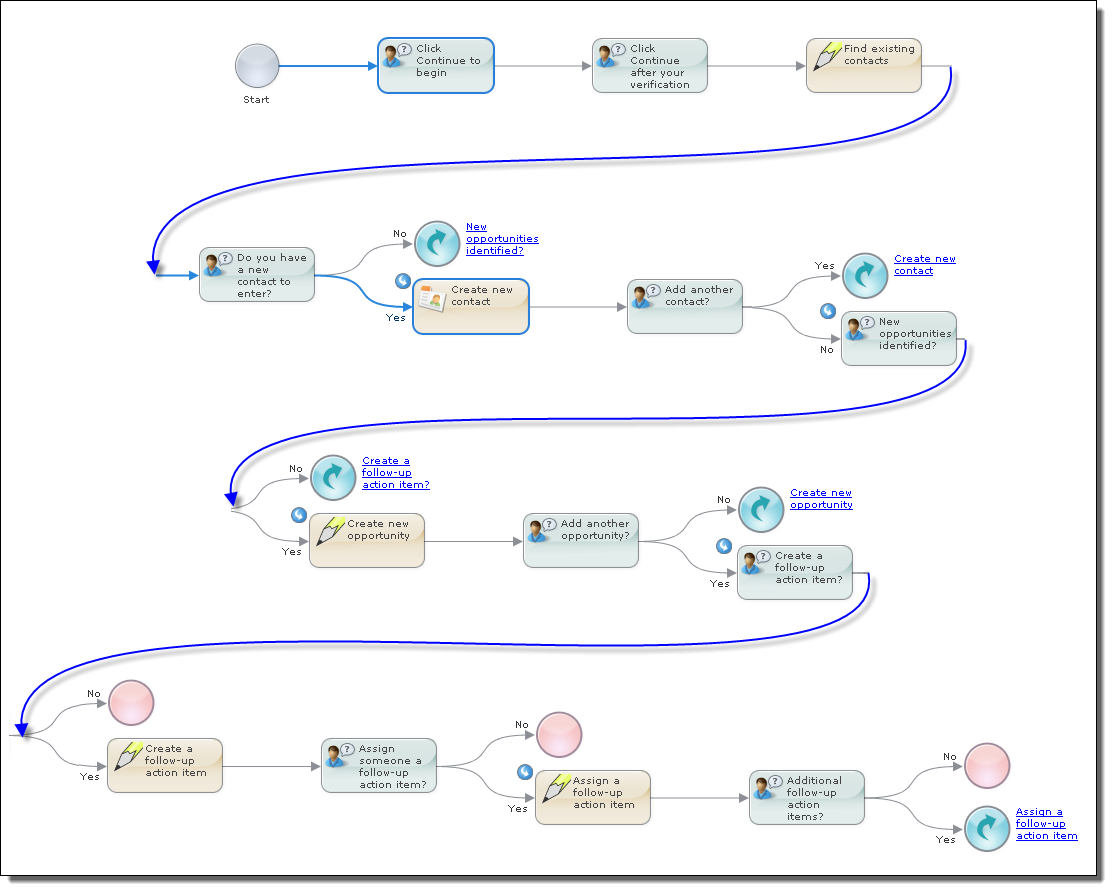
The next figure shows all of the embedded guide's steps.
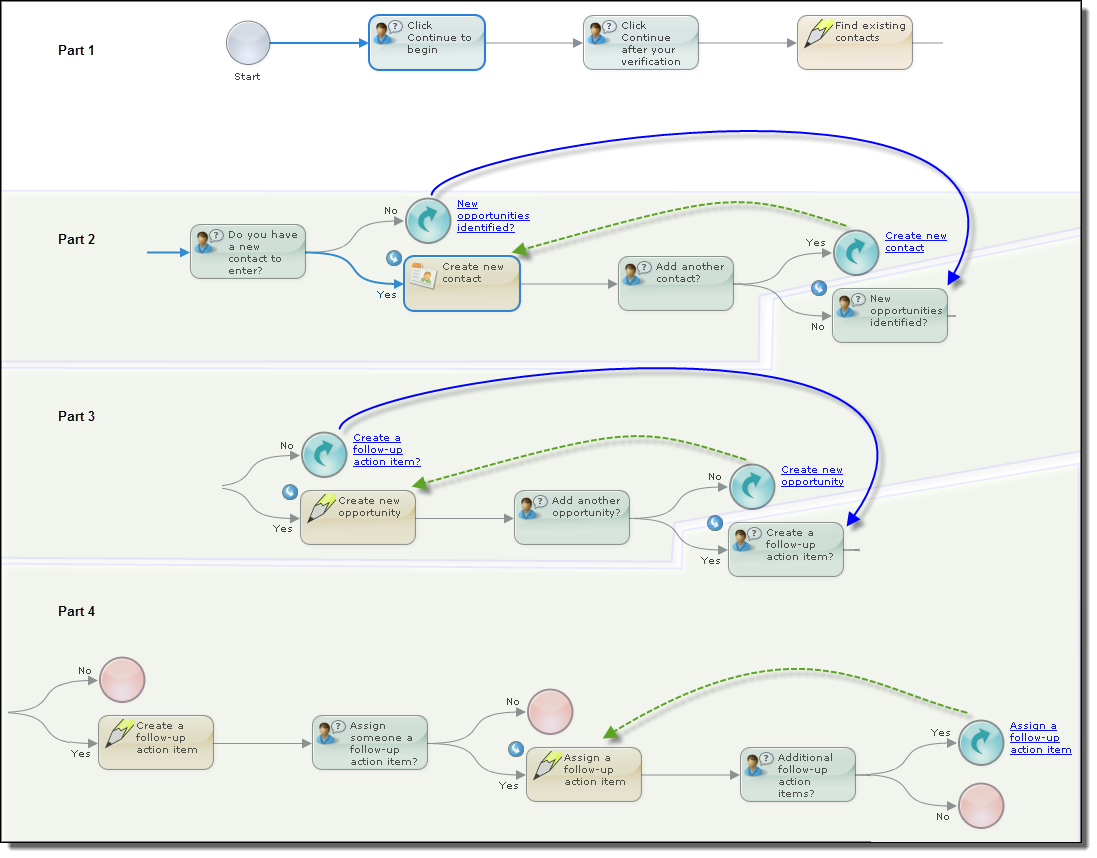
The execution of this guide can be divided into four parts, and each of these parts is shown in its own area in the next figure:
- •Part 1: Preliminary steps, some of which is introduction.
- •Part 2: Entering new contacts.
- •Part 3: Entering new opportunities.
- •Part 4: Creating and assigning action items.
The curved arrows within circles in this figure are jump steps. They tell Guide Designer that it should "jump" to a step and execute that step and the steps that follow. Guide Designer represents them this way instead of drawing lines between the steps as the step canvas could quickly become a tangled maze of lines. However, arrows representing the jumps are shown in the next figure as the jumps are very straightforward in this guide.
The blue arrows show forward jumps and the green arrows show backward jumps.
What You Will Be Building Here
As the guide shown in the previous topic is large, this tutorial will only describe some of the steps, leaving the remainder as exercises. The next figure shows most of the steps that are described in detail in this tutorial.