Developing Data Engineering Integration Mappings for Publications
To develop a Data Engineering Integration mapping for a publication, perform the following steps in the Developer tool:
- 1. Create source and target connections. The source connection is a connection to the publishing application and the target connection is a Hive connection to the Data Integration Hub publication repository.
- 2. Create source and target data objects.
- 3. Create a mapping and add the source and target objects to the mapping.
- 4. Add Data Integration Hub parameters to the mapping.
- 5. Add an Expression transformation to the mapping, configure ports in the transformation, and connect ports between the source, the transformation, and the target.
- 6. Configure the mapping run-time environment and create an application from the mapping.
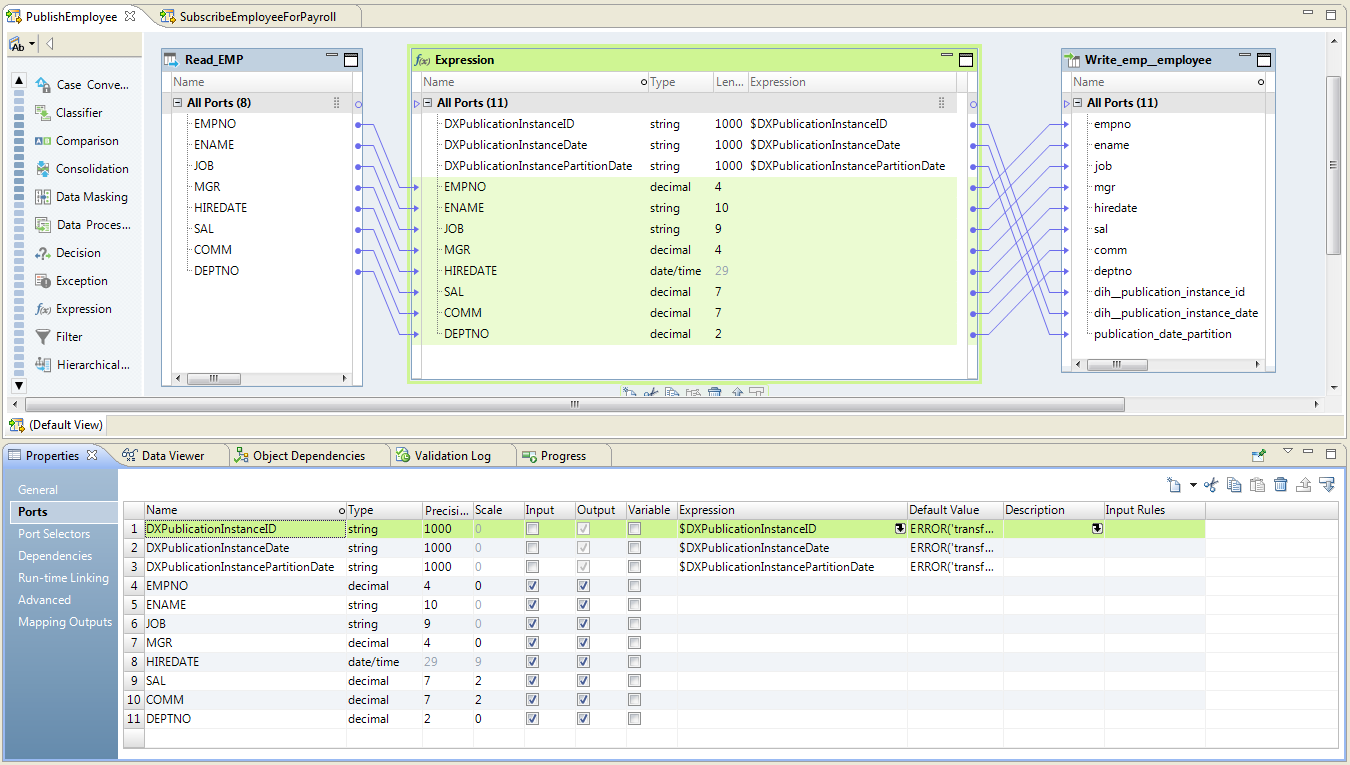
The following image shows a sample publication mapping:
Step 1. Create Source and Target Connections
1. Create a Streaming source connection to the publishing application.
2. Create a target connection to the Data Integration Hub publication repository.
Step 2. Create Source and Target Data Objects
Create data objects under Physical Data Objects.
1. Create a source data object and define the column projection in the source connection to publish.
2. Create a target data object and select the table in the target connection to where to publish the data from the source. The object must be a relational data object.
Step 3. Create a Mapping with Source and Target
1. Create and name a new mapping.
2. Add the source physical data object to the mapping as a Reader.
3. Add the target physical data object to the mapping as a Writer.
Step 4. Add Data Integration Hub Parameters to the Mapping
 Add the following parameters to the mapping:
 DXPublicationInstanceID
DXPublicationInstanceDate
DXPublicationInstancePartitionDate
Step 5. Add an Expression Transformation to the Mapping
1. Add an Expression transformation to the mapping, between the source and target objects.
2. Link all the ports from the source object to the identical ports in the Expression transformation. For example, if your topic table includes the column EMPNO, link the EMPNO port in the source object to the EMPNO port in the Expression transformation.
3. Configure the following additional ports in the Expression transformation:
DXPublicationInstanceID
DXPublicationInstanceDate
DXPublicationInstancePartitionDate
The data type of all ports is string, and the minimum precision is 200.
4. Link all the ports from the Expression transformation to the identical ports in the target object. For example, link the EMPNO port in the Expression transformation to the EMPNO port in the target object, and link the DXPublicationInstanceID port in the Expression transformation to the dih__PublicationInstanceID port in the target object.
5. Save the mapping.
Step 6. Configure the Mapping Run-time Environment and Create an Application
1. In the Properties pane select Run-time, and then, under Validation Environments, select Hadoop and then select Hive. Verify that Native is not selected.
2. Create an application from the mapping.
The mapping is deployed to the Data Integration Service for Hadoop environment.