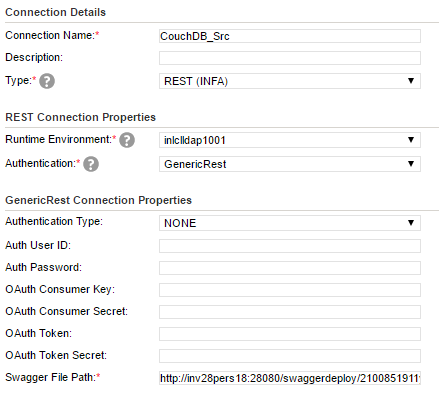
1. Create a REST connection. Verify that you specify the absolute path of the swagger specification file and the authentication method in the connection properties.
The following image shows the configured REST connection:
2. Create a flat file connection to write data to the flat file.
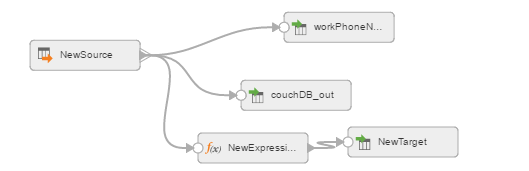
3. Create a REST mapping.
The following image shows the REST mapping:
4. Add a Source transformation. Specify a name and description in the general properties.
5. On the Source tab, perform the following steps:
- a. In the Connection field, select the configured REST connection to connect to the Couch database.
- b. In the Operation field, select CouchDB as the operation.
- c. In the Request Options section, configure the request message in the following XML format, specify the attributes in the message, and validate the message:
- d. In the Advanced Properties section, set the tracing level to Normal, and use the default cache size of 1024 KB.
The following image shows the CouchDB operations:

<!--1 or more repetitions:-->
<proc:CouchDB_INPUT xmlns:proc="http://xml.schemas/infa/procedure/">
<!--Optional:-->
<CouchDB>
<!--1 or more repetitions:-->
<emp>
$$empID
</emp>
</CouchDB>
</proc:CouchDB_INPUT>
<proc:CouchDB_INPUT xmlns:proc="http://xml.schemas/infa/procedure/">
<!--Optional:-->
<CouchDB>
<!--1 or more repetitions:-->
<emp>
$$empID
</emp>
</CouchDB>
</proc:CouchDB_INPUT>
The request message specifies the criteria to include the employee ID for all employees.
6. On the Field Mapping tab, select the elements, such as _id, FirstName, and LastName in the response structure that you want to map to the output fields.
The following image shows the response structure on the left pane in a hierarchical format and the output groups on the right pane in a relational format:
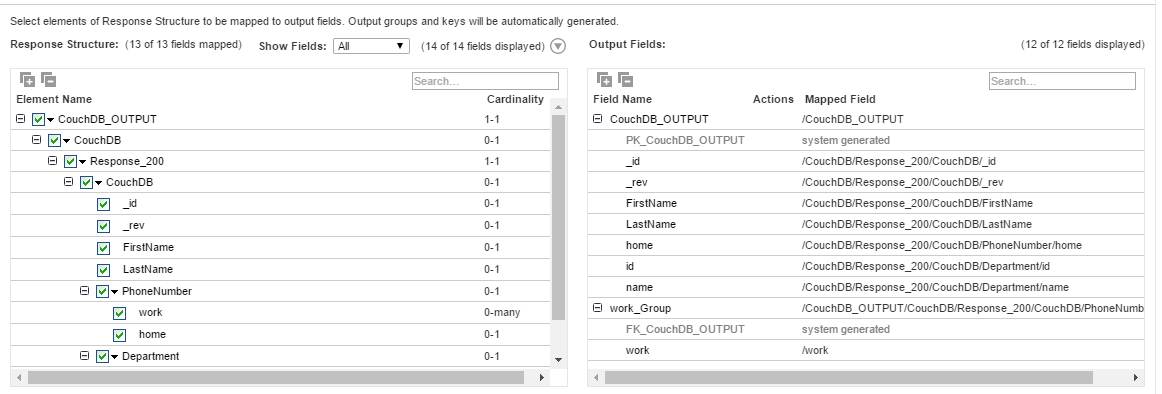
The Secure Agent creates two output groups, workPhoneNumber and couchDB_out, which results in two relational output files. Primary and foreign keys are auto-generated.
7. Add three Target transformations and specify the target objects for each of the transformations. Perform the following steps:
- a. Select a flat file connection for each of the target transformations to write data to the flat files.
- b. Create target objects workPhoneNumber.csv, couchDB_out.csv, and NewTarget.csv files to write data to the target.
- c. Select the output group from CouchDB that you want to link to the target objects.
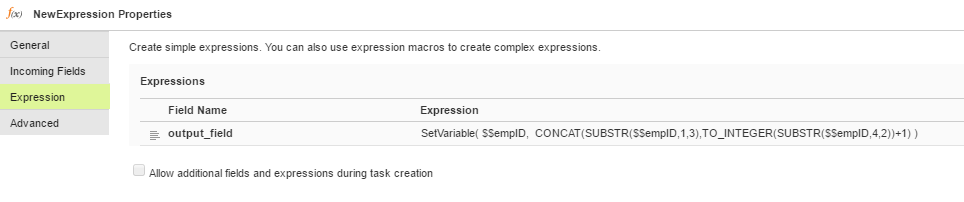
8. Add an Expression transformation, and include a SetVariable function and the parameterized value $$empID in the expression so that the task updates the values by one at the end of each run.
The following image shows the configured expression that utilizes the in-out parameters:
9. Click Task Wizards > Mapping Configuration Task, and select the mapping for the task.
10. When you save and run the mapping, the Secure Agent retrieves employee records from CouchDB and writes the data to the corresponding flat files.