1. In Informatica Cloud home page, click Apps.
The drop-down menu appears.
2. Select Data Synchronization.
The Data Synchronization page appears.
3. Click New to create a Data Synchronization task.
The Definition tab appears.
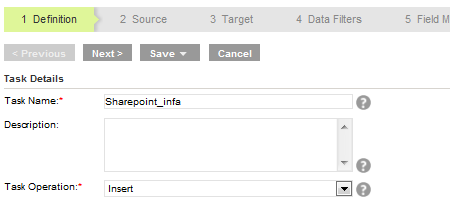
4. Specify the Task Name, provide a Description, and select Insert as Task Operation.
5. Click Next.
The Source tab appears.
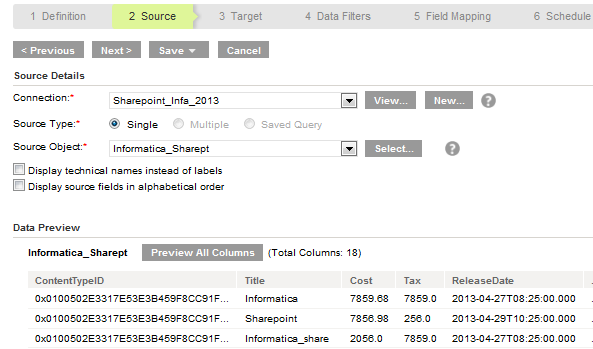
6. Select the source Connection, Source Type and Source Object to be used for the task.
Note: The files present in the relevant folder(s) of a document library are fetched. Special characters present in the names of Lists/Document Libraries are not displayed in the object drop-down list.
7. Click Next.
The Target tab appears.
8. Select the target Connection and Target Object required for the task.
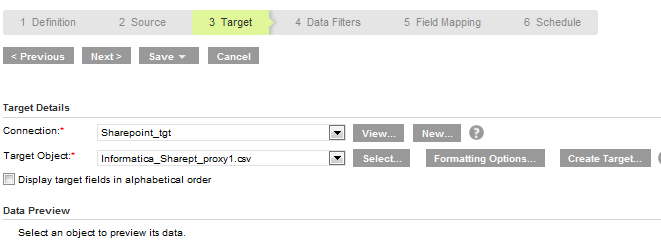
9. Click Next.
The Data Filters tab appears.
10. In Data Filters tab, Process all rows is chosen by default.
To assign filters to fetch specific data, see Data Filters.
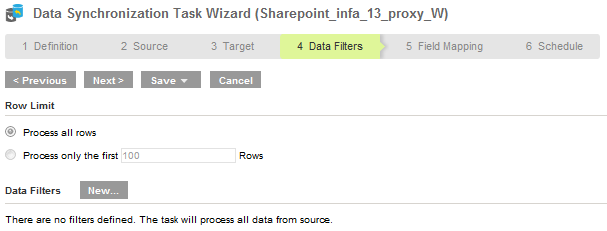
11. Click Next.
The Field Mapping tab appears.
12. In Field Mapping tab, map source fields to target fields accordingly.
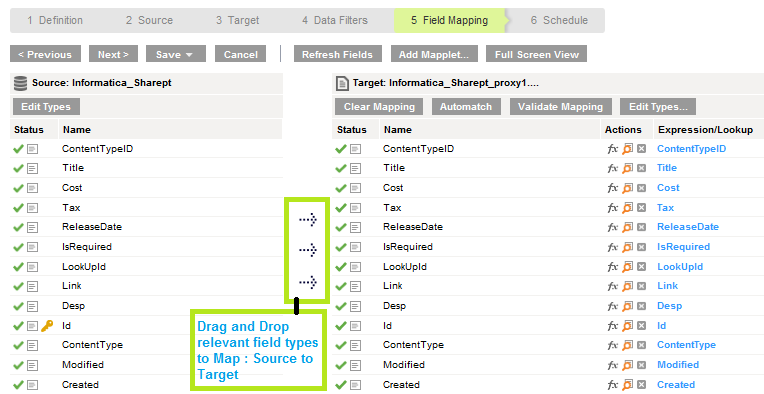
To perform field mapping, drag and drop the required fields from source to target.
Note: When you select a Flat file as target connection, the Body/BodyLength fields need to be unmapped.
- - When you select Source connection as Salesforce/any database and Target connection as SharePoint, in the field mapping: Edit Body function and then add DEC_BASE64 expression to map the body. You need to ensure that “BodyLength” is mapped.
- - When you select Source connection as SharePoint and Target connection as Salesforce/any database, in the field mapping: Edit Body function and then add ENC_BASE64 expression to map the body. You need to ensure that “BodyLength” is mapped.
- - To add or edit expression in Field Mapping, click fx.
13. Click Next.
The Schedule tab appears.
14. In Schedule tab, you can schedule the task as per the requirement and save.
15. If you do not want schedule the task, click Save and Run the task.
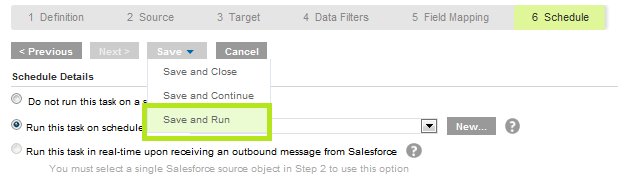
After you Save and Run the task, you will be redirected to monitor log page. In monitor log page, you can monitor the status of Data Synchronization tasks.