1. Click Task Wizards in the Informatica Cloud home page.
2. Select Data Synchronization from the menu.
The Data Synchronization Tasks tab appears.
3. Click New to create a Data Synchronization task. The Definition tab appears.
4. Specify the task name, description, and select the task operation Insert. Click Next. The Source tab appears. To delete a feed or comment from Chatter select delete operation.
5. Select the source connection, source type, and source object.
The source object should contain the following fields when you post feeds or comments to Chatter or delete feeds or comments from Chatter:
- User Feed
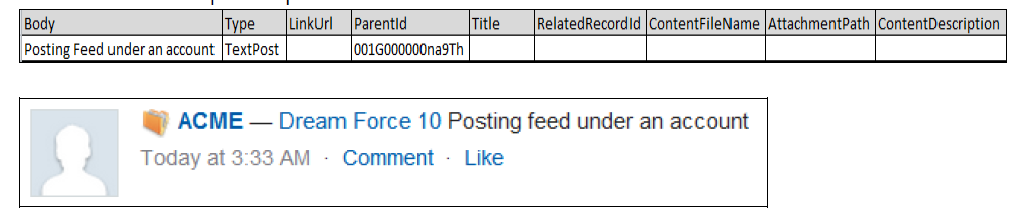
- Account Feed
- To post an account feed, you must specify the Parent Id.
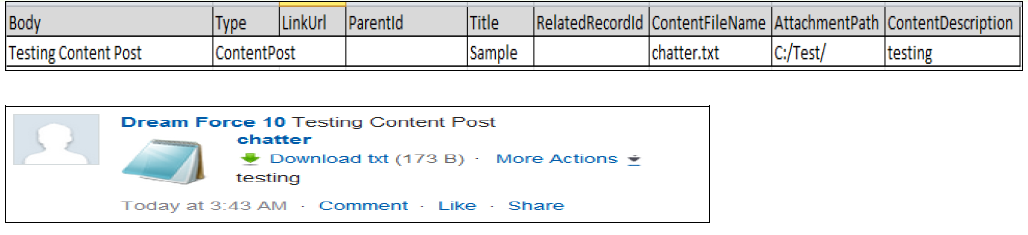
- Content Post
- Specify the type as ContentPost to attach a file to the feed.
- Search Tag Feed
- To add a search tag in a feed, you must append # to the keyword. The following image shows details of search tag feed:
- Delete Feed
- To delete a feed, select FeedItem object as a target in Informatica cloud. To delete a feed comment select FeedComment object as a target in Informatica cloud. You must specify the FeedID to delete feeds and commentID to delete feed comments from Chatter.
Specify the type as TextPost and mention the content of the post in the body.


6. Select the target connection, target type, and target object for the task. To post feeds to Chatter, select FeedItem object. To post feed comments to Chatter, select FeedComment object. Click Next.
7. To assign filters to a DSS task, see Data Filters. To select all rows, click Data Filters, and then click Next.
In the data filters tab, you can use the following filter fields:
Column Name | Description |
|---|---|
ParentId | ID of the object type to which the FeedItem is related. For example, set this field to a UserId to post to someone’s profile feed, or an AccountId to post to a specific account. |
Body | The message that appears in the feed. If you want to post a feed with the search keyword. In the feed make use of the # character before the search keyword. For example, if your search keyword is ABC, specify ‘#ABC’. |
Type | You can select the following type of FeedItem:
|
LinkUrl | To post URL on a feed. |
RelatedRecordId | The ID of the ContentVersion object associated with a ContentPost. This field is null for all posts except ContentPost. |
Title | The title of the FeedItem. |
AttachmentPath | The location of the file to be attached to the feed. For example, C:\Test\ (Mandatory field for Content Post) . |
ContentFileName | The name of the file that you want to attach. |
ContentDescription | The description of the file to be attached to the feed. |
RelatedRecordId | The ID of the ContentVersion object associated with a ContentPost. For example, set this field to an existing ContentVersion and post it to a feed as a FeedItem object of TypeContentPost. |
To post a feed comment, use the following filter fields:
Field Name | Description |
|---|---|
CommentFeedItemId | The Id of the feed to which the comment needs to be posted. |
CommentBody | The text to be posted as comment. |
CommentType | The comment Type should be TextComment or ContentComment. |
CommentContentPath | The full path of the file to be attached to the FeedComment. |
CommentContentDescription | The Description about the attachment. |
8. In the field mapping tab, map the source fields to the target fields.
9. Click Next. The Schedule tab appears.
10. In the Schedule tab, you can schedule the task for each requirement and save.
11. If you do not want to schedule the task, click Save and Run to run the task.