1. In Informatica Cloud home page, click Configure.
The drop-down menu appears.
2. Select Connections.
The Connections page appears.
3. Click New to create a connection.
The New Connection page appears.
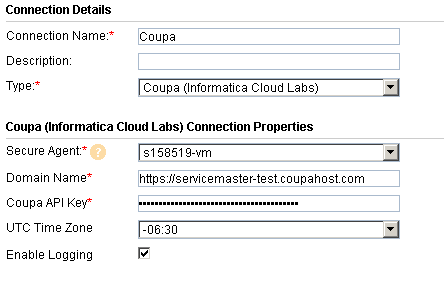
4. Specify the following details.
Connection Property | Description |
|---|---|
Connection Name | Name of the connection. |
Type | Type of connection. Select Coupa. |
Secure Agent | Secure Agent where you have installed the Coupa Connector. |
Domain Name | Coupa Domain Name. For example, https://servicemaster-test.coupahost.com. |
Coupa API Key | Coupa unique API key. |
UTC Time Zone | Coupa UTC Time Zone (This time zone is appended with the filter values for the fields of data type date and time.) |
Enable Logging | Check the box to enable logging. |
5. Click OK to save the connection.