1. In the Informatica Cloud home page, click Configure > Connections.
The Connections page appears.
2. Click New to create a connection.
The New Connection page appears.
The following image shows the New Connection page details:
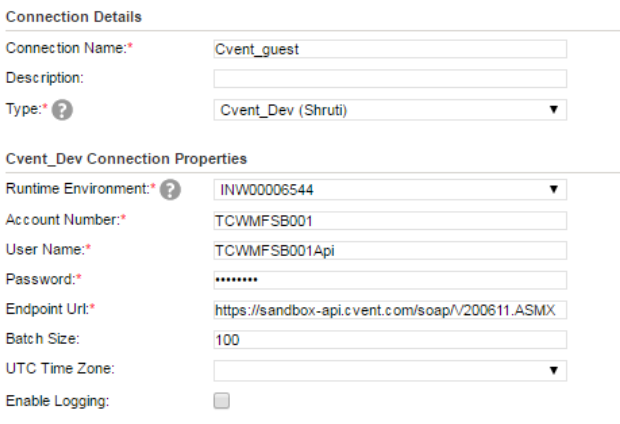
3. Configure the following connection properties on the New Connection page:
Connection Property | Description |
|---|---|
Connection Name | Name of the connection. |
Description | Provide a description. |
Type | Select the required Cvent connection. |
Runtime Environment | Select the required Secure Agent. |
Account Number | Specify the account number. |
User Name | User name of Cvent API. |
Password | Password for Cvent API. |
Endpoint Url | Enter the Endpoint URL to connect to the Cvent application. |
Batch Size | Number of records to be retrieved at a time. Default value is 100. |
UTC Time Zone | Cvent UTC Time Zone. Appends the time zone with the filter values for the fields of date and time data types. |
Enable Logging | Check the box to enable logging if required. |
Note: The connection is validated by invoking login method of Cvent API.
4. Click OK to save the connection.
Note: You should test the connection before you save the connection details. You can click Test to verify if the connection is successful.