1. In the Informatica Cloud home page, click Configure > Connections.
The Connections page appears.
2. Click New to create a connection.
The New Connection page appears.
The following image shows the Connection page:
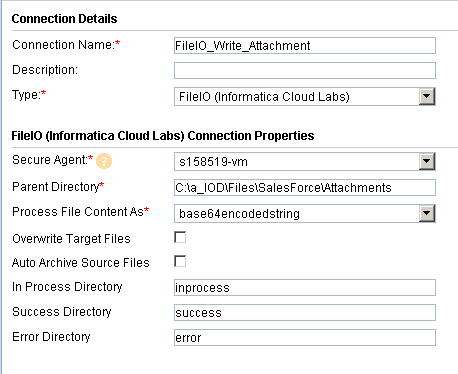
3. Specify the following details.
Connection Property | Description |
|---|---|
Connection Name | Enter a unique name for the connection. |
Description | Provide a relevant description for the connection. |
Type | Select FileIo from the list. |
Secure Agent | Select the appropriate secure agent from the list. |
Parent Directory | Enter the parent directory path. The parent directory is the folder that contains the files to perform read and write operations. The parent directory must contain an .infaccess empty file. Create a folder within the parent directory with any name other than inprocess, success, and error. For example, you can create a read, write, or test folder. The empty file will be listed as objects when you select this connection as source or target in the task. |
Process File Content As | Select the required option from the list of available options to process the file content. The following file processing options are available:
|
Overwrite Target Files | Check the box to enable overwrite target files. Otherwise the file containing same names will be created in the incrementing naming order using a counter. For example, when you do not enable overwrite target file option, the existing file ABCD will not be overwritten. Instead a new file ABCD(1) will be created. |
Auto Archive Source Files | Check the box to enable automatic archiving of source files. This option allows you to move the files from source directory after the file is processed. |
In Process Directory | Mention the directory path to be used for file processing. By default, parent directory is considered. |
Success Directory | Mention the directory path where the files will be moved after processing. By default, parent directory is considered. Mention the success directory path only when Auto Archive Source Files option is enabled. |
Error Directory | Mention the error directory path. When they are issues/errors in file processing. Such files are moved to error directory. |
4. Click OK to save the connection.
Note: You should test the connection before you save the connection details. You can click Test to verify if the connection is successful.