NetSuite V2 Targets in Mappings
In a mapping, you can configure a Target transformation to represent a single NetSuite target.
Select a single object as the target type. NetSuite v2 Connector does not support the use of multiple objects and parameter objects. You can add parent and child objects as targets. NetSuite V2 Connector does not support the use of sibling objects.
The following table describes the NetSuite target properties that you can configure in a Target transformation:
Property | Description |
|---|
Connection | Select the name of the target connection. |
Target Type | Select Single Object. |
Object | Specify the target object. |
Operation | Select a target operation. |
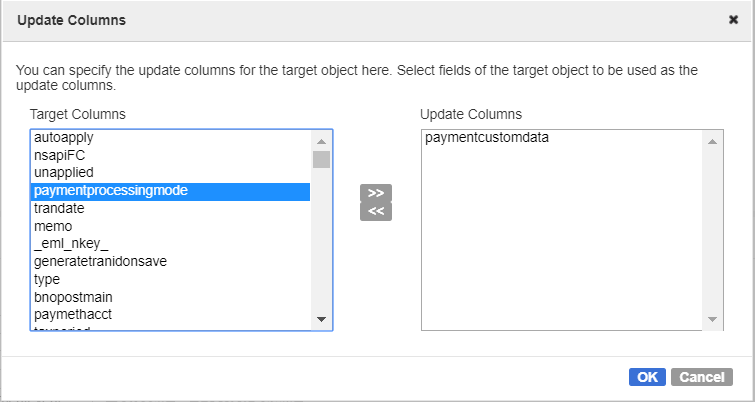
Update columns | Select the fields of the target object to be used as the update columns. The option is applicable for update, upsert, and delete operations. The UI option will not show up for insert operations. |
The following table describes the NetSuite target advanced properties that you can configure in a Target transformation:
Advanced Property | Description |
|---|
Batch Size | Number of rows that the Secure Agent writes in a batch to the target. When batch size is 0, the Secure Agent writes data to the target one row at a time. When batch size is greater than 0, the Secure Agent writes data to the target in batches of the specified size. |
Maximum number of concurrent threads | Number of concurrent threads. To run a Data Synchronization task that uses concurrent threads instead of sequential threads, specify the number of concurrent threads that you want to use. To optimize performance results with concurrent threads, the administrator might need to adjust the heap size. For example, a heap size of 512 MB for 10 threads might optimize performance results. The default value is 4. |
Success File Directory | Not supported |
Error File Directory | Not supported |
Forward Rejected Rows | Determines whether the transformation passes rejected rows to the next transformation or drops rejected rows. By default, the Secure Agent forwards rejected rows to the next transformation. |
Configuring NetSuite V2 Child Objects
To write data to a NetSuite V2 child object, you must select the target type as Single Object and then select the child object from the list.
1. In the mapping, click the Target transformation, and then click the Target tab.
2. Select the NetSuite V2 connection that you want to use.
3. Select the Target Type as Single Object.
4. Click Select.
The Select Target Object page appears.
5. Enter a search phrase and click Search to search for the child object.
You can use double quotes to search for objects whose names start with the search phrase. For instance, if you enter the search phrase as "employee", the Secure Agent lists all objects whose names start with the term employee.
You can differentiate between parent and child objects based on the naming convention that the objects use. Child objects use the following naming convention: <parentobjectname>_child_<childobjectname>
For instance, the customerpayment_child_paymentevent object selected in the following image is a child object and the customerpayment object listed in the previous row is a parent object.
6. Select the child object from the list and click OK.
7. Select an operation that you want to use.
8. If you select update, upsert, or delete operation, you must specify the update columns for the target object. Click Add to add the update columns.
The Update Columns window appears.
9. Select the target columns that you want to add as update columns and click OK.
10. Configure the other transformations in the mapping.


