1. In the Informatica Cloud home page, click Confiure > Connections.
The Connections page appears.
2. Click New to create a connection.
The New Connection page appears.
3. Specify the following details:
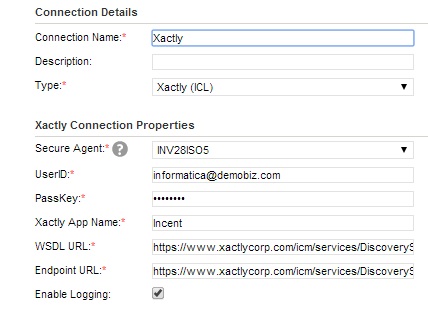
Connection Property | Description |
|---|---|
Connection Name | Enter a unique name for the connection. |
Description | Provide a relevant description for the connection. |
Type | Type of connection. Select Xactly from the list. |
Secure Agent | Select the appropriate secure agent from the list. |
UserID | Enter the UserID for accessing the Xactly portal. |
PassKey | Enter the password for accessing the Xactly portal. |
Xactly App Name | Specify the application name to sign in to Xactly. |
WSDL URL | Provide a WSDL URL. |
Endpoint URL | Enter the endpoint URL where you want to send the request. |
Enable Logging | Select to log SOAP request and response in the session log file. |
4. Click OK to save the connection.
Note: Informatica Cloud recommends that you test the connection before saving the connection details. You can click Test to verify if the connection is successful.