1. Click Task Wizard in Informatica Cloud home page.
2. Select Data Synchronization from the menu.
The Data Synchronization page appears.
3. Click New to create a Data Synchronization task.
The Definition tab appears. The following image shows the Definition page:
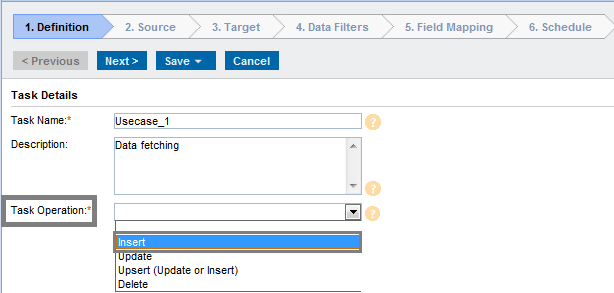
4. Specify the Task Name for the task.
5. Provide a Description for the task.
6. Select Insert in Task Operation.
7. Click Next.
The Source tab appears. The following image shows the Source page:
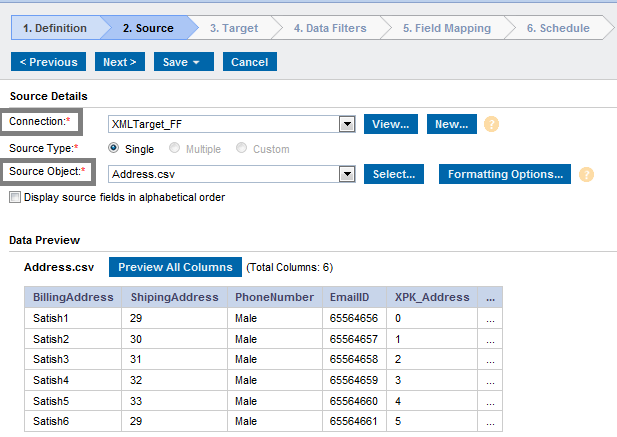
8. Select the Connection for the task.
9. Select the Source Type for the task.
10. Select the Source Object for the task.
11. Click Next.
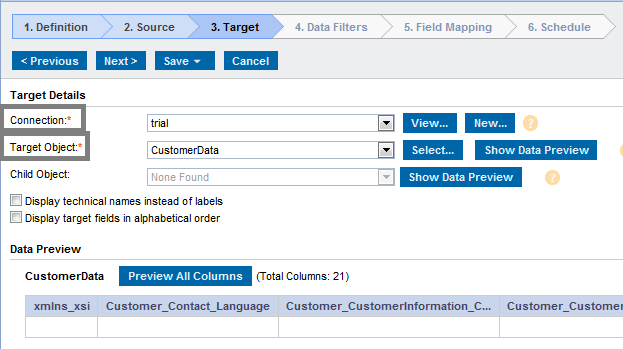
The Target tab appears.
12. Select the target Connection and Target Object required for the task.
The following image shows the Target page:
13. Click Next.
The Data Filter tab appears in which by default Process all rows is chosen.
14. Click Next.
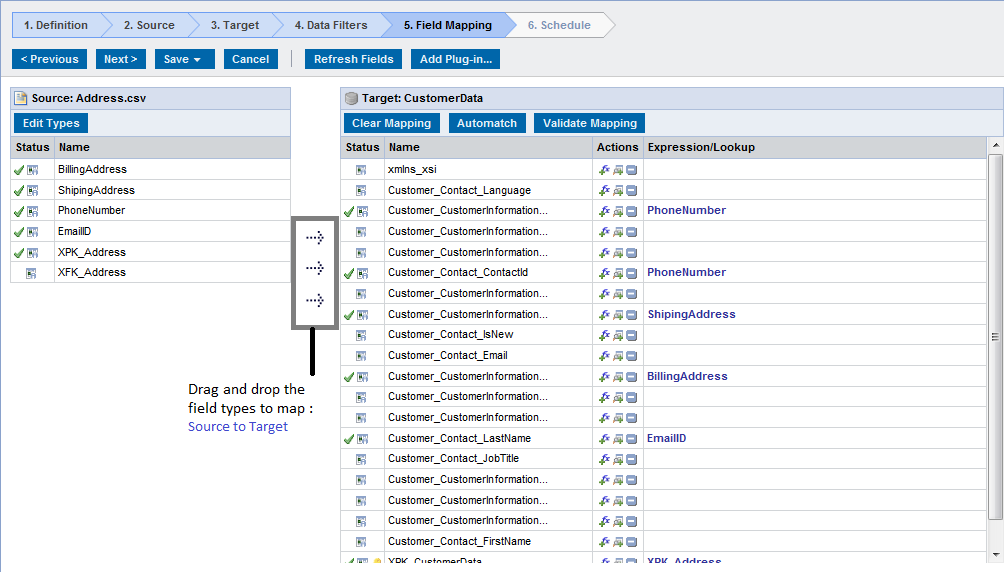
The Field Mapping tab appears, where you can map source fields to target fields accordingly. The following image shows the Field Mapping page:
15. Click Next.
The Schedule tab appears where you can schedule the task according to the requirement and save.
16. Click Save and Run the task if you do not want to schedule the task.
The following image shows the Schedule Details page: 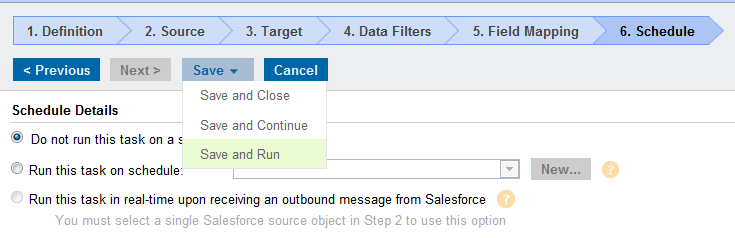 After you run the task, the Monitor Log page appears where you can monitor the status of Data Synchronization tasks.
After you run the task, the Monitor Log page appears where you can monitor the status of Data Synchronization tasks.