Defining the Target Object
When you add a target to a mapping, you can use an existing target or create a target at run time.
You specify the target object properties on the Target tab.
If you use an existing target object, select the target from a list of target objects and link the target to the upstream transformation. If the target table changes, you must update the Target transformation to match it. If the physical target and the Target transformation do not match, the mapping fails.
If you use an existing target object for a flat file target, the existing target is overwritten when you run the Mapping Configuration task.
Guidelines to Create Target at Run Time
If the mapping includes a flat file target or relational database target, you can create the target at run time. If you create the target, note the following guidelines:
- •You cannot link the target fields to the upstream transformation.
- •The first time the mapping runs, the Mapping Configuration task creates the physical target based on the fields from the upstream transformation.
- •In subsequent runs, the Mapping Configuration task replaces the data in the physical target that was created in the initial run. Consequently, if you change the mapping after the initial run, in subsequent runs the target will not reflect changes to the number of target fields and its metadata. To see the changes, you can either delete the existing target before you run the mapping or change the name of the target.
- •To reduce the number of unused fields in the target, configure field rules in the Target transformation or in the upstream transformations.
- •Informatica Cloud automatically discovers the target object metadata for data type, precision, and scale, based on the data source,. You can edit this metadata, if needed, in the Source transformation.
- •You can choose to truncate target
- •When you create a flat file target at run time, you can choose to append time stamp information to the file name to show when the file is created.
Target Example
You might work with a flat file target in a mapping that reads Salesforce user account data but excludes user preference data. A Source transformation reads data from the Account object and the related User object.
The Target transformation uses a flat file connection that writes to the following directory: C:\UserAccountData. The default All Fields rule includes all incoming fields. You create a Named Field rule to exclude the unnecessary user preferences fields.
When you select Create New Target at Runtime, you enter the following name for the target file: SF_UserAccount_%d%m%y.csv.
The Mapping Configuration task creates a target file named SF_UserAccount_291116.csv in the C:\UserAccountData directory when the task runs on November 29, 2016. The target file includes all fields from the Salesforce Account and User objects except for the user preferences fields specified in the Named Fields rule.
Flat File Target Time Stamps
When you create a flat file target at run time, you can append time stamp information to the file name to show when the file is created.
When you specify the file name for the target file, you include special characters based on Linux STRFTIME function formats that the Mapping Configuration task uses to include the time stamp information in the file name. The time stamp is based on the organization's time zone.
The following table describes some common STRFTIME function formats that you might use:
Special Character | Description |
|---|
%d | Day as a two-decimal number, with a range of 01-31. |
%m | Month as a two-decimal number, with a range of 01-12. |
%y | Year as a two-decimal number without the century, with range of 00-99. |
%Y | Year including the century, for example 2015. |
%T | Time in 24-hour notation, equivalent to %H:%:M:%S. |
%H | Hour in 24-hour clock notation, with a range of 00-24. |
%l | Hour in 12-hour clock notation, with a range of 01-12. |
%M | Minute as a decimal, with a range of 00-59. |
%S | Second as a decimal, with a range of 00-60. |
%p | Either AM or PM. |
Specifying Target Properties
You can use an existing target or create a target to hold the results of a mapping. If you choose to create the target, the agent creates the target when you run the task.
To specify the target properties, follow these steps:
1. Select the Target transformation in the mapping.
2. On the Incoming Fields tab, configure field rules to specify the fields to include in the target.
3. To specify the target, click the Target tab.
The option to select multiple objects is available for NetSuite connections only.
4. Select the target connection.
5. For the target type, choose Single Object or Parameter.
6. Specify the target object or parameter.
- - To create a target flat file at run time, enter the name for the target file including the extension, for example, Accounts.csv.
Note: To create a relational target at run time, you must select the Insert operation.
- - If you want the file name to include a time stamp, click Handle Special Characters and add special characters to the file name. For example, add the special characters shown here to include all the time stamp information: Accounts_%d%m%y%T.csv.
7. For a flat file target, click Formatting Options if you want to configure the formatting options for the file, and click OK.
8. Click Select and choose a target object. You can select an existing target object or create a new target object at run time and specify the object name. 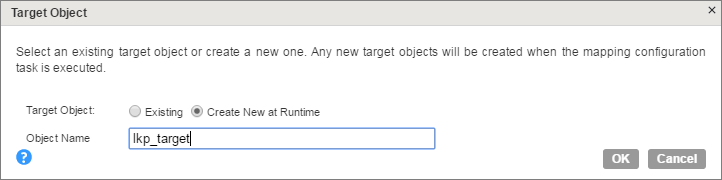
9. Specify Advanced properties for the target, if needed. The available properties are specific to the connector type. Refer to your Connector Guide for more information.