Web Services Transformation Example
The following example demonstrates how to use the Web Services transformation to interact with NetSuite to get product availability details.
You can review this example to learn how to configure a Web Services transformation to structure a SOAP request and response using the NetSuite operation, getItemAvailability. The web service client passes the item ID in the request. The web service then returns information on the latest item availability in a SOAP response.
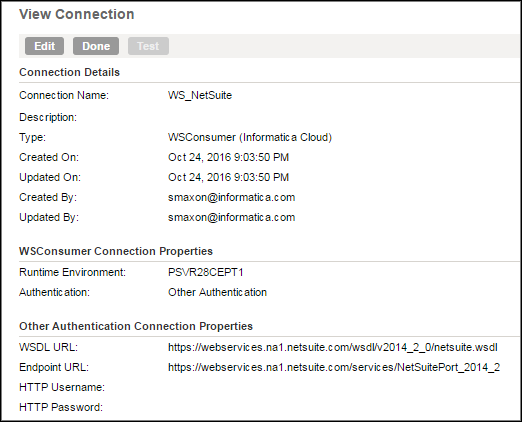
First, to connect to the web service, create a WSConsumer connection. You add a WSDL that describes the request and response web service messages and configures the necessary security. For this example, we use the following NetSuite connection:
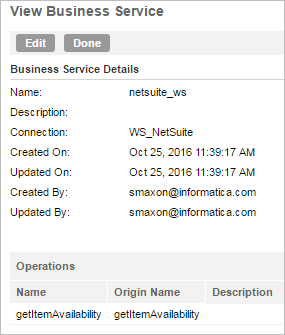
Second, define a business service using the connection. In this case, we use the connection to define a business service and access the getItemAvailability operation:
Third, create a mapping that uses the Web Service transformation. The example mapping includes the following configuration options:
- 1. The source is a simple .csv file that includes four fields with the login details and an item ID:
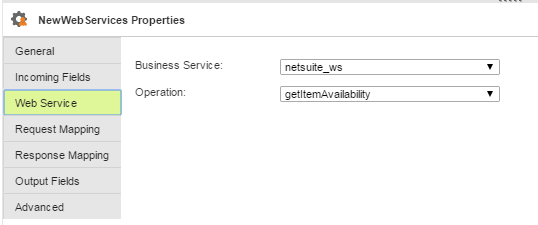
- 2. On the Web Service tab, select the business service and operation previously defined:
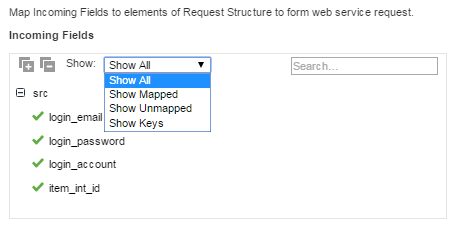
- 3. After you add a Web Services transformation, you can connect the source and see four incoming fields. You can filter your view of the incoming fields to show all fields, mapped fields, unmapped fields, or keys:
- 4. In the Request Mapping, the incoming fields are mapped to the SOAP message. The Envelope contains the credentials and the Body contains the item ID, as shown in the following image. You drag incoming fields onto items in the request structure to create the mapping:
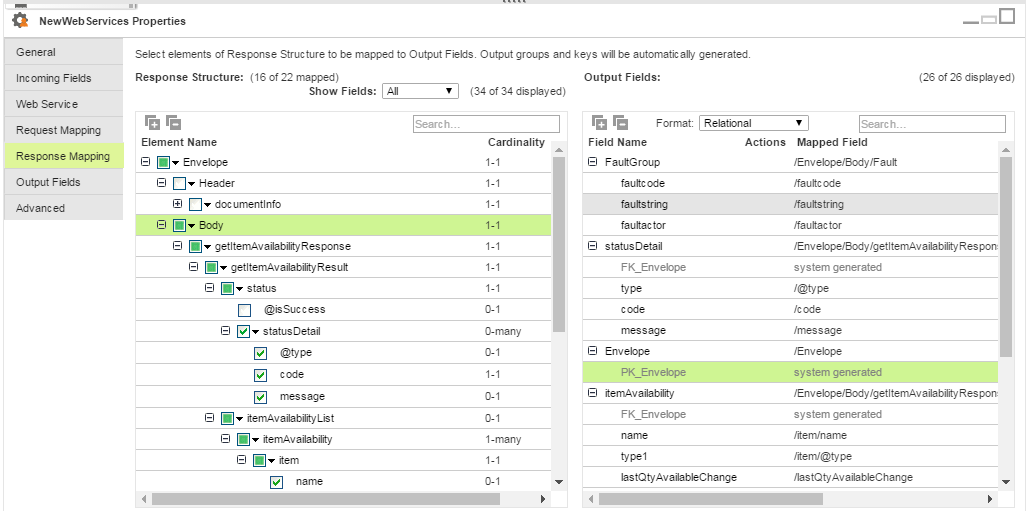
- 5. On the Response Mapping tab, you map the SOAP message to the output fields you want to use. You can choose Relational or Denormalized format for output fields. This example uses Relational format:
The system generates these output field groups automatically:
- - FaultGroup, if it is supported by the connection type you are using.
- - Envelope, which contains the documentinfo, if you map the header.
- - One group for each element you have mapped where the cardinality is greater than one.
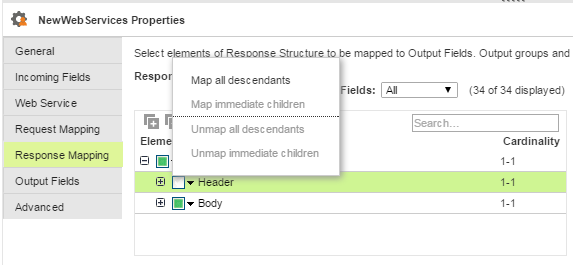
The example above has three groups. In the response structure, you can choose to map or unmap objects and fields by selecting a node in the hierarchy and choosing an option to map (or unmap), as shown in this image. Click the down arrow to display the mapping options for a specific node:
- 6. On the Output Fields tab, you can see each group. If needed, you can edit the type, precision, and scale of the fields:
- 7. The mapping includes three targets: one for the status, one for the availability, and one for the FaultGroup data:
When the mapping runs, it returns the item availability and status code. If it cannot successfully run, it creates a record in the default target that contains the fault information.
