Data Synchronization Task Example
You can create a Data Synchronization task to read data from multiple SAP objects and write the data to a flat file object.
You can read General Ledger Accounting line items from the BKPF and BSEG tables in SAP. BSEG is an SAP Cluster table that is used to store Accounting Document Segment information. BKPF is a Transparent SAP Table that is used to store Accounting Document Header information. In this example, you can join the BKPF and BSEG tables and map the source object to a flat file target object.
In this example to write the accounting document details to a flat file object, perform the following steps:
- 1. Define the Data Synchronization task.
- 2. To configure the SAP Table sources, select an SAP Table connection, and select the BKPF transparent table and the BSEG cluster table as the source objects. Create join conditions between the source BKPF table and the related BSEG table.
- 3. To configure a flat file target for the task, select a flat file connection and specify a flat file object.
- 4. Configure the field mappings to define the data that the Data Synchronization task writes to the target.
- 5. Save and run the Data Synchronization task.
Step 1: Define the Data Synchronization Task
1. Click Task Wizards > Data Synchronization.
The Data Synchronization Task Wizard appears.
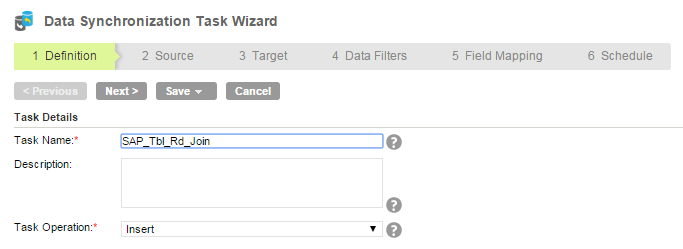
2. Enter a name for the Data Synchronization task.
3. Enter a description for the Data Synchronization task.
4. Select the insert task operation for the target.
The following image shows the Data Synchronization task definition page:
5. Click Next.
Step 2: Configure the SAP Table Source
1. Select an SAP Table connection.
2. Select Multipleas the source type.
3. Click Add to specify the SAP source object.
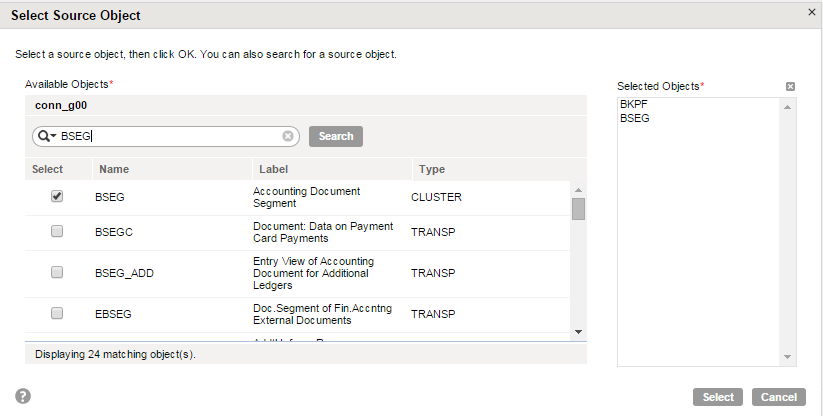
The Select Source Object dialog box appears. Select the BKPF transparent table.
4. Click Select.
5. Click Add to select the BSEG cluster table.
The following image shows the Select Source Object dialog box:
6. Create relationships between the SAP tables.
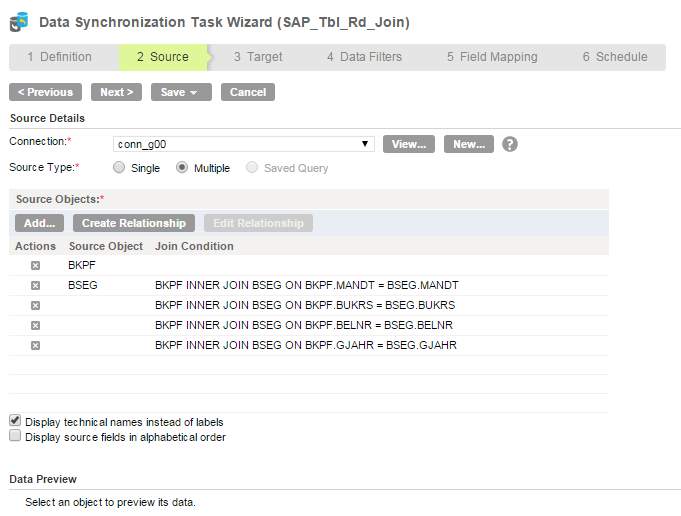
- a. Select the BKPF SAP object and click Create Relationshipto create the join conditions between the source BKPF table and the related BSEG table.
The Create Relationship dialog box appears.
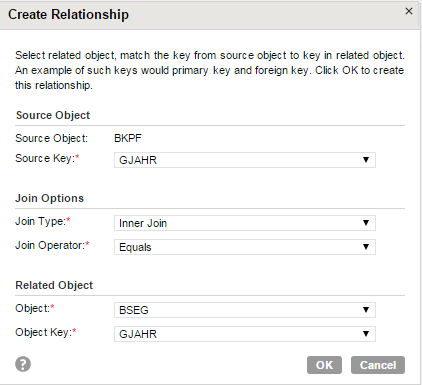
- b. Specify the key field in the source SAP object, the type of join, the join operator, the related SAP object, and the key field in the related object.
- c. Click OK to create the relationship.
- d. Repeat the previous steps to create multiple relationships.
The following image shows the Create Relationship dialog box:
7. Select a source object to preview the data. The Data Preview area displays the first 10 rows of the first five columns in the SAP object. You can also view the total number of columns in the object. To preview all source columns in a file, click Preview All Columns.
8. To display technical names instead of business names, select Display technical field names instead of labels.
9. To display source fields in alphabetic order, click Display source fields in alphabetical order.
By default, fields appear in the order returned by the source system.
The following image shows the join conditions for multiple SAP objects in the Data Synchronization task source details page:
10. Click Next.
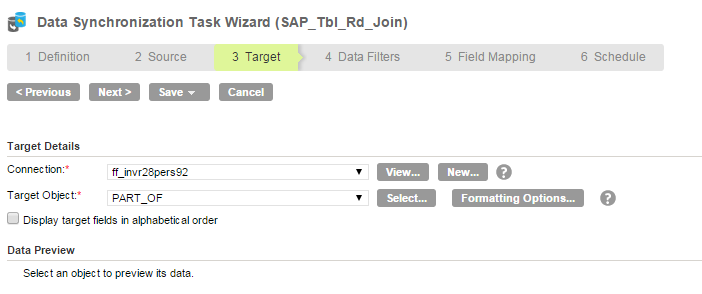
Step 3: Configure the Flat File Target
1. Select a flat file connection and select a flat file object.
2. Select a target flat file object and click OK.
The following image shows a flat file object in the Data Synchronization task target details page:
3. Click Next to specify any data filters or sort fields.
4. Click Next.
Step 4: Configure the Field Mapping
1. Map the source and target fields.
You can select all source objects or one of the source objects to map with the target fields.
2. Click Next to configure a schedule and advanced options.
3. Save and run the Data Synchronization task.
