Mapping with an SAP Table Source Example
You can create a Mapping Configuration to read data from a single SAP object and write the data to a target object.
You can read data from an SAP purchasing document header, the EKKO table, and write the purchasing details to any target.
In this example to read data the EKKO table and write the data to a flat file target object, perform the following steps:
- 1. Define the mapping.
- 2. To configure an SAP Table source, select an SAP Table connection and select the EKKO table.
- 3. To configure a flat file target, select a flat file connection, specify a flat file object, and map the source and target fields.
- 4. Save the mapping and create a Mapping Configuration task.
Step 1: Define the Mapping
1. To create a mapping, click Design > Mappings, and then click New Mapping.
The New Mapping dialog box appears.
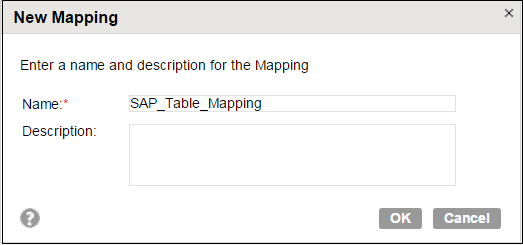
2. Enter a name and description for the mapping.
The following image shows the New Mapping dialog box:
3. Click OK.
Step 2: Configure the SAP Table Source
1. To configure an SAP source, on the Transformation palette, click Source.
2. In the Properties panel, on the General tab, enter a name and description.
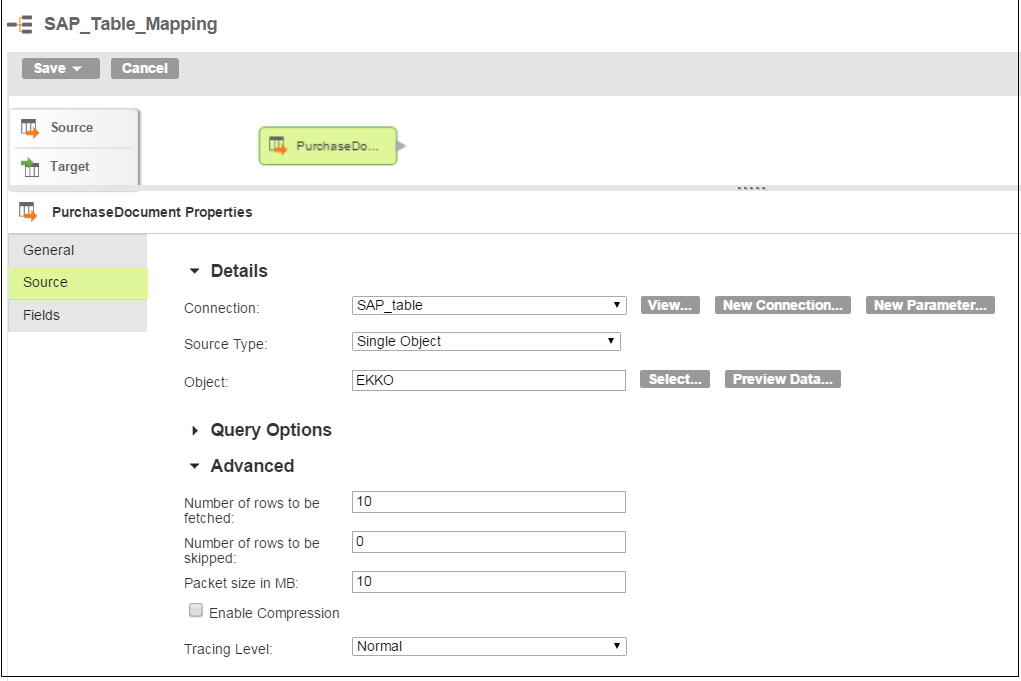
3. Click the Source tab to configure source details.
4. Specify an SAP Table connection as the source object connection.
5. Specify the source type as Single Object and click Select.
6. In the Select Source Objectdialog box, select the EKKO table,
7. Click Query Options in the Source tab to specify any filter and sort options for the SAP Table object.
8. Click Advanced to specify the advanced source properties.
The following image shows the source details page:
Step 3: Configure the Flat File Target
1. To add a flat file Target transformation, on the Transformation palette, click Target.
2. On the General tab, enter a name and description.
3. Draw a link to connect the Source transformation to the Target transformation.
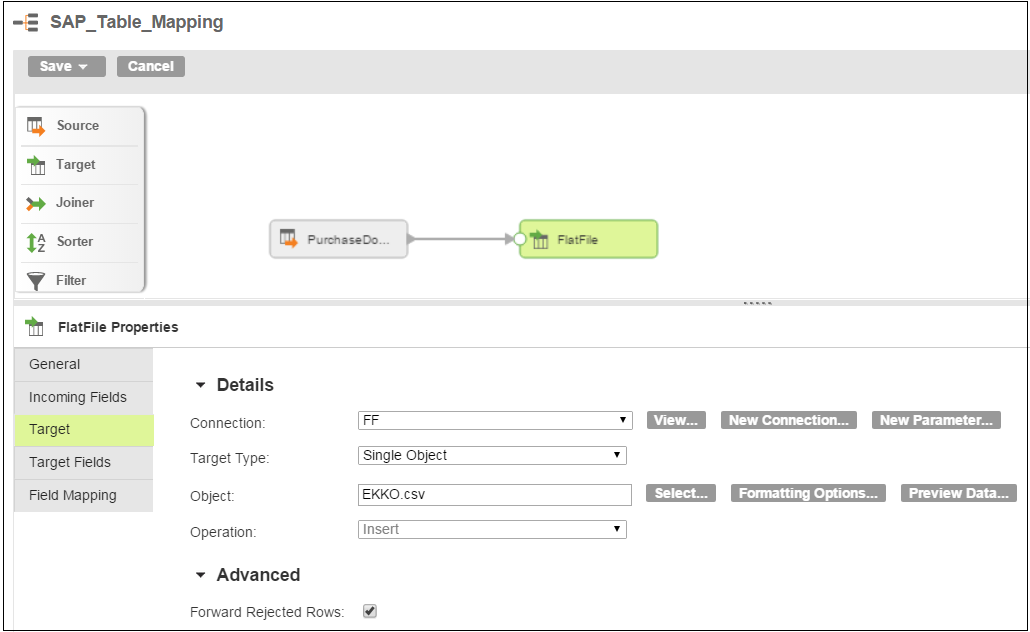
4. Click the Target tab to configure the flat file target details.
5. Specify a flat file connection as the target connection.
6. Select the target type as Single Object and click Select.
7. Specify a flat file object.
The following image shows the target details:
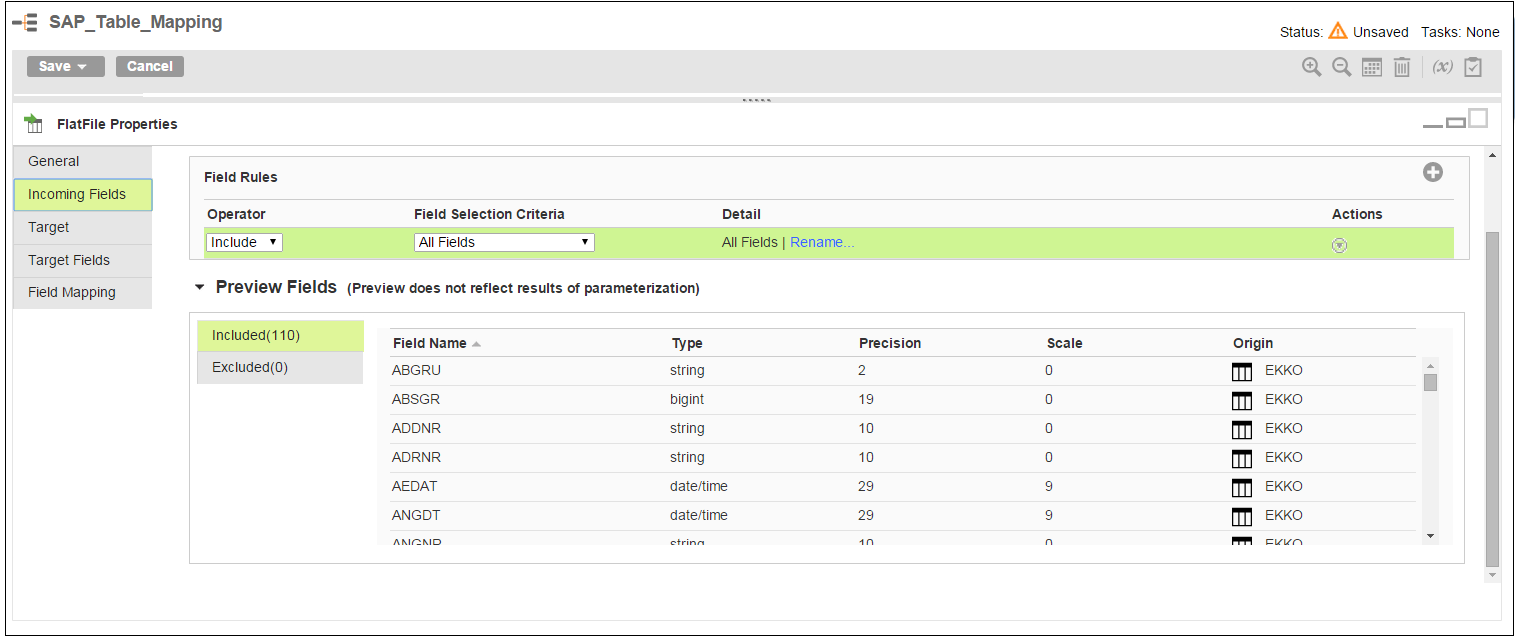
8. To preview fields, click Incoming Fields.
The following image shows the incoming field details:
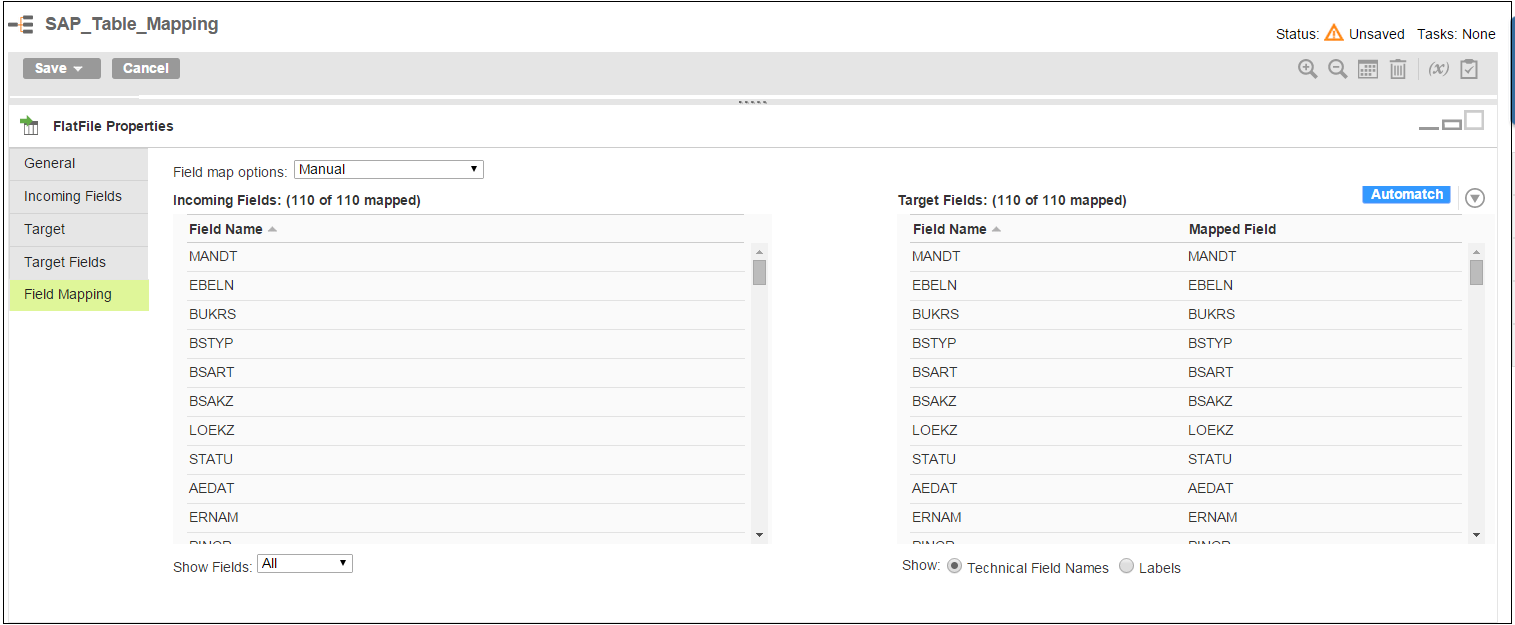
9. Click Field Mapping and map the fields that you want to write to the target.
The following image shows the field mapping details:
Step 4: Save the Mapping and Create a Mapping Configuration Task
1. Click Save > Save and New Configuration Task.
The New Mapping Configuration Task page appears.
2. Enter a name and description for the task.
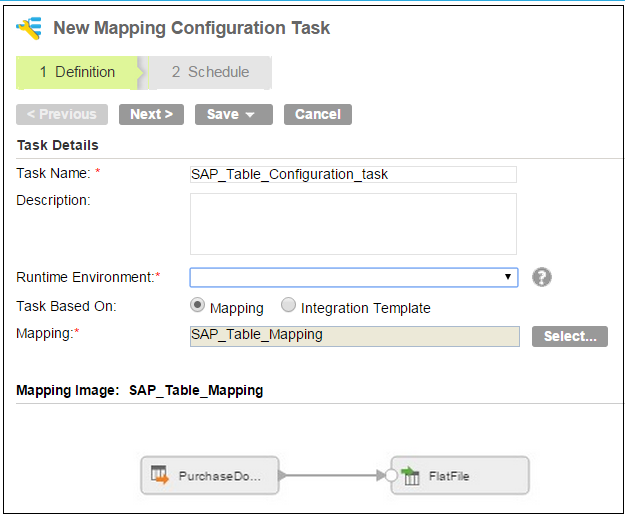
3. Select the runtime environment that contains the Secure Agent you want to use to access SAP tables.
The following image shows the Mapping Configuration task details:
4. Click Nextto configure the schedule and advanced options.
5. Save and run the Mapping Configuration task.
