1Create a Business 360 connection.
2Create a connection to the analytical application.
3Create a mapping.
4Add a Source transformation, and specify a name and description in the general properties.
5On the Source tab, perform the following steps:
- aIn the Connection field, select the Business 360 connection.
- bIn the Source Type field, select Single Object.
- cIn the Object field, select the source object from which you want to read data.
- dTo view the list of supported business applications, on the left pane, select Home.
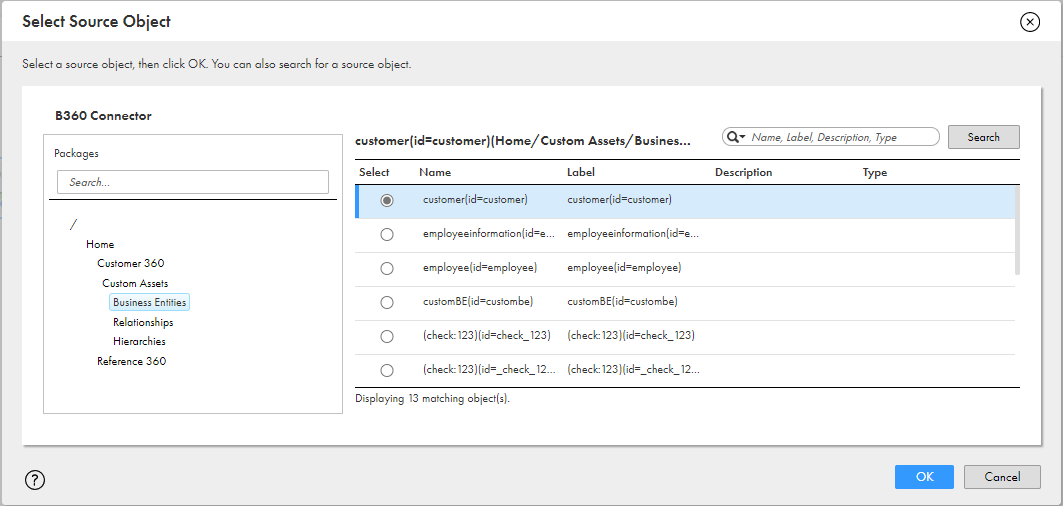
- eTo view the list of available assets, select the asset type under an application. For example, if you select Customer 360 and Business Entities on the left pane, you can view the list of available business entities on the right pane from which you can select the required source object.
- fTo view the list of custom assets, on the left pane, expand Custom Assets, and select an asset type .
The following image shows the source assets:

The custom assets are grouped based on the asset type.
The list of custom assets appears on the right pane. For example, if you choose Business Entities, the list of custom business entities appears on the right pane.
Note: If you change the name of the business entity or delete it in the Business 360 Console, the existing mappings with references to that business entity will fail when you run the mapping.
6On the Field Mapping tab, select elements in the response structure that you want to map to the output fields.
The following image shows the response structure on the left pane in a hierarchical format and the output fields on the right pane in a relational format:

Additionally, you can map the following system fields if you want to export their values using an export job:
- - BusinessId. Contains the unique ID of an existing master record.
- - sourceLastUpdate. Contains the last updated date of a field, or field group.
- - matchMergeState. Contains the match and merge status of a source record.
- - populationName. Contains the name of populations. You can specify multiple populations for the records that you ingress. For more information about population, see Default Population in the Business 360 Console help.
- - validationStaus. Contains the validation statuses of records, such as passed, failed, and pending.
Note: In the response structure, the sourceLastUpdate field appears only for field groups with the Source Last Updated Date field enabled in Business 360 Console.
Note: Before you include the system fields on the Field Mapping tab, review and upgrade the business applications to the latest version in Business 360 Console. For more information about reviewing and upgrading the business applications in Business 360 Console, see Upgrade in the Business 360 Console help.
7Add a Target transformation, and specify the name and description in the general properties.
8Select the connection to the analytical application.
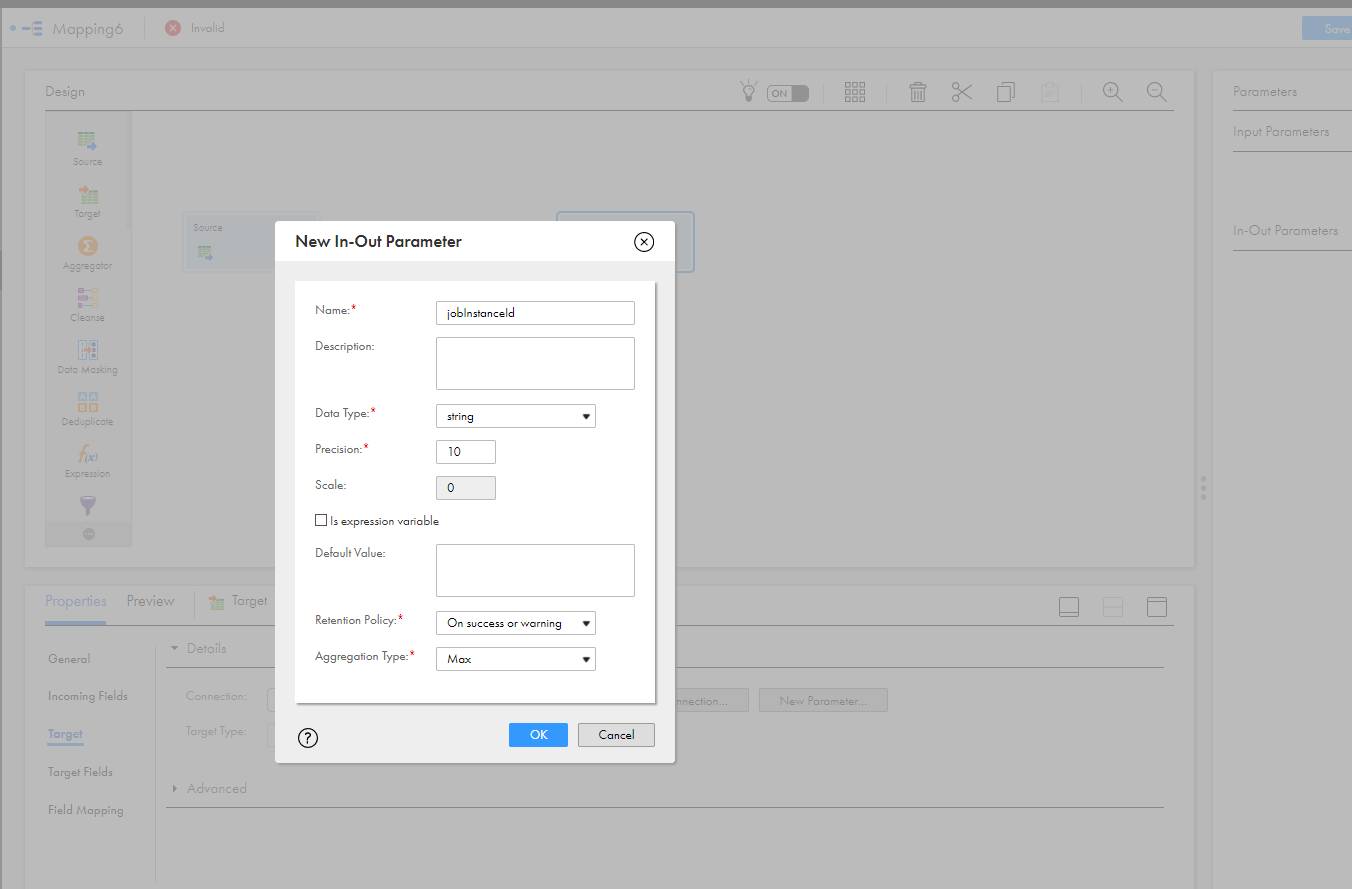
9Go to Target > Parameters Panel > Input-Output Parameters, and create a parameter. Specify jobInstanceId as the name of the parameter.
The input-output parameter is internally mapped to the job instance ID. When you run an ingress or export job, Cloud Application Integration process passes the job instance ID to the input-output parameter in Cloud Data Integration. Based on the defined taskflows, the job is executed. If you do not define the input-output parameter for the Target transformation in Cloud Data Integration, your job fails.
The following image shows the input-output parameter dialog box:

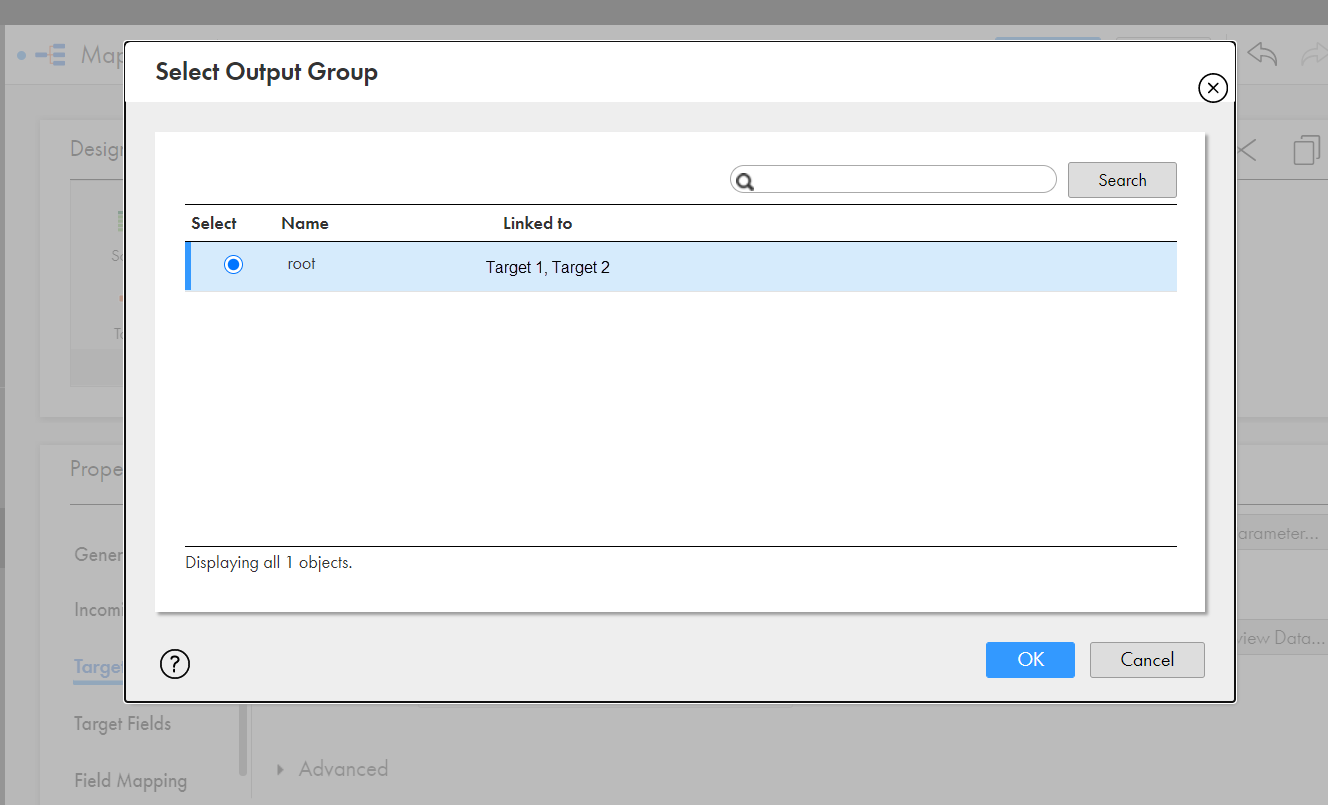
10Draw links to connect the Source transformation to the Target transformation.
The following image shows the Select Output Group dialog box where you select the output group to write data to the target:

Note: You cannot modify the targets from the mapped output groups. As a workaround, delink the source from the target, and relink.
11Save the mapping.