Amazon Redshift
Amazon Redshift is an Internet hosting service and data warehouse product. Amazon Redshift is part of Amazon Web Services, the cloud-computing platform offered by Amazon.
Objects Extracted
Permissions to Configure the Resource
If you create a new user, ensure that you configure read permission on the Amazon Redshift data source for the user account.
Prerequisites
- Obtain JDBC driver file
Verify that you are using the correct version of the Amazon Redshift JDBC driver:
- - For Enterprise Data Catalog versions 10.4.1.3 and later, use version 2.0 of the Amazon Redshift JDBC driver.
- - For Enterprise Data Catalog versions prior to 10.4.1.3, use version 1.0 of the Amazon Redshift JDBC driver.
- - For Enterprise Data Catalog version 10.5.0.2 or later, use version 4.2 of the Amazon Redshift JDBC driver.
Copy the files to the RedShiftScanner directory in the <INFA_HOME>/services/CatalogService/ScannerJars/externalDependencies directory. You need not recycle the Catalog Service.
Note: Verify that ANTLR version 4.8.1 is included in the driver JAR file.
Alternatively, you can perform the following steps to complete the prerequisites:
- 1. Verify that you are using the correct version of the Amazon Redshift JDBC driver:
- ▪ For Enterprise Data Catalog versions 10.4.1.3 and later, use version 2.0 of the Amazon Redshift JDBC driver.
- ▪ For Enterprise Data Catalog versions prior to 10.4.1.3, use version 1.0 of the Amazon Redshift JDBC driver.
Note: Verify that ANTLR version 4.8.1 is included in the driver JAR file.
- 2. Include the <Informatica Installation directory>/externaljdbcjars/<redshift-jdbc version>.jar file in the redshiftJars.zip file.
- 3. Copy the redshiftJars.zip file to the <INFA_HOME>/services/CatalogService/ScannerBinaries directory.
- 4. Open the <INFA_HOME>/services/CatalogService/ScannerBinaries/CustomDeployer/scannerDeployer.xml file and add the following lines in the file:
<ExecutionContextProperty isLocationProperty="true" dependencyToUnpack="redshiftJars.zip"> <PropertyName>RedShiftScanner_DriverLocation</PropertyName> <PropertyValue>scanner_miti/RedShift/Drivers</PropertyValue> </ExecutionContextProperty
- 5. Save the scannerDeployer.xml file.
- 6. If you want to enable profiling for the Amazon Redshift resource, copy the downloaded Amazon Redshift JDBC driver file to the <INFA_HOME>/connectors/thirdparty/informatica.amazonredshift/common/ directory.
- 7. Recycle the Catalog Service.
- Update the JDBC driver file
- To replace the obsolete JDBC driver jar with latest driver jar, perform the following steps:
- 1. Open the <INFA_HOME>/services/CatalogService/ScannerBinaries/ directory.
- 2. Replace the redshift-jdbc41 driver jar with redshift-jdbc42 in the redshiftJars.zip file.
- 3. Recycle the Catalog Service.
Basic Information
The General tab includes the following basic information about the resource:
Information | Description |
|---|
Name | The name of the resource. |
Description | The description of the resource. |
Resource type | The type of the resource. |
Execute On | You can choose to execute on the default catalog server or offline. |
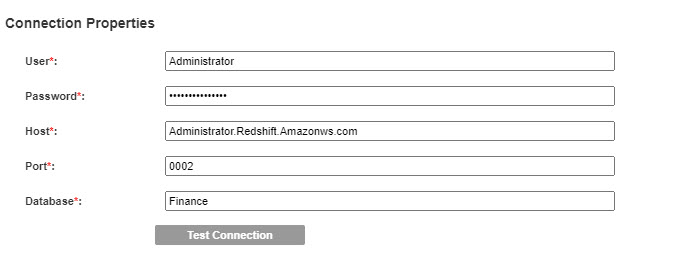
Resource Connection Properties
The General tab includes the following properties:
Property | Description |
|---|
User | The user name used to access the database. |
Password | The password associated with the user name. |
Host | Host name or IP address of Amazon Redshift service. |
Port | Amazon Redshift server port number. Default is 5439. |
Database | The name of the database instance. |
The following image shows sample connection properties on the General tab:
The Metadata Load Settings tab includes the following properties:
Property | Description |
|---|
Enable Source Metadata | Extracts metadata from the data source. |
Import System Objects | Select this option to specify that the system objects must be imported. |
Schema | Click Select... to specify the Amazon Redshift schemas that you want to import. You can use one of the following options from the Select Schema dialog box to import the schemas: - - Select from List: Use this option to select the required schemas from a list of available schemas.
- - Select using regex: Provide an SQL regular expression to select schemas that match the expression.
|
S3 Bucket Name | Provide a valid Amazon S3 bucket name for the Amazon Redshift data source. You must provide this value if you want to enable profiling for Amazon Redshift. If you do not want to enable profiling, retain the default value. Bucket name should use the access key or private key specified in DIS connection. |
Case Sensitive | Specifies that the resource is configured for case insensitivity. Select one of the following values: - - True. Select this check box to specify that the resource is configured as case sensitive.
- - False. Clear this check box to specify that the resource is configured as case insensitive.
The default value is False. |
Memory | The memory required to run the scanner job. Select one of the following values based on the data set size imported: Note: For more information about the memory values, see the Tuning Enterprise Data Catalog Performance article on How To-Library Articles tab in the Informatica Doc Portal |
Custom Options | JVM parameters that you can set to configure the scanner container. Use the following arguments to configure the parameters: |
Track Data Source Changes | View metadata source change notifications in Enterprise Data Catalog. |
Agent Options | Specify the Enterprise Data Catalog Agent options to run the scanner job. |
You can enable data discovery for an Amazon Redshift resource. For more information, see the
Enable Data Discovery topic.
Note: Effective in version 10.5.2.1, you can run a profile and perform data domain discovery on external tables for an Amazon Redshift resource.
You can enable composite data domain discovery for an Amazon Redshift resource. For more information, see the
Composite Data Domain Discovery topic.