Informatica MDM Product 360 Cloud Edition - Configuration and Customization Guide
Transfering configurations and customizings to other environments
Configuration files with environment specific configurations
Preface
This documentation describes how you can configure and customize the Informatica MDM Product 360 modules P360Server, P360SupplierPortal and P360WebSearch hosted in an AWS environment.
The following other Informatica MDM Product 360 modules cannot be configured or customized in an AWS environment:
P360AuditTrail
P360ProcessEngine
For the modelling of P360BPM workflows refer to the Informatica BPM documentation.
First of all, the modules are configured and customized in the DEV (non-production) environment. When the configurations and customizations are completed and tested these can be transferred from the DEV environment to the QA environment. In a last step the configurations and customizations can be transferred from the QA environment to the PROD environment.
The Informatica MDM Product 360 modules cannot be configured or customized directly in a QA or PROD environment. Configurations and customizations have to be always made in the DEV environment and then transferred from DEV environment to QA environment and finally from QA environment to PROD environment.
Configuration and customization
The following sections describe how to configure and customize the customizable Informatica MDM Product 360 modules. Furthermore, it describes how to deploy workflows, upload import files and how to download export files and clients.
Prerequisites
The Informatica MDM Product 360 modules can be accessed via Amazon S3 interface. To work with the interface you need:
a tool for accessing Amazon S3 resources like S3 browser
the secrets for your Amazon S3 provided by Informatica
For deploying workflows you need to have the Informatica BPM ActiveVOS Designer installed locally.
S3 object hierarchy
On the first level of the object hierarchy there are 3 objects defined reflecting the three different environments that are provisioned for each P360 Hosted Cloud Edition: dev, qa and prod. On the 2nd level there are objects (folders) for the different modules.
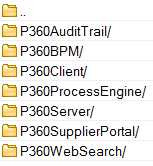
Access to all S3 objects is controlled by Informatica. You will probably only have access to the objects below dev.
Downloading clients
The Informatica MDM Product 360 desktop client, the repository editor and a installer for configuring the Media Manager Process Engine can be found in the dev/P360Client folder.
Navigate to the S3 folder dev/P360Client.
Download the desired client zip-file to a local folder.
Extract the file into your client folder.
The Informatica MDM Product 360 desktop client is preconfigured. You need not /should not change the ServerConnection.xml file.
Changing product paradigm to 3PPD
Informatica MDM Product 360 Cloud Edition is provisioned with 2PPD by default. To change to 3PPD perform the following steps:
Informatica MDM Product 360 Server
Copy all files from the S3 bucket folder dev/P360Server/accelerators/productparadigm/3ppd/plugins into dev/P360Sserver/customization/plugins
Copy all files from the S3 bucket folder dev/P360Server/accelerators/productparadigm/3ppd/features into dev/P360Sserver/customization/features
Perform the steps listed underneath Deploy configurations and customizations.
Informatica MDM Product 360 Desktop Client
Download the file dev/P360Client/P360DesktopClient_variant_delta.zip to your local machine.
Extract the file into your client folder.
Reverting product paradigm to 2PPD
Changing back from 3PPD to 2PPD will be possible only if no assignments to variants are existing so far.
Informatica MDM Product 360 Server
Copy all files from the S3 bucket folder dev/P360Server/accelerators/productparadigm/2ppd/plugins into dev/P360Sserver/customization/plugins
Copy all files from the S3 bucket folder dev/P360Server/accelerators/productparadigm/2ppd/features into dev/P360Sserver/customization/features
Perform the steps listed underneath Deploying configurations and customizations.
Informatica MDM Product 360 Desktop Client
Remove your workspace.
Remove your client folder
Extract P360DesktopClient.zip again.
Reverting product paradigm to 1PPD
Changing back from 3PPD or 2PPD to 1PPD will be possible only if no assignments to variants are existing so far.
1PPD config files are only available with and after the 8.1.1.02 release of Product 360
Informatica MDM Product 360 Server
Copy all files from the S3 bucket folder dev/P360Server/accelerators/productparadigm/1ppd/plugins into dev/P360Sserver/customization/plugins
Copy all files from the S3 bucket folder dev/P360Server/accelerators/productparadigm/1ppd/features into dev/P360Sserver/customization/features
Perform the steps listed underneath Deploying configurations and customizations.
Informatica MDM Product 360 Desktop Client
Remove your workspace.
Remove your client folder
Extract P360DesktopClient.zip again.
Configuring modules
Navigate to the customization folder of the module you want to configure.
→ Here you will find the same structure as for the on premise installations. For example the configuration/HPM folder, containing all configuration files for P360Server.Edit the appropriate configuration file accordingly. How to change a file depends on your tool in use. Usually you have to download the file, edit it, and upload it again.
Perform the steps listed underneath Deploying configurations and customizations.
Only those files are visible, that you are allowed to change.
Adjusting the repository
Install the repository editor on your local machine
Navigate to the S3 folder dev/P360Client
Download the file P360RepoEdit.zip to a local folder.
Unzip the file.
Download the repository files to your local machine
Navigate to the S3 folder dev/P360Server/customization/configuration/HPM
Download the files Repository.repository, Repository_en.properties and other respective i18n files e.g. Repository_de.properties
Adjust the repository to your needs
Edit the repository using the repository editor.
Adjust the i18n properties files accordingly.
Upload the repository files
Upload your adjusted Repository.repository, Repository_en.properties and other respective i18n files to the S3 folder dev/P360Server/customization/configuration/HPM
Perform the steps listed underneath Deploying configurations and customizations.
Installing customizations
Installing plugins and features
Installing additional plugins is only allowed for the module P360Server.
Develop your plugin in a local environment.
Your plugins have to follow the naming schema com.informatica.p360.custom.*.jar
If you need to add properties, you have to add these to the file plugin_customization.ini. You are not allowed to add properties to any other properties files!
Upload your plugin to the S3 folder dev/P360Server/customization/plugins
If you need to deploy features upload your feature folder to dev/P360Server/customization/features
Your features have have to follow the naming schema com.informatica.p360.custom.*
Perform the steps listed underneath Deploying configurations and customizations.
Removing plugins and features
Copy the plugin/feature you want to remove and rename it to <plugin_name>.del and <feature_name>.del, respectively, e.g. com.informatica.p360.custom.myPlugin.1.0.0.0.jar.del.
Upload <plugin_name>.del / <feature_name>.del to the S3 folder dev/P360Server/customization/plugins and dev/P360Server/customization/features, respectively.
Perform the steps listed underneath Deploying configurations and customizations.
Installing webdefinitions
Develop your webdefinition in a local environment.
Upload your webdefinition to the S3 folder dev/P360Server/customization/configuration/HPM/webdefinitions
Perform the steps listed underneath Deploying configurations and customizations .
Removing webdefinitions
Copy the webdefinition you want to remove and rename it to <webdefinition_name>.del.
Upload <webdefinition_name>.del to the S3 folder dev/P360Server/customization/configuration/HPM/webdefinitions
Perform the steps listed underneath Deploy configurations and customizations .
Deploying webdefinitions without restarting P360Server
In P360 v10 or higher, there is a possibility to deploy webdefinitions without the restart of P360Server. Perform the following steps
In a local environment create an empty text file called do_deploy_web.txt
Upload this file to the customization folder of the module you have configured/installed the webdefinitions
Deploying configurations or customizations
After changing a configuration file or uploading a plugin, feature, webdefinition or search index you have to apply the changes to the system (VMs) in the cloud. Thereto, perform the following steps:
In a local environment create an empty text file called do_deploy.txt
Upload this file to the customization folder of the module you have configured/installed the plugin,feature, webdefinition or search index.
A cron job is running on each instance of the cloud system waiting for such a do_deploy.txt file. Having found such a file the following procedure runs:
The server of the module is stopped.
A full backup of the last configuration is done. The backup is stored in the backups folder of the respective module.
All files are transferred from the S3 folder into the corresponding application folders.
The actual configurations are copied to the backups/current folder.
The server of the module is started.
All steps of the deployment are written into a log file called deployCustomization.log and can be found in the customization folder of the respective module.
Starting and stopping modules
You are also able to stop or start a module without deploying configuartions or customizations. Thereto, perform the following steps:
In a local environment create an empty text file called:
- stop_server.txt to stop a server
- start_server.txt to start a server
- restart_server.txt to stop and then immediately start the server againUpload this file to the toplevel folder of the module you want to start/stop; e.g. to restart P360Server upload the file start_server.txt to the S3 folder dev/P360Server.
Deploying workflows
Design your workflow in your local P360 BPM ActiveVOS Designer.
Set the "Address" parameter of the workflow's Partner Link responsible for the communication from P360BPM to P360Server to "https://p360server.p360.internal:1543".
Login to P360 BPM ActiveVOS console.
Enter your credentials.
Click on the Deploy button in the upper right corner.
→ A dialog pops up.Select the bpr file containing your workflow project from your local machine and click Deploy.
→ The Deployment log dialog will pop up.Close the dialog.
From the upper menu bar select Catalog.
From the menu on the left, select Catalog > Contributions.
→ You should see your workflow project in the list of Contributions.
Uploading import files
You can use the hotfolder mechanism of Informatica MDM Product 360 by uploading files to the S3 folder dev/P360Server/hotfolder.
There have to be respective hotfolder configurations available on the Informatica MDM Product 360 server matching your files to upload on the Informatica MDM Product 360 server.
Downloading export files
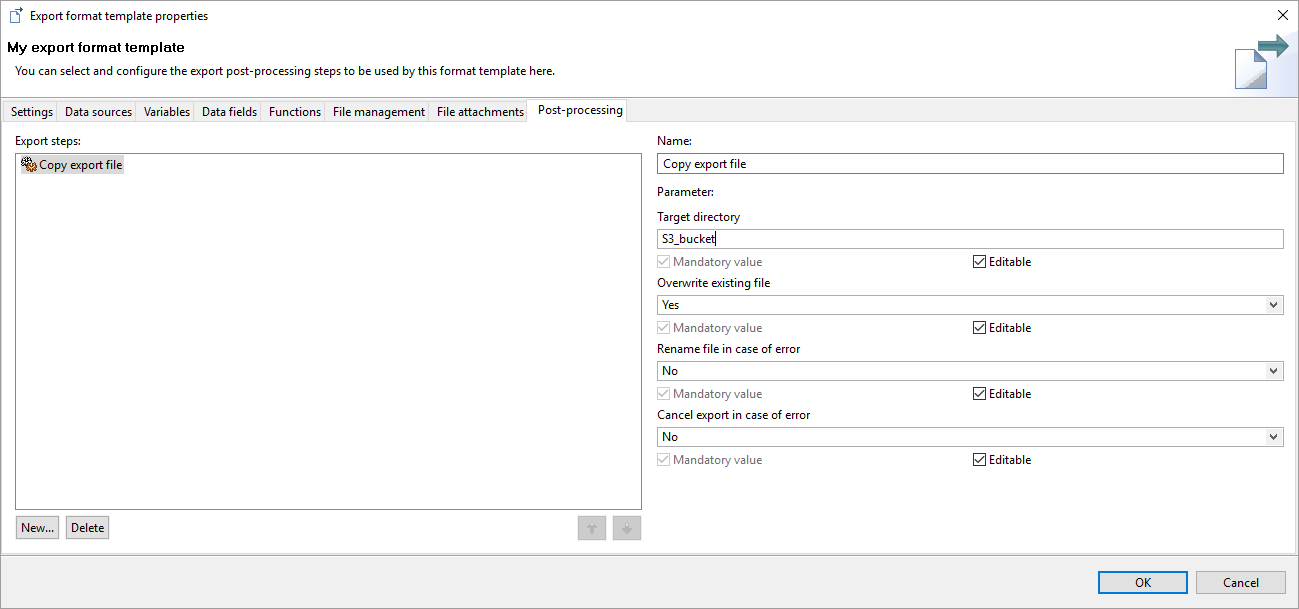
In order to access export files, you will have to define a final post export step for each export template that copies the export files from the Informatica MDM Product 360 server to the S3 folder dev/P360Server/export
Select export step: "Copy export file"

Enter the target directory: "S3_bucket"
If you want to provide your export files in a specific folder please do the following steps:
1.) Create a folder in the export folder of the S3 bucket: i.e.: "MyWebShop"
2.) Enter the target directory: "S3_bucket/MyWebShop"
3.) Do this for all your environments
After running an export the exported files will be available in the S3 folder dev/P360Server/export
You can reuse the export format templates on QA and PROD environment without any changes. The files will be copied to qa/P360Server/export or prod/P360Server/export, respectivelly.
Verification
You can verify whether the modules started successfully by viewing the respective log files. To access the logs files go to the logs folder of your module. You'll find the same files as for the on premise edition.
The log files are synchronized every 5 minutes.
Transfering configurations and customizings to other environments
After you have configured, customized and tested the P360 modules in your DEV environment the configurations and customizations can be transferred to the QA environment. In a final step the configurations and customizations can be then transferred from the QA environment to the PROD environment.
The actual environment transfer will be performed by Informatica. You can request the respective environment transfer at Informatica Global Customer Support. Informatica will then schedule the requested environment transfer accordingly.
The environment transfer will transfer all configurations and customizations made to the source environment from the source environment to the target environment such as:
module configurations for the Informatica MDM Product 360 modules P360Server, P360SupplierPortal and P360WebSearch
repository changes
custom plugins and features
web definitions
search indexes
The environment transfer will not transfer:
export format templates, dashboards and flexible UI templates uploaded via P360 Desktop Client to the environment
data created in P360 such as import mappings, hotfolder configurations, users, user groups, ACLs, business entities, etc.
workflows
DQ configurations and rules
dictionaries
etc.
Prerequisites
Source and target environment must be on the same Informatica MDM Product 360 version. If this is not the case, please request for an appropriate environment update before requesting an environment transfer.
In addition, the customizations to be transferred must have been successfully deployed (see Deploying configurations and customizations), .i.e. they are located in the backups/current S3 bucket folders of the source environment. Customizations located just in the customization S3 bucket folders of the source environment will not be transferred to the target environment.
The customizations should be tested before transferring them.
Requesting for an environment transfer
Open a ticket at Informatica Global Customer Support.
In the ticket, specify the type of transfer desired:
- from DEV environment to QA environment or
- from QA environment to PROD environmentSpecify a time-slot you would like the transfer to be done.
The time-slot should span 4 hours at least.
Please check regularly the status of the ticket you have opend in step 1. You will be informed whether the transfer will be performed in the time-slot you have proposed and when the transfer has been completed.
Configuration files with environment specific configurations
There are several configuration files which might need to be configured differently on the QA or the PROD environment than on the DEV environment. Such files are:
the files for configuring SAML
the files for configuring LDAP
the files for configuring e-mail settings for task notifications
the plugin_customization.ini
The configuration of these files on the target environment will be performed by Informatica. You can request the respective file configuration at Informatica Global Customer Support. Informatica will then perform the configuration accordingly.
Requesting for a specific SAML configuration
Open a ticket at Informatica Global Customer Support.
In the ticket, specify the environment for which you want the specific configuration.
Attach the configuration files SamlConfig.xml and idp-metadata.xml with the desired configurations to that ticket.
Specify a time-slot you would like the configuration to be done.
The time-slot should span 4 hours at least.
Please check regularly the status of the ticket you have opend in step 1. You will be informed whether the configuration will be performed in the time-slot you have proposed and when the configuration has been completed.
Requesting for a specific LDAP configuration
Open a ticket at Informatica Global Customer Support.
In the ticket, specify the environment for which you want the specific configuration.
Attach the configuration file LdapConfig.xml with the desired configuration to that ticket.
Specify a time-slot you would like the configuration to be done.
The time-slot should span 4 hours at least.
Please check regularly the status of the ticket you have opend in step 1. You will be informed whether the configuration will be performed in the time-slot you have proposed and when the configuration has been completed
Requesting for specific E-Mail settings for task notifications
Open a ticket at Informatica Global Customer Support.
In the ticket, specify the environment for which you want the specific settings.
Specify the values for the following settings:
Setting
Description
mail.host
The mail server's host name. This setting is mandatory.
mail.protocol
The protocol to be used. This setting is mandatory.
mail.port
The port to be used. This setting is optional. If not specified, then the protocol's standard port will be used.
mail.user
The user name for authentication. This setting is not required, if the server doesn't require authentication.
mail.password
The password for authentication. This setting is not required, if the server doesn't require authentication.
Specify a time-slot you would like the configuration to be done.
The time-slot should span 4 hours at least.
Please check regularly the status of the ticket you have opend in step 1. You will be informed whether the configuration will be performed in the time-slot you have proposed and when the configuration has been completed
Requesting for a specific settings in the plugin_customization.ini
Open a ticket at Informatica Global Customer Support.
In the ticket, specify the environment for which you want the specific settings.
Provide a list of those properties and values which should be different in the the plugin_customization.ini file of the QA or PROD environment. E.g. if you want to specify a different system name in your PROD environment, then you should specify a value for the property systemcom.heiler.ppm.communication.server/systemName
Specify a time-slot you would like the configuration to be done. The time-slot should span 4 hours at least.
Please check regularly the status of the ticket you have opend in step 1. You will be informed whether the configuration will be performed in the time-slot you have proposed and when the configuration has been completed