Configuration and Operation
Configuration of CLAIRE product classification service
A configuration file (config.ini) is provided. It's located in the CLAIRE accelerator package under server.ai folder. From this configuration file you are able to set parameters like authentication information, server paths and port number for the CLAIRE recommendation service under section 'DEFAULT'.
[DEFAULT]# Username and password for basic authentication for ai server. Please ensure that you configured Product360 CLAIRE accelerator accordingly. user = adminpassword = admin# Folders path where to store the data and modelsupload_folder = c:/informatica/ai/data/product_classificationmodel_path = c:/informatica/ai/model/product_classification# Python logging level. Possible values are: NOTSET, DEBUG, INFO, WARNING, ERROR, CRITICALlogging_level = DEBUG# Port number which the ai server usesport_number = 5000The parameters are mandatory and described here:
|
Parameter name |
Description |
Valid values |
Default |
|
user |
Username for basic authentication against the server |
<user_name> |
admin |
|
password |
Password for basic authentication against the server |
<user_password> |
admin |
|
upload_folder |
Path to the folder where data (.csv files) used for the training process will be saved |
any valid path to an existing folder |
c:/informatica/ai/data |
|
model_path |
Path to the folder where trained models used for the classification process will be stored |
any valid path to an existing folder |
c:/informatica/ai/model |
|
logging_level |
Python logging level |
CRITICAL, ERROR, WARNING, INFO, NOTSET |
DEBUG |
|
port_number |
Port number used by the ai server for communication |
<user_name> |
5000 |
Product360 configuration
In the configuration file claire.properties which is located in the conf directory of the Product360 Server the connection to the CLAIRE recommendations server should be configured:
################################################################################### ###### Claire server settings ###### ========================= ###### These settings contain all configurations needed for CLAIRE features ###### like auto-classification or translation. ###### #################################################################################################################################################################### General Claire server settings# # These settings describe the connection with the claire server#claire.server.url = http://localhost:5000claire.server.user = adminclaire.server.password = admin################################################################################# Classification# # Connection settings for claire server used for classification training and auto-classification# If these values are empty, the classification feature is considered to be inactive.#claire.classification.server.url = ${claire.server.url}claire.classification.server.user = ${claire.server.user}claire.classification.server.password = ${claire.server.password}AI Training for Auto Classification
The classification of product data is supervised learning, and the first step is to train a model based on existing data. To generate a model the CLAIRE accelerator leverages the power of Product 360´s export. To train a model, an export template has to be used in order to define the data for the training. It usually consists of the assignment to a structure group and one or more text values per product record and we ship examples to use. In addition, the export template must configure the post processing step "Classification training". This post processing step will send the created file to the CLAIRE recommendation service which will eventually train a model based on the data.

Supported content languages for model generation
Machine learning models allowing to support auto classification use cases can be sensitive to the exact language being used for their training. Every individual model needs to be trained on the same content language for all records used. We have extensively tested English and German during development and received very good results with it.
Besides these two here is the overall list of languages which we expect to work well with the accelerator:
Dutch
English
Finnish
French
German
Italian
Norwegian
Portuguese
Spanish
Swedish
Note that any content language not listed above is likely to not work with the accelerator. Also note that we have not done full test cycles with each of the languages listed above.
Standard export templates for AI training
With the CLAIRE accelerator package 3 pre-built export templates are provided under Resources/Export Templates and can be used as is or as template for your own training exports.
AI Classification Training Items.ext
AI Classification Training Products.ext
AI Classification Training Variants.ext
Training data
Please ensure that there is enough training data to create your machine learning model. A training based on a few thousand records only might not bring best results. Also, the labels should be meaningful and more than just a short description like "Blue T-Shirt". Generally, the prediction results are heavily dependent on the quantity and quality of the data you feed the training with.
Create your own export templates for AI classification training
It is possible to create custom export templates for AI training, e.g., if the data you want to train on is in custom fields. Some preconditions to keep in mind are:
It must be a csv file
The purpose of the export template must be "AI Training"
There must be a column having the header title "category". This column needs to contain the structure group assignment within the training structure.
All label fields (can be multiple) must have the column header "label"
The export template must have the post processing step "Classification training" attached
Create AI classification training export profiles
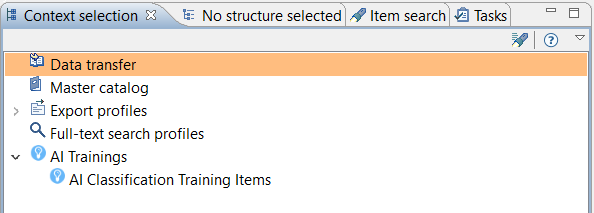
After creating an export template or importing the examples you can create AI classification trainings in the context selection view. Although the "AI Classification Trainings" are basically exports we separated them from the "regular" export profiles for a better user experience.
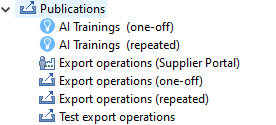
Also, in the process overview the AI trainings are separated from the "regular" export job executions for better process traceability
As we are using the export functionality of Product 360 you have the full power of configuring and scheduling export profiles to manage your AI trainings.
Please note that we currently don´t have any delta training. That means you have to retrain the model including exporting all of your data for every training.
Start AI classification training
To start an AI classification training, follow the steps bellow:
Right click on the export profile
Select Start training...
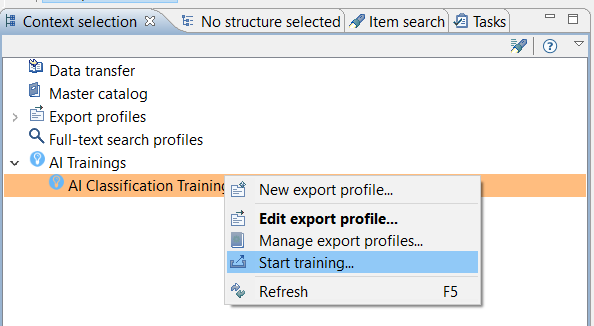
The export parameter configuration dialog will open up. At this stage you set the export parameters for executing the training.
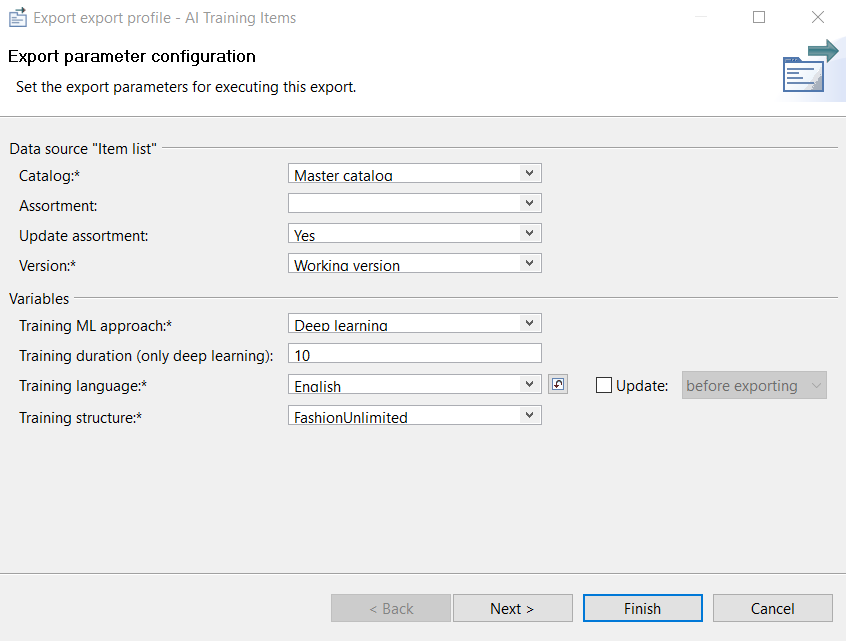
Click on Finish and wait until the training has been successfully completed.
Export variables
|
Variable name |
Description |
|
Training ML approach |
The ML approach used for the training process. Possible values are "Deep learning" or "Natural language processing". See section Natural language processing and deep learning explained for details. |
|
Training duration (only deep learning) |
The training duration (in hours) for deep learning that should be used to train the model. By default, it's set to 10 hours which should give reasonable results according to our tests. In case of natural language processing trainings this parameter won't be taken into consideration and the generation of a model will be a lot faster. |
|
Training language |
The language of text fields exported to train model. |
|
Training structure |
The structure the training should be based on. |
Display available models
There is an entry in the "Management" menu of the Desktop UI called "Show CLAIRE models" where you can display all trained classification models, the algorithm they are based on, and their accuracy based on macro F1 (see chapter Best Practices and Recommendations under section Model accuracy measurement for details).
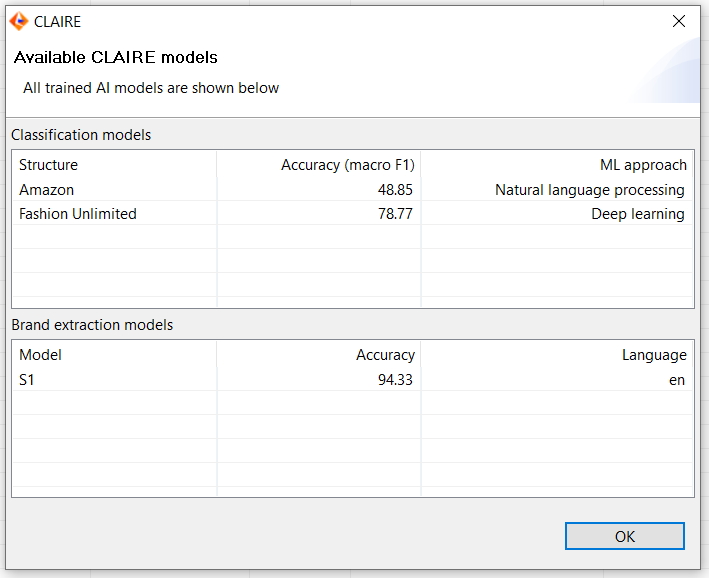
Natural language processing and deep learning explained
Deep learning:
Convolutional neural network, specifically tailored for text classification tasks. Such models are based on decades of research into both AI and biology and are the technology of choice for many modern applications, including autonomous driving and speech recognition. Such networks consist of a large number of computational units that vaguely resemble some properties of neurons in human brain. Ordinarily, anyone who trains such models needs to know a lot of low-level details, to get the best performance. For this accelerator however everything is handled automatically "under the hood" for your convenience. Tests have shown that we need around 10h of training to get a deep learning model of good accuracy.
Natural language processing:
This approach produces a model rooted in classic techniques such as bag-of-words and "traditional" classifiers, such as a support vector machine or a random forest. These models are simpler, compared to deep learning, but train much faster (in our tests it took less than an hour). It might seem that such techniques are getting completely obsoleted by deep learning, but the reality is that they're still useful, although usually tend to produce models of lower accuracy.
Batch Classification
In order to provide an auto classification in a batch process setup (for example after the import of data) the accelerator comes with the following capabilities:
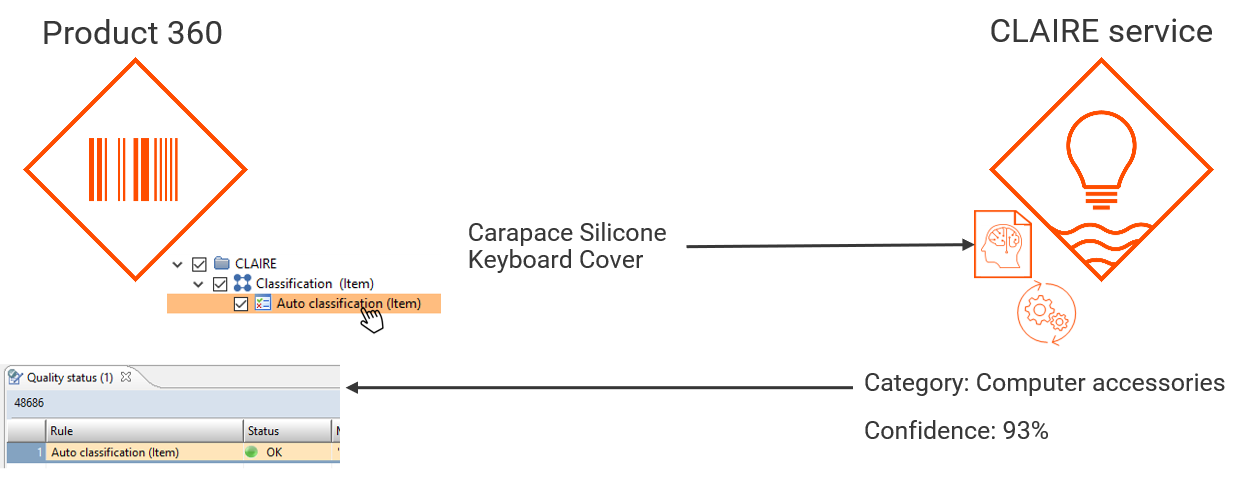
After installation of the accelerator there is a new data quality category named "CLAIRE" which looks like this:
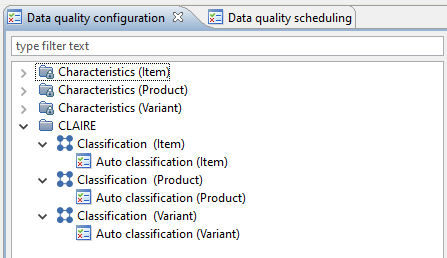
How to use the auto classification rule configuration
It is highly recommended to clone one of the existing auto classification rule configurations and then modify the input ports according to your needs. The "default" rule configuration is just a template and should not be used as is. Even if you delete this rule configuration, category or group, it will come up on next server start again.
After the data quality rule configuration has been cloned and the parameter adjusted, it can be used for triggers or direct execution just as every other data quality rule configuration. The parameters are mandatory and described here:
|
Parameter |
Description |
|
Source Field |
The value which will be taken as input for the prediction. |
|
Threshold |
Only recommendations with a confidence equal or above this value (in %) will be considered. |
|
Structure identifier |
Only recommendations for this structure will be considered. |
|
Mapping mode |
Set "MOVE" to replace existing mapping(s) or "ADD" to add a mapping. |
|
ML approach |
Set "DL" for using the deep learning ML approach or "NLP" for using natural language processing. See section Natural language processing and deep learning explained for details. |
|
Retain existing assignments |
If true, objects which already have an assignment to a group of the defined structure system will be skipped. |
It is possible to optionally configure a direct link within the data quality status detail tab of the Web UI which allows a user not only to spot a possible failed batch execution on item level but also to open a flex UI for fixing the classification problem right away. For that it is required to edit DQNavigationDefinition.xml which can be found in the webdefinitions folder of the Product 360 server. The following lines have to be added to it to link an erroneous status with a flex UI:
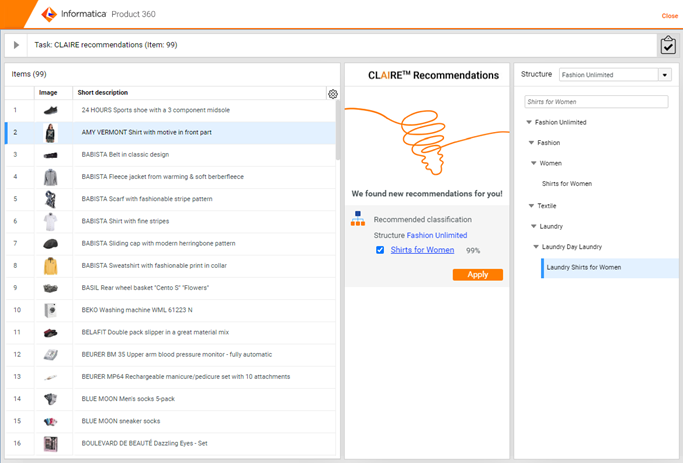
<!-- AutoClassification via CLAIRE --> <ruleNavigation ruleName="Auto Classification Item" flexTemplateName= "Classification with Claire" rootEntity="Article" />Note that the ruleName property needs to be set to the actual rule name and the flexTemplateName to the name of the flex UI template you want to associate with the rule itself (e.g., a version of the Claire UI as seen below)
For details on the expected performance of batch executions for auto classification please revise the chapter Best Practices and Recommendations under the section Recommendations for best results.
Configuration of CLAIRE Flex UI
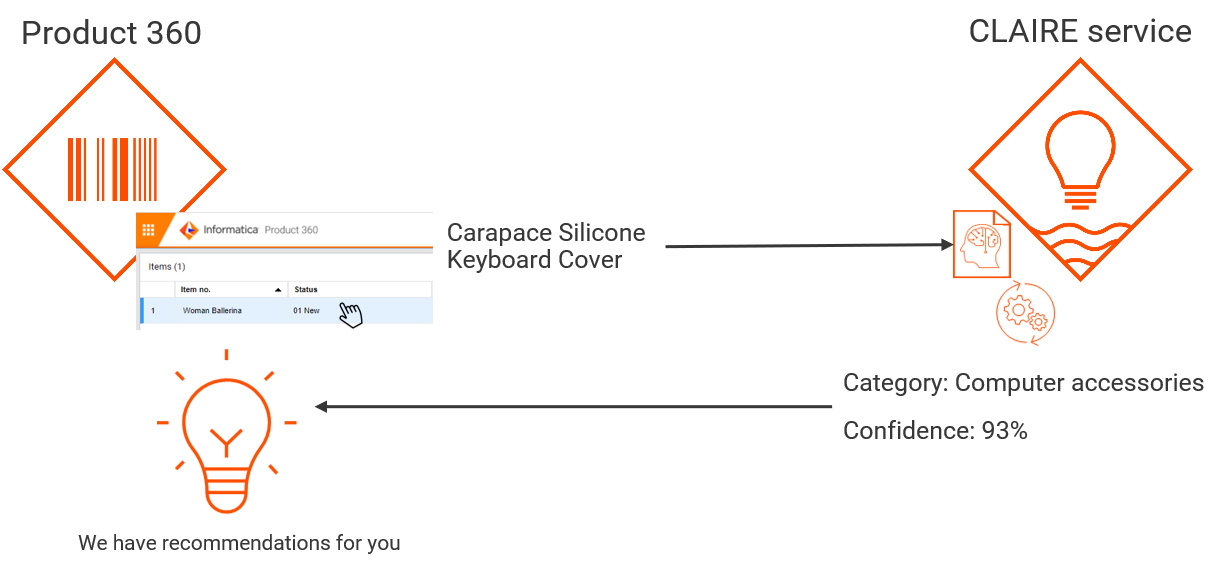
The CLAIRE panel can be integrated into any flex UI with a component for classification. Below you see an example of how to configure a CLAIRE panel into your flex UI definition.
<group identifier="Claire info"> <layoutData> <parameter key="colSpan" value="1" /> <parameter key="rowSpan" value="7" /> </layoutData> <component identifier="claire full" type="claire" i18NKey="Claire" > <layoutData> <parameter key="collapsible" value="true"/> <parameter key="collapsed" value="false"/> </layoutData> <parameter key="context" value="classification"/> <parameter key="sourceField" value="ArticleLang.DescriptionLong(en)"/> <parameter key="algorithm" value="deeplearning"/> <parameter key="threshold" value="80"/> <parameter key="selectionThreshold" value="80"/> </component></group>|
Parameter name |
Description |
Valid values |
Default |
|
context |
The context or use case the CLAIRE panel will be used for. Only recommendations for this use case will be shown. If empty or not set all recommendations will be shown. |
classification |
<empty> |
|
sourceField |
The source field which will be used for prediction. The field has to be fully qualified and formatted according to the REST API syntax. |
ArticleLang.DescriptionLong(de) |
ArticleLang.DescriptionLong(en) |
|
algorithm |
The algorithm used for classifications predictions which will be shown. If not configured all panels for classification will be shown. See section Natural language processing and deep learning explained for details. |
deeplearning, nlp |
<all> |
|
threshold |
All predictions of CLAIRE below or equal to this threshold will not be shown in the flex UI component |
0-100 |
80 |
|
selectionThreshold |
All predictions of CLAIRE above or equal to this threshold will be automatically selected in the CLAIRE flex UI component checkbox |
0-100 |
80 |
