Shuffle Address Example
You want to mask employee addresses and keep the ZIP code unmasked.
Create a shuffle rule and an advanced masking rule to shuffle addresses and leave the ZIP code unmasked. Shuffle masking masks the data in a column with data from the same column in another row of the table. Shuffle masking switches all the values for a column in a file or database table. You can restrict which values to shuffle based on a lookup condition or a constraint.
Create shuffle masking rules with a dictionary that contains three address columns and a ZIP code column. The ZIP code remains unmasked. The three address columns shuffle, but remain consistent.
The following text shows a sample flat file with the required columns:
SNO,AddressLine1,AddressLine2,AddressLine3,ZIP
1,3290 Apple Lane,Chillicothe,IL,61523
2,7760 Ash Street,Dallas,TX,75240
3,2229 Ash Street,Moscow,TN,38057
4,6698 Caldwell Road,Rochester,NY,14620
Complete the following steps to create rules to shuffle addresses with the ZIP code unmasked in Test Data Manager:
- 1. Create a shuffle rule.
- 2. Create an advanced masking rule that keeps the ZIP code column unmasked and shuffles the address columns together.
Creating the Shuffle Rule
Create a shuffle rule in Test Data Manager.
1. In the Policies view, click Actions > New > Masking Rule.
The New Rule window appears.
2. Enter a name and optional description for the rule.
3. Select the string datatype and standard shuffle masking type. Select override allowed.
4. Click Next.
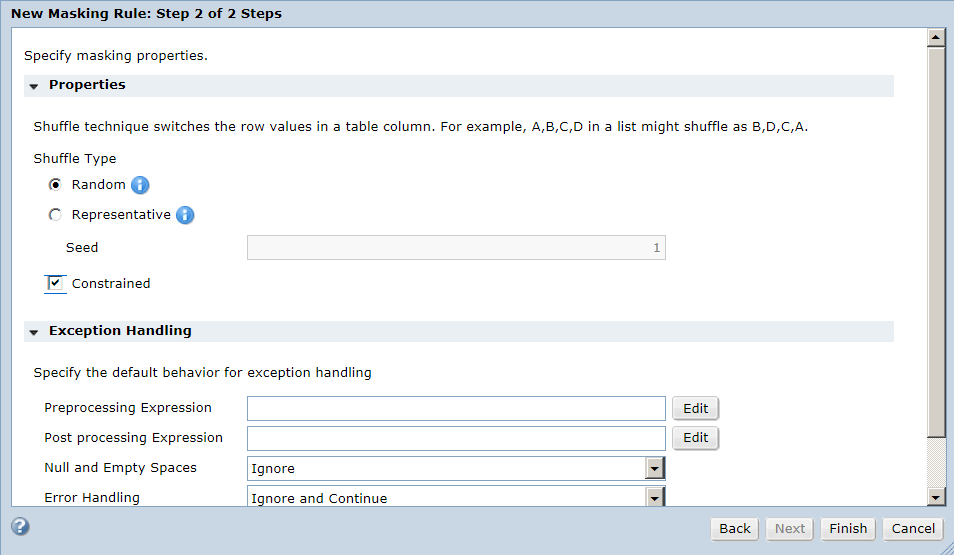
5. Enter the following shuffle masking parameters:
- - Shuffle type. Select Random.
- - Constrained. Select Constrained.
The following image shows the shuffle masking parameters:
6. Click Finish.
The rule appears in the Policies view.
Create the Advanced Masking Rule
Create an advanced masking rule that shuffles address lines.
The advanced rule shuffles three address line columns together and keeps the ZIP code column unmasked. The rule uses shuffle masking with a lookup on AddressLine3 and dependent masking on AddressLine1 and AddressLine2.
In the rule editor, you create input columns, variable columns, and output columns.
Setting Up the Advanced Masking Rule
Set up the advanced masking rule.
1. In the Policies view, click Actions > New > Masking Rule.
The New Masking Rule window appears.
2. Enter a name and optional description for the rule.
3. Select the advanced masking type.
4. Click Next.
Creating the Input Columns
Create input columns in the advanced masking rule.
1. Create an input column. Click Create Input Column in the Specify Masking Properties window.
The Add Column window appears.
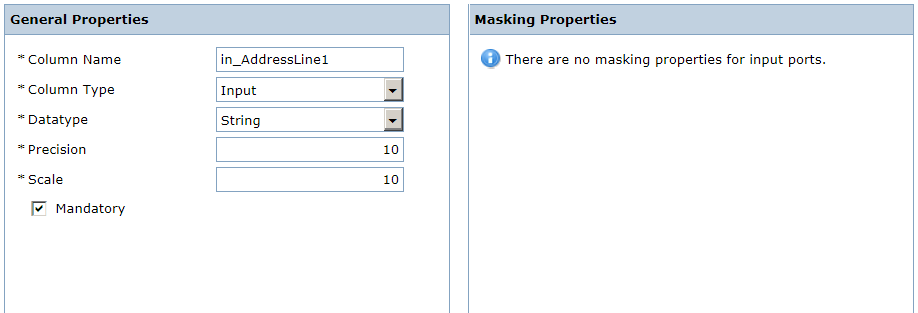
2. Enter the following general properties:
- - Column name. Enter i_AddressLine1.
- - Column type. Select Input.
- - Datatype. Select String.
- - Precision. Select 10.
- - Scale. Select 10.
- - Mandatory. Select the check box.
The following image shows the i_AddressLine1 column properties:
3. Click OK.
The i_AddressLine1 input column appears in the list of input columns.
4. Create an input column with the following general properties:
- - Column name. Enter i_AddressLine2.
- - Column type. Select Input.
- - Datatype. Select String.
- - Precision. Select 10.
- - Scale. Select 10.
- - Mandatory. Select the check box.
5. Create an input column with the following general properties:
- - Column name. Enter i_AddressLine3.
- - Column type. Select Input.
- - Datatype. Select String.
- - Precision. Select 10.
- - Scale. Select 10.
- - Mandatory. Select the check box.
6. Create an input column with the following general properties:
- - Column name. Enter i_ZIP.
- - Column type. Select Input.
- - Datatype. Select String.
- - Precision. Select 10.
- - Scale. Select 10.
- - Mandatory. Select the check box.
Creating the Variable Columns
Create variable columns in the advanced masking rule.
1. Create a variable column to shuffle AddressLine3 based on ZIP. Click Create Input Column.
The Add Column window appears.
2. Enter the following general properties:
- - Column name. Enter v_AddressLine3.
- - Column type. Select Variable.
- - Datatype. Select String.
- - Precision. Select 10.
- - Scale. Select 10.
- - Mandatory. Select the check box.
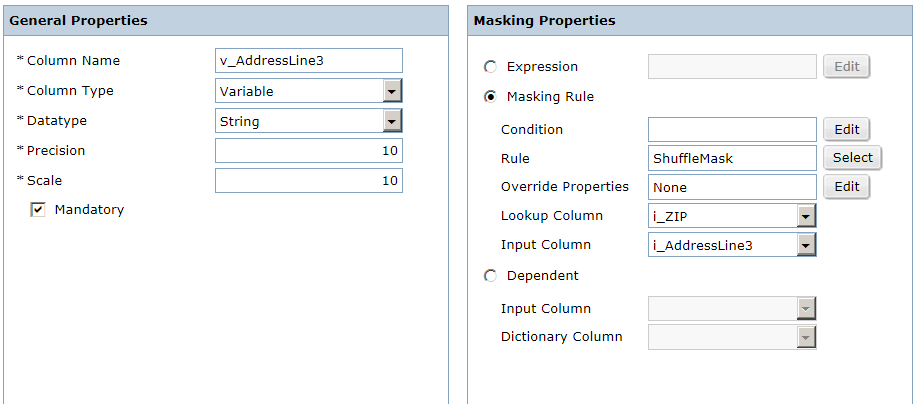
3. Select the masking rule masking property. Configure the following masking properties:
- - Condition. Leave blank.
- - Rule. Select the shuffle rule that you created in Step 2.
- - Override Properties. Select None.
- - Lookup column. Select i_ZIP.
- - Input column. Select i_AddressLine3.
The following image shows the v_AddressLine3 column properties:
4. Click OK.
The v_AddressLine3 variable column appears in the list of variable columns.
5. Create a variable column to mask AddressLine2 based on the masked value of AddressLine3. Click Create Input Column.
The Add Column window appears.
6. Enter the following general properties:
- - Column name. Enter v_AddressLine2.
- - Column type. Select Variable.
- - Datatype. Select String.
- - Precision. Select 10.
- - Scale. Select 10.
- - Mandatory. Select the check box.
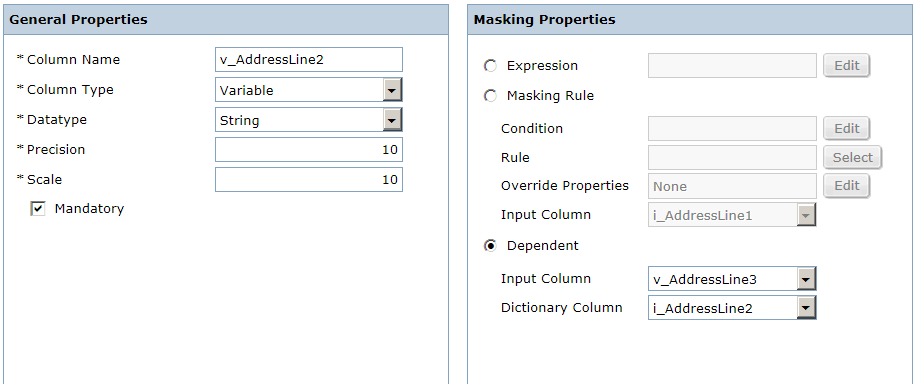
7. Select the dependent masking property. Configure the following masking properties:
- - Input column. Select v_AddressLine3.
- - Dictionary column. Select i_AddressLine2.
The following image shows the v_AddressLine2 column properties:
8. Click OK.
The v_AddressLine2 variable column appears in the list of variable columns.
9. Create a variable column to mask AddressLine1 based on the masked value of AddressLine3. Click Create Input Column.
The Add Column window appears.
10. Enter the following general properties:
- - Column name. Enter v_AddressLine1.
- - Column type. Select Variable.
- - Datatype. Select String.
- - Precision. Select 10.
- - Scale. Select 10.
- - Mandatory. Select the check box.
11. Select the dependent masking property. Configure the following masking properties:
- - Input column. Select v_AddressLine3.
- - Dictionary column. Select i_AddressLine1.
12. Click OK.
The v_AddressLine1 variable column appears in the list of variable columns.
Creating the Output Columns
Create output columns in the advanced masking rule.
1. Click Create Input Column.
The Add Column window appears.
2. Enter the following general properties:
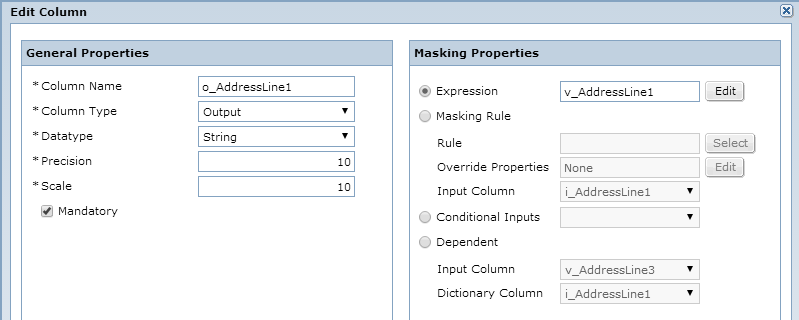
- - Column name. Enter o_AddressLine1.
- - Column type. Select Output.
- - Datatype. Select String.
- - Precision. Select 10.
- - Scale. Select 10.
- - Mandatory. Select the check box.
3. Select the dependent masking property. Configure the following dependent properties:
- - Input column. Select v_AddressLine3.
- - Dictionary column. Select i_AddressLine1.
The following image shows the o_AddressLine1 column properties:
4. Click OK.
The o_AddressLine1 variable column appears in the list of variable columns.
5. Click Create Input Column.
The Add Column window appears.
6. Enter the following general properties:
- - Column name. Enter o_AddressLine2.
- - Column type. Select Output.
- - Datatype. Select String.
- - Precision. Select 10.
- - Scale. Select 10.
- - Mandatory. Select the check box.
7. Select the dependent masking property. Configure the following dependent properties:
- - Input column. Select v_AddressLine3.
- - Dictionary column. Select i_AddressLine2.
8. Click OK.
The o_AddressLine2 variable column appears in the list of variable columns.
9. Click Create Input Column.
The Add Column window appears.
10. Enter the following general properties:
- - Column name. Enter o_AddressLine3.
- - Column type. Select Output.
- - Datatype. Select String.
- - Precision. Select 10.
- - Scale. Select 10.
- - Mandatory. Select the check box.
11. Select the dependent masking property. Configure the following dependent properties:
- - Input column. Select v_AddressLine3.
- - Dictionary column. Select i_AddressLine3.
12. Click OK.
The o_AddressLine3 variable column appears in the list of variable columns.
Saving the Advanced Masking Rule
Save the advanced masking rule.
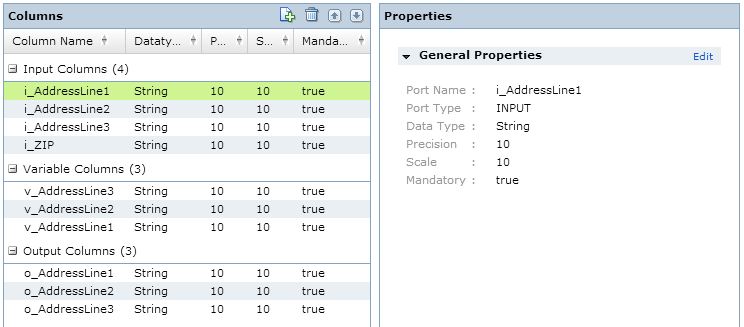
1. Verify that all the rule columns that you created are visible in the columns list.
The following image shows the rule columns:
2. Click Finish.
The rule appears in the Policies view.
