1Log in to Application Integration, go to Explore > Tutorials > Calculator and open the Calculator process.
2Select the Divide Service step on the fourth parallel path.
The step properties section appears.
3Click the Fault Handling tab and select Catch Faults.
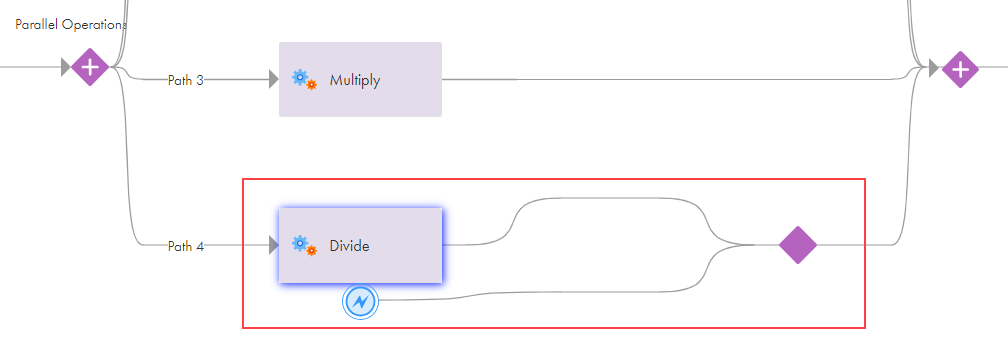
Two converging branches emerge from the Divide Service step. The lower branch represents the path taken if a fault occurs. The upper branch represents the path taken if no fault occurs as shown in the following image:

When you enable fault handling for a step, you configure an event that happens after the fault but within the scope of the step.
4Drag a Wait step on to the lower branch of the Divide Service step and select the Wait step.
The step properties section appears.
5Configure the following properties for the Wait Step:
- aClick the General tab and enter Wait 2 Seconds in the Name field.
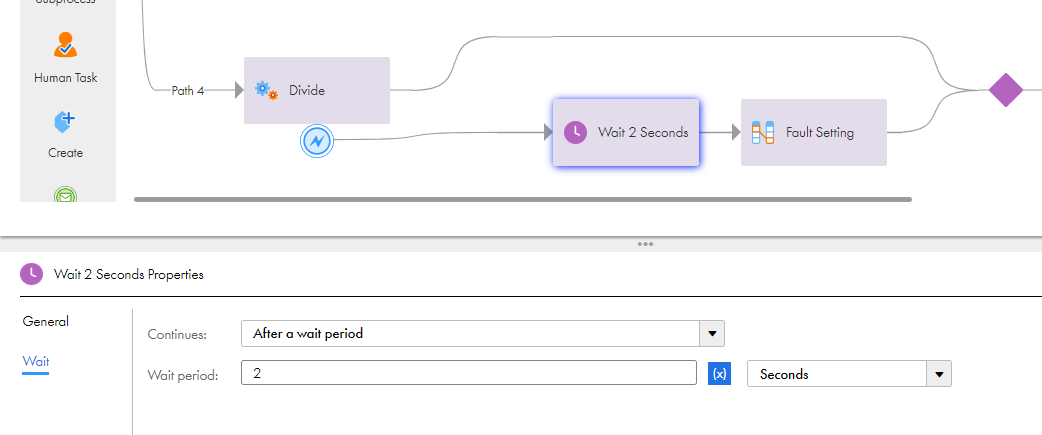
- bClick the Wait tab and set the Continues field to After a wait period and set the Wait field to 2 Seconds as shown in the following image:

6Click the Start step and add a temporary field with name Faulted and Type Text. For more information, see step 8 in Step 1: Create a Process and Configure Basic Process Properties under Create a Process.
Note: You use this field when you later add a decision step about whether the process has a fault or not.
7Drag an Assignment step onto the lower branch of the Divide step just after the Wait step.
8Select the Assignment step and configure the following properties in the step properties section:
- aClick the General tab and enter Fault Setting in the Name field.
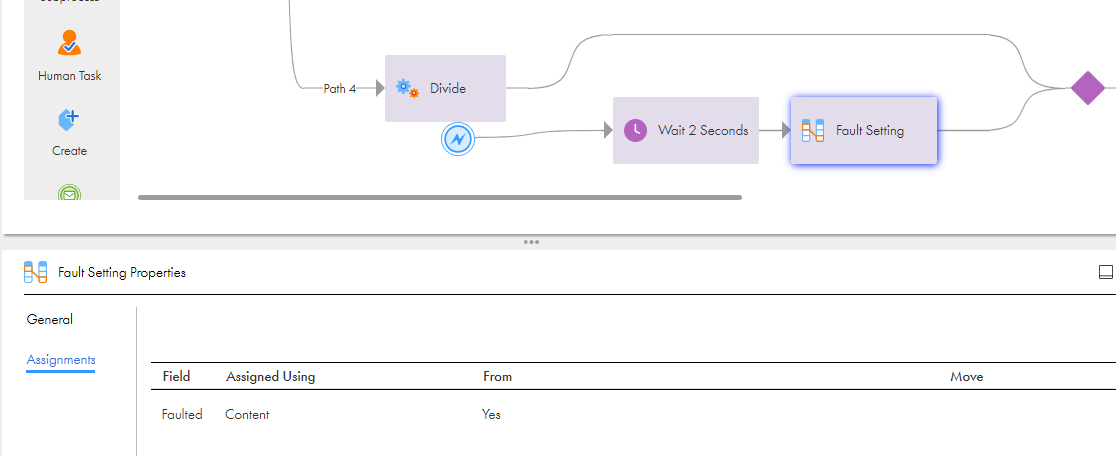
- bClick the Assignments tab, add the Faulted field that you created in step 6. Set the Value to Content > Yes as shown in the following image:

9Click Save.