1 Select the Target transformation in the mapping.
2On the General tab, enter a target name and optional description
3On the Incoming Fields tab, configure field rules that specify the fields to include in the target
For more information about field rules, see Field rules.
4On the Target tab, select the target connection and specify the target type, for example, Single Object or Parameter.
For mappings in SQL ELT mode, you select the target connection in the mapping properties.
The option to select multiple objects is available for NetSuite connections only.
5To use an input parameter for the target object, select an existing parameter, or click New Parameter and create a new parameter for the target object.
6To use an existing target object, either enter the object name or click Select and select the target object.
7 To create a new target object, perform the following steps:
- aClick Select.
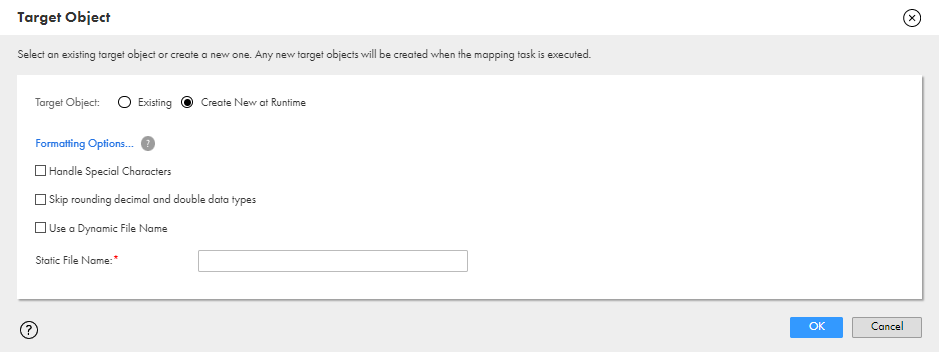
- bIn the Target Object dialog box, select Create New at Runtime:
- cFor flat file targets, enter the name of the target file including the extension, for example, Accounts.csv.
- d For relational targets, enter the table name.
- eFor cloud data warehouse targets, optionally choose to use exact field names in the new target object, enter the object name, and enter other properties such as the table location, table type, and path, if required.
- fClick OK.

If you want the file name to include a time stamp, select Handle Special Characters and add special characters to the file name, for example, Accounts_%d%m%y%T.csv.
If you want to use a dynamic file name, select Use a Dynamic File Name and configure the file name expression.
If you're using a fixed-width flat file format that uses the Decimal or Double data type with precision and scale, and you don't want the data to be rounded in the target file, select Skip rounding decimal and double data types.
For more information about the target properties for different connection types, see the help for the appropriate connector.
8To configure formatting options for flat file targets, click Formatting Options, and configure the formatting options such as the delimiter character and text qualifier.
9 For relational targets, select the target operation and related properties such as whether to truncate the table for Insert operations.
If you create a relational target at run time, the target operation is always Insert.
10 Specify advanced properties for the target, if required.
Advanced properties vary based on the connection type. For information about connector properties, see the help for the appropriate connector.
11Configure the target fields on the Target Fields tab.
You can edit field names and metadata, add fields, and delete unnecessary fields.
You can't edit field metadata in mappings in SQL ELT mode. If you create the target at run time, you can't configure target fields.
12Map incoming fields to target fields on the Field Mapping tab.
If you create the target at run time, fields are mapped automatically.
For more information about field mapping, see Target transformation field mappings.