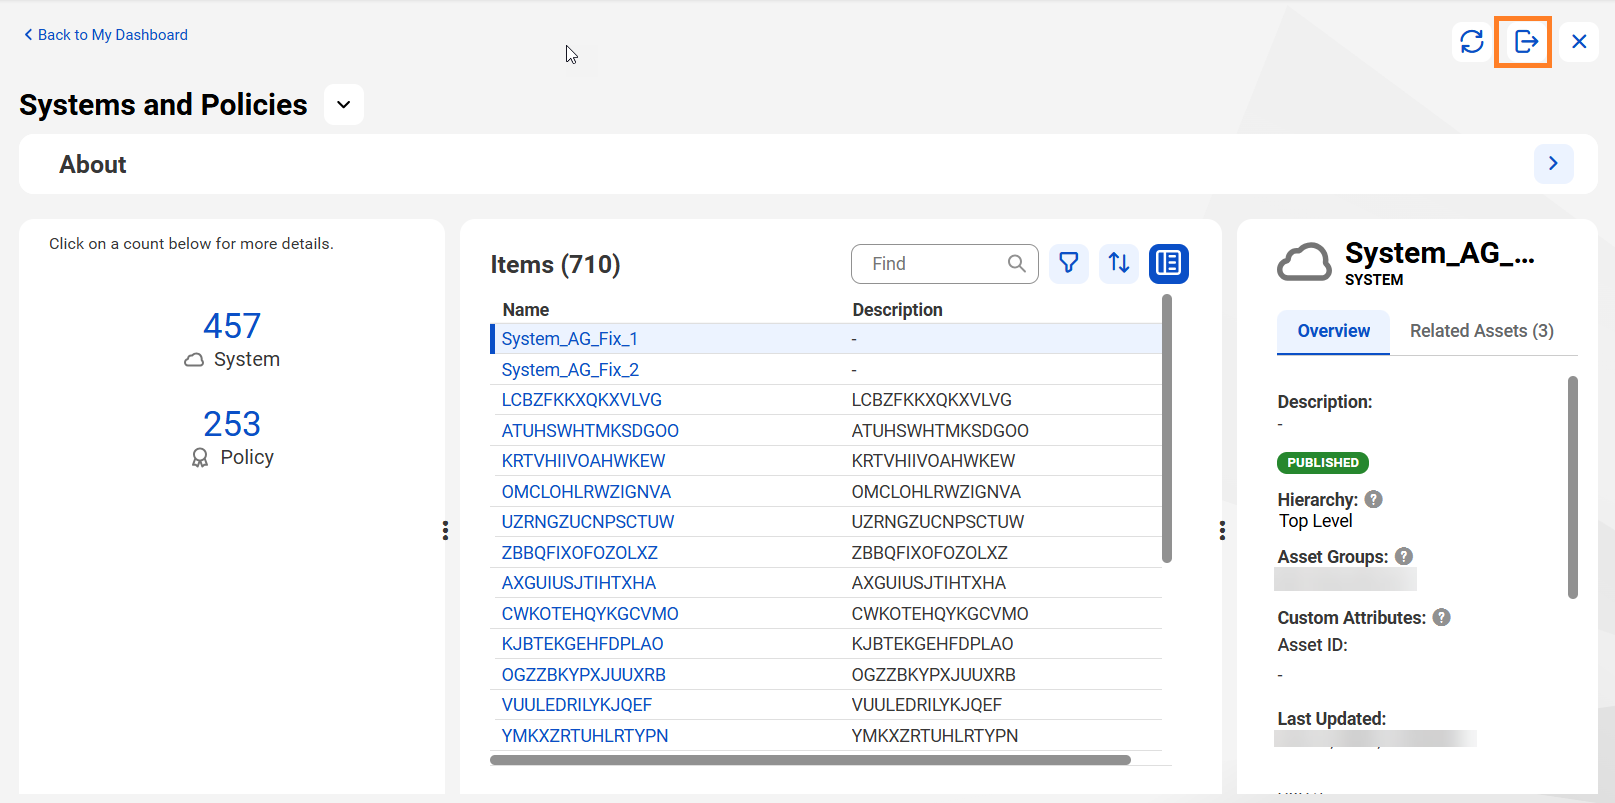
1On the dashboard, click the widget title or the widget items to expand the widget.
2Click the Export assets icon at the top right corner.
The Export Dashboard Widget dialog box appears.
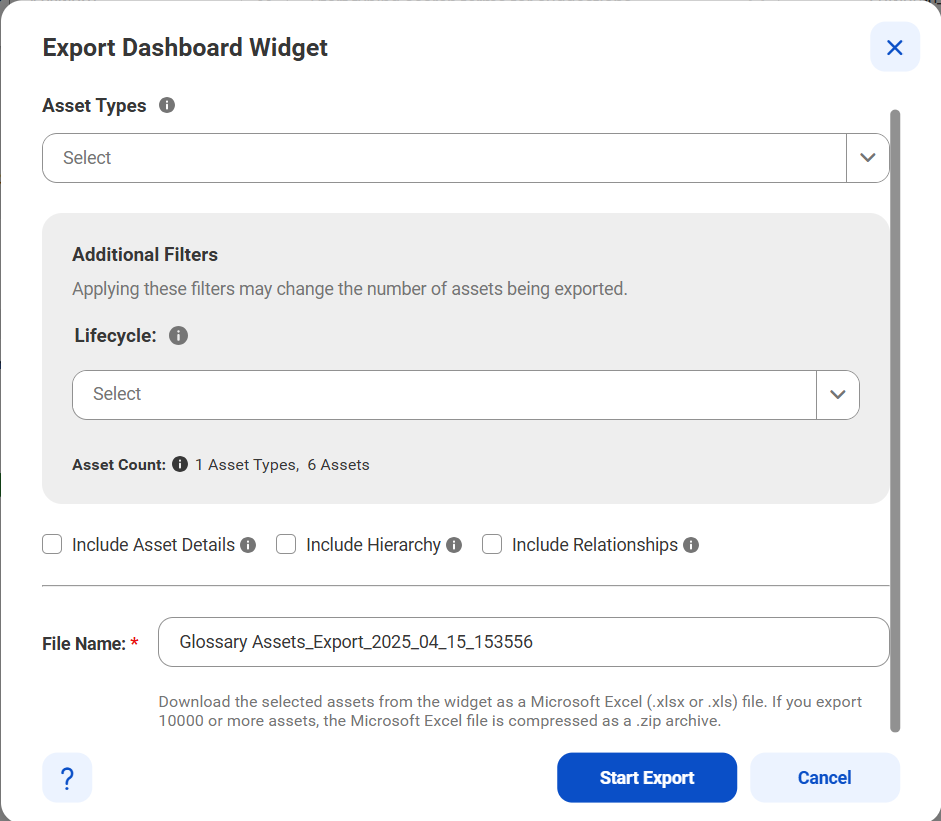
3In the Asset Types field, select the type of assets you want to export.
Note: The asset types are preselected when the widget is configured. If you don't specify the asset type, then all assets of the widget are selected for export.
4Optionally, apply an additional filter to the selected assets. The additional filter that you see varies and is based on the value configured for the Group by option of the selected assets:
- - Created by. Filter assets by the user who created the assets.
- - Updated by. Filter assets by the user who updated the assets.
- - Stakeholders. Select one or more stakeholders who are responsible or interested in the assets. If you want to export assets without any stakeholders, select No Stakeholders.
- - Lifecycle. Select the stage of the asset in the production lifecycle.
5Select the following check boxes to include additional information about the exported assets:
- - Include Asset Details. Export the custom attributes and stakeholder details of all assets and additional details of technical assets.
- - Include Hierarchy. Export all assets in the hierarchy of the search results.
- - Include Relationships. Export the relationships between business assets selected from the search results.
Note: If you select the Include Asset Details option, the export file for technical assets include sheets where changes are restricted. To curate assets, use the editable columns in the Technical Data Set and Technical Data Element sheets.
6In the File Name field, enter a new file name or retain the system-generated file name.
7Click Start Export to export the selected assets from the search results.
This triggers an export job that you can monitor on the Job Status panel.
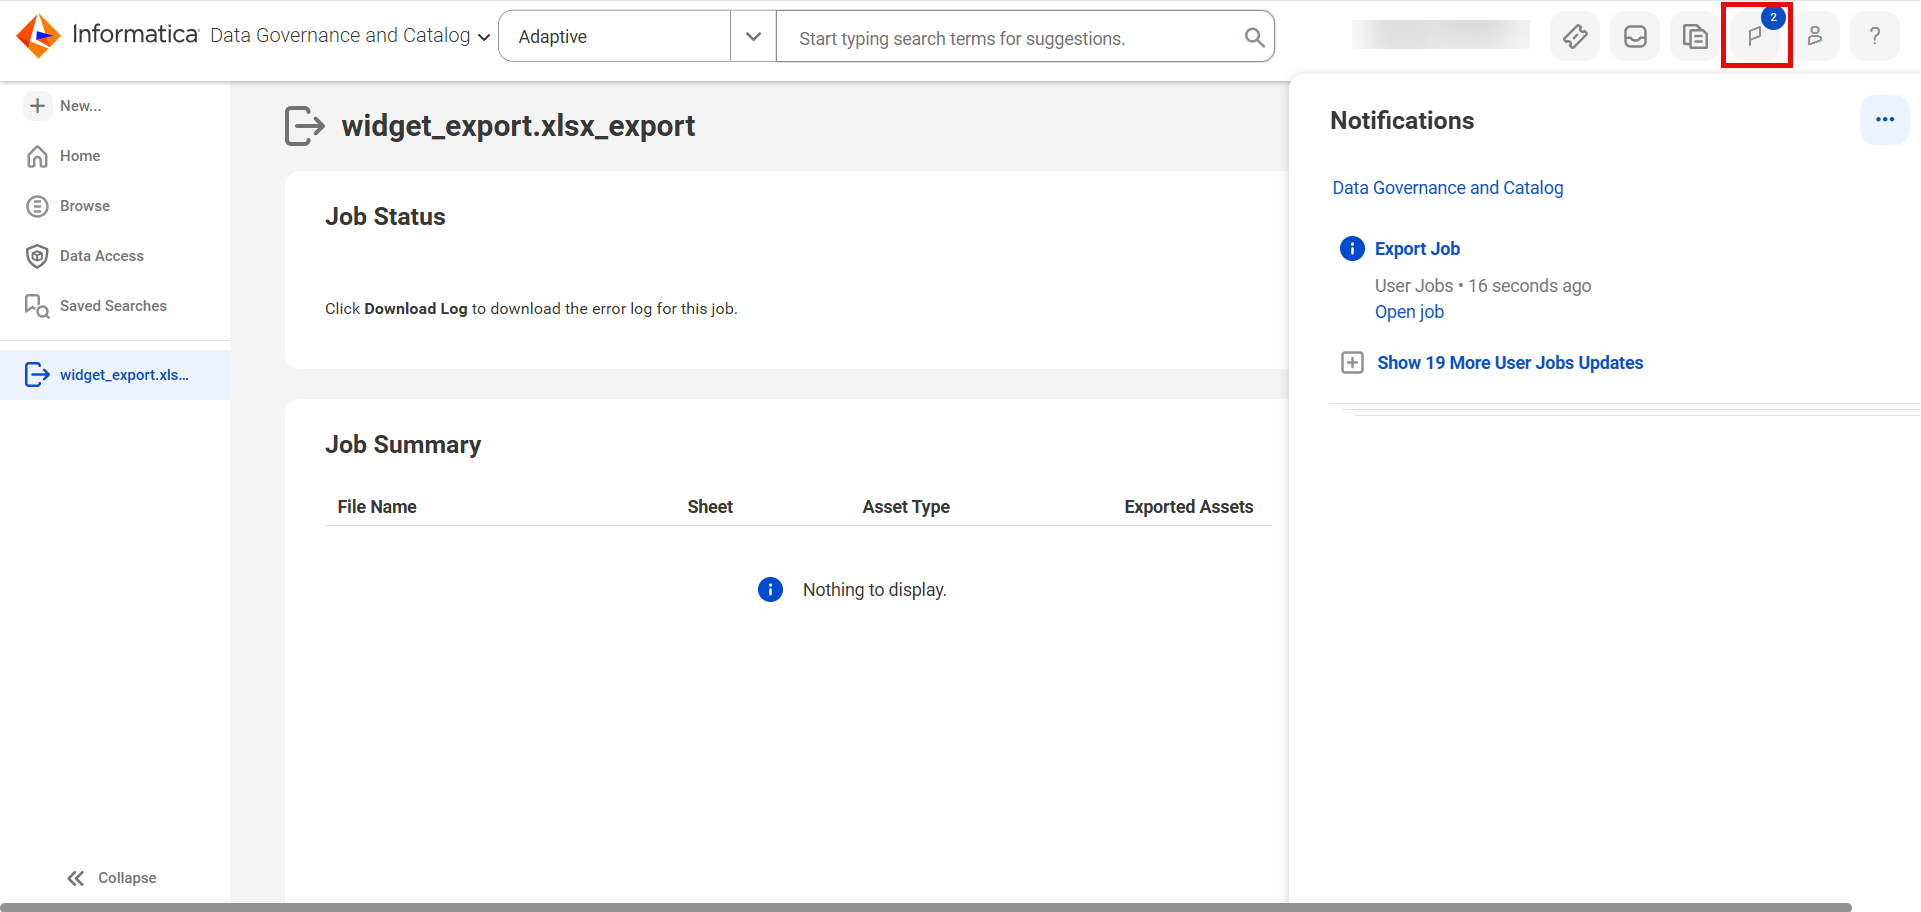
8Click Open Job on the Job Status panel to view the job.
9After the export job is complete, click Download Export File to download the exported file.
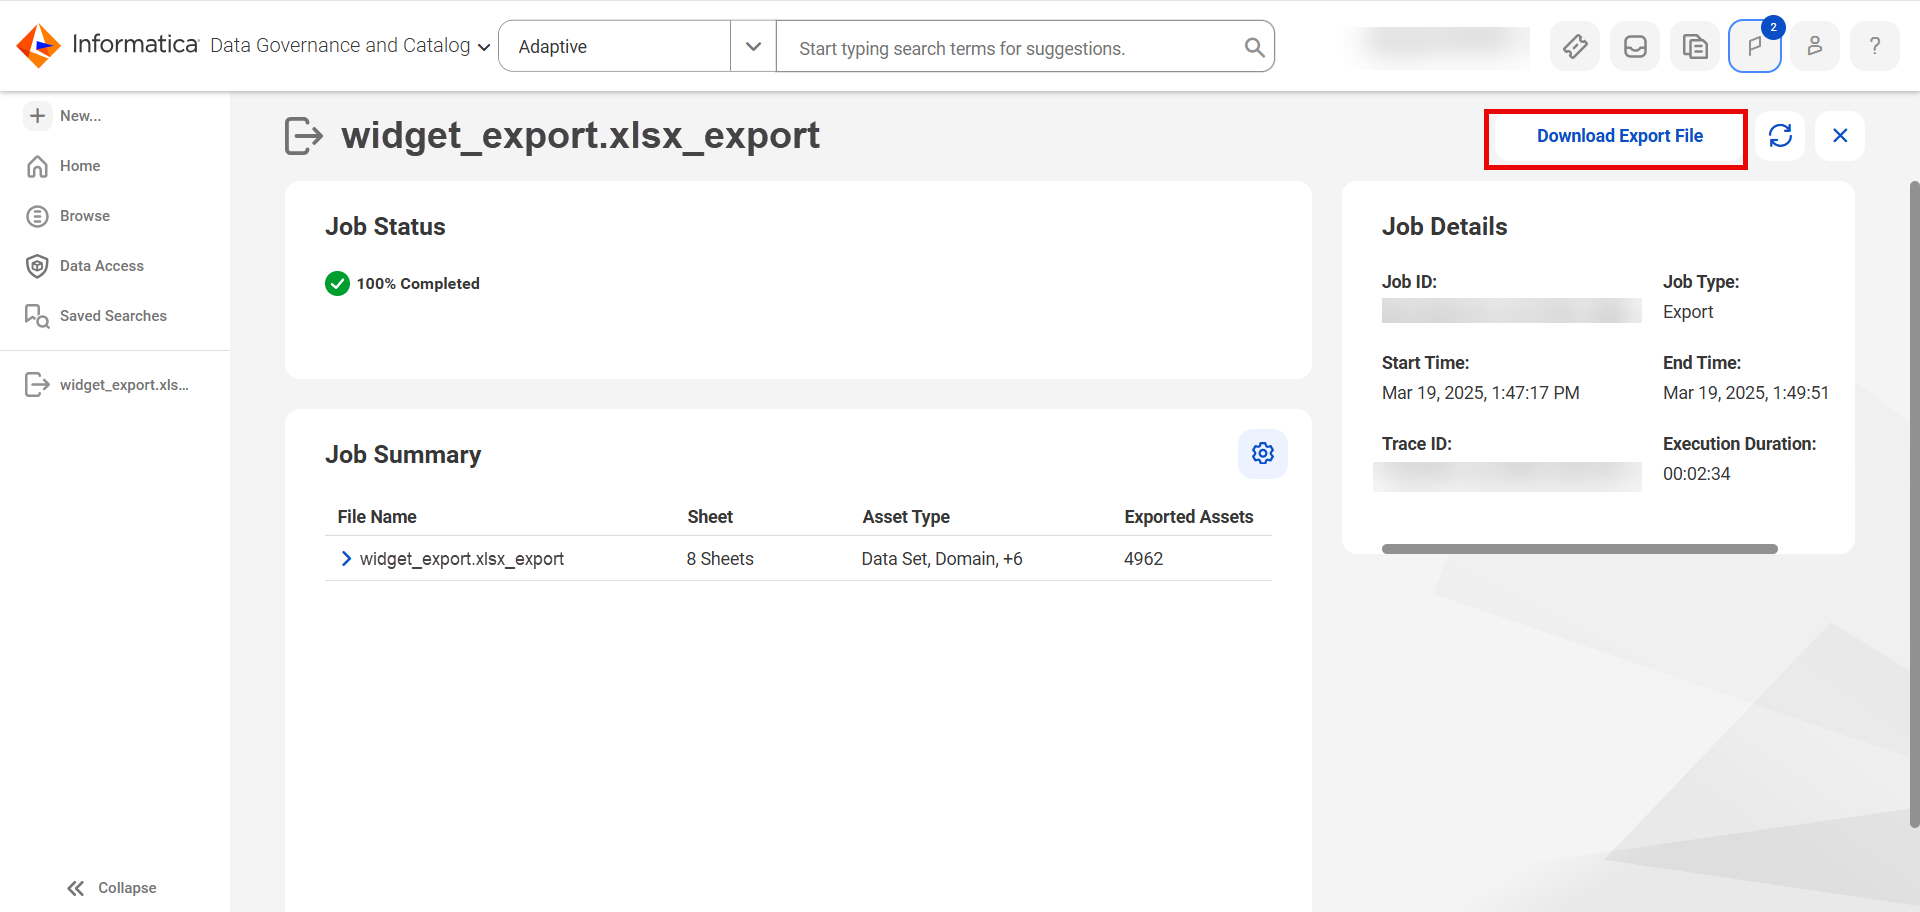
The Job Status panel displays the job summary, details, and download link to download the exported file. The Job Summary section displays the list of asset types, number of sheets, and number of exported assets that are available in the downloaded Microsoft Excel file.
Note: The predefined batch size of the exported file is 50,000. If the search results have more than 50,000 assets, the system compresses the export file as a .zip file. For example, if the search results have 100,000 assets, these assets are exported as a .zip file containing two Microsoft Excel files, with each file containing 50,000 assets.
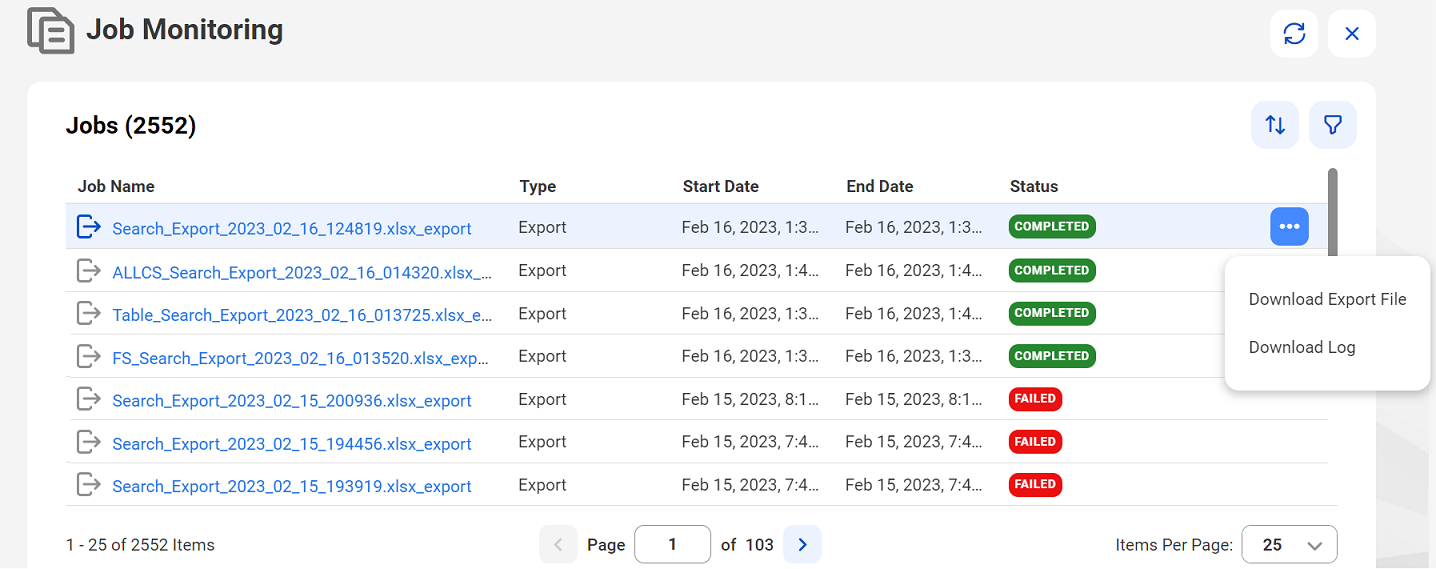
10Alternatively, you can also check the status of your export job on the Job Monitoring page.

11After the export job is complete, click Action > Download Export File next to the corresponding job on the Job Monitoring page to download the exported file. Click Action > Download Log if you want to download the log file to know the job activities.
12You can also click the Notification icon on the Home page to monitor the job status. Click the URL to open the corresponding job page to know the job status.
Once the export job is complete, you'll receive notifications with a link to the corresponding job page in Data Governance and Catalog.