You can add and arrange widgets to dashboards to quickly access key data or features or to prioritize certain information. You can also export data from certain widgets in various formats.
Adding widgets on a dashboard
You can add widgets to a dashboard to view snippets of data that are relevant for your data governance activities.
Note:
If you want to add Asset widgets, clone the system-generated Asset dashboard and modify the widgets on the cloned dashboard.
1On a dashboard, click the action menu icon.
The action menu appears.
2Select Edit Dashboard
The dashboard appears in edit mode.
3Click New widget.
4From the list, select the widget type you want to create.
The New Widget dialog box appears.
5In the New Widget dialog box, enter the properties of the widget. To understand the fields in the dialog box, see Widget properties.
6Click Create and the widget pins to the dashboard.
7Click Save to publish your changes.
Modifying widgets on a dashboard
Widgets provide quick information to important statistics and data in your organization. You can modify the widget name and description, select filters, and change the visualization of widgets.
Note:
If you want to modify usage analytics widgets, clone a system-generated User Adoption or Asset dashboard and modify the widgets on the cloned dashboard.
1On a dashboard, click the action menu icon.
The action menu appears.
2Select Edit Dashboard
3On a widget, click the action menu icon.
The action menu appears.
4Click Edit.
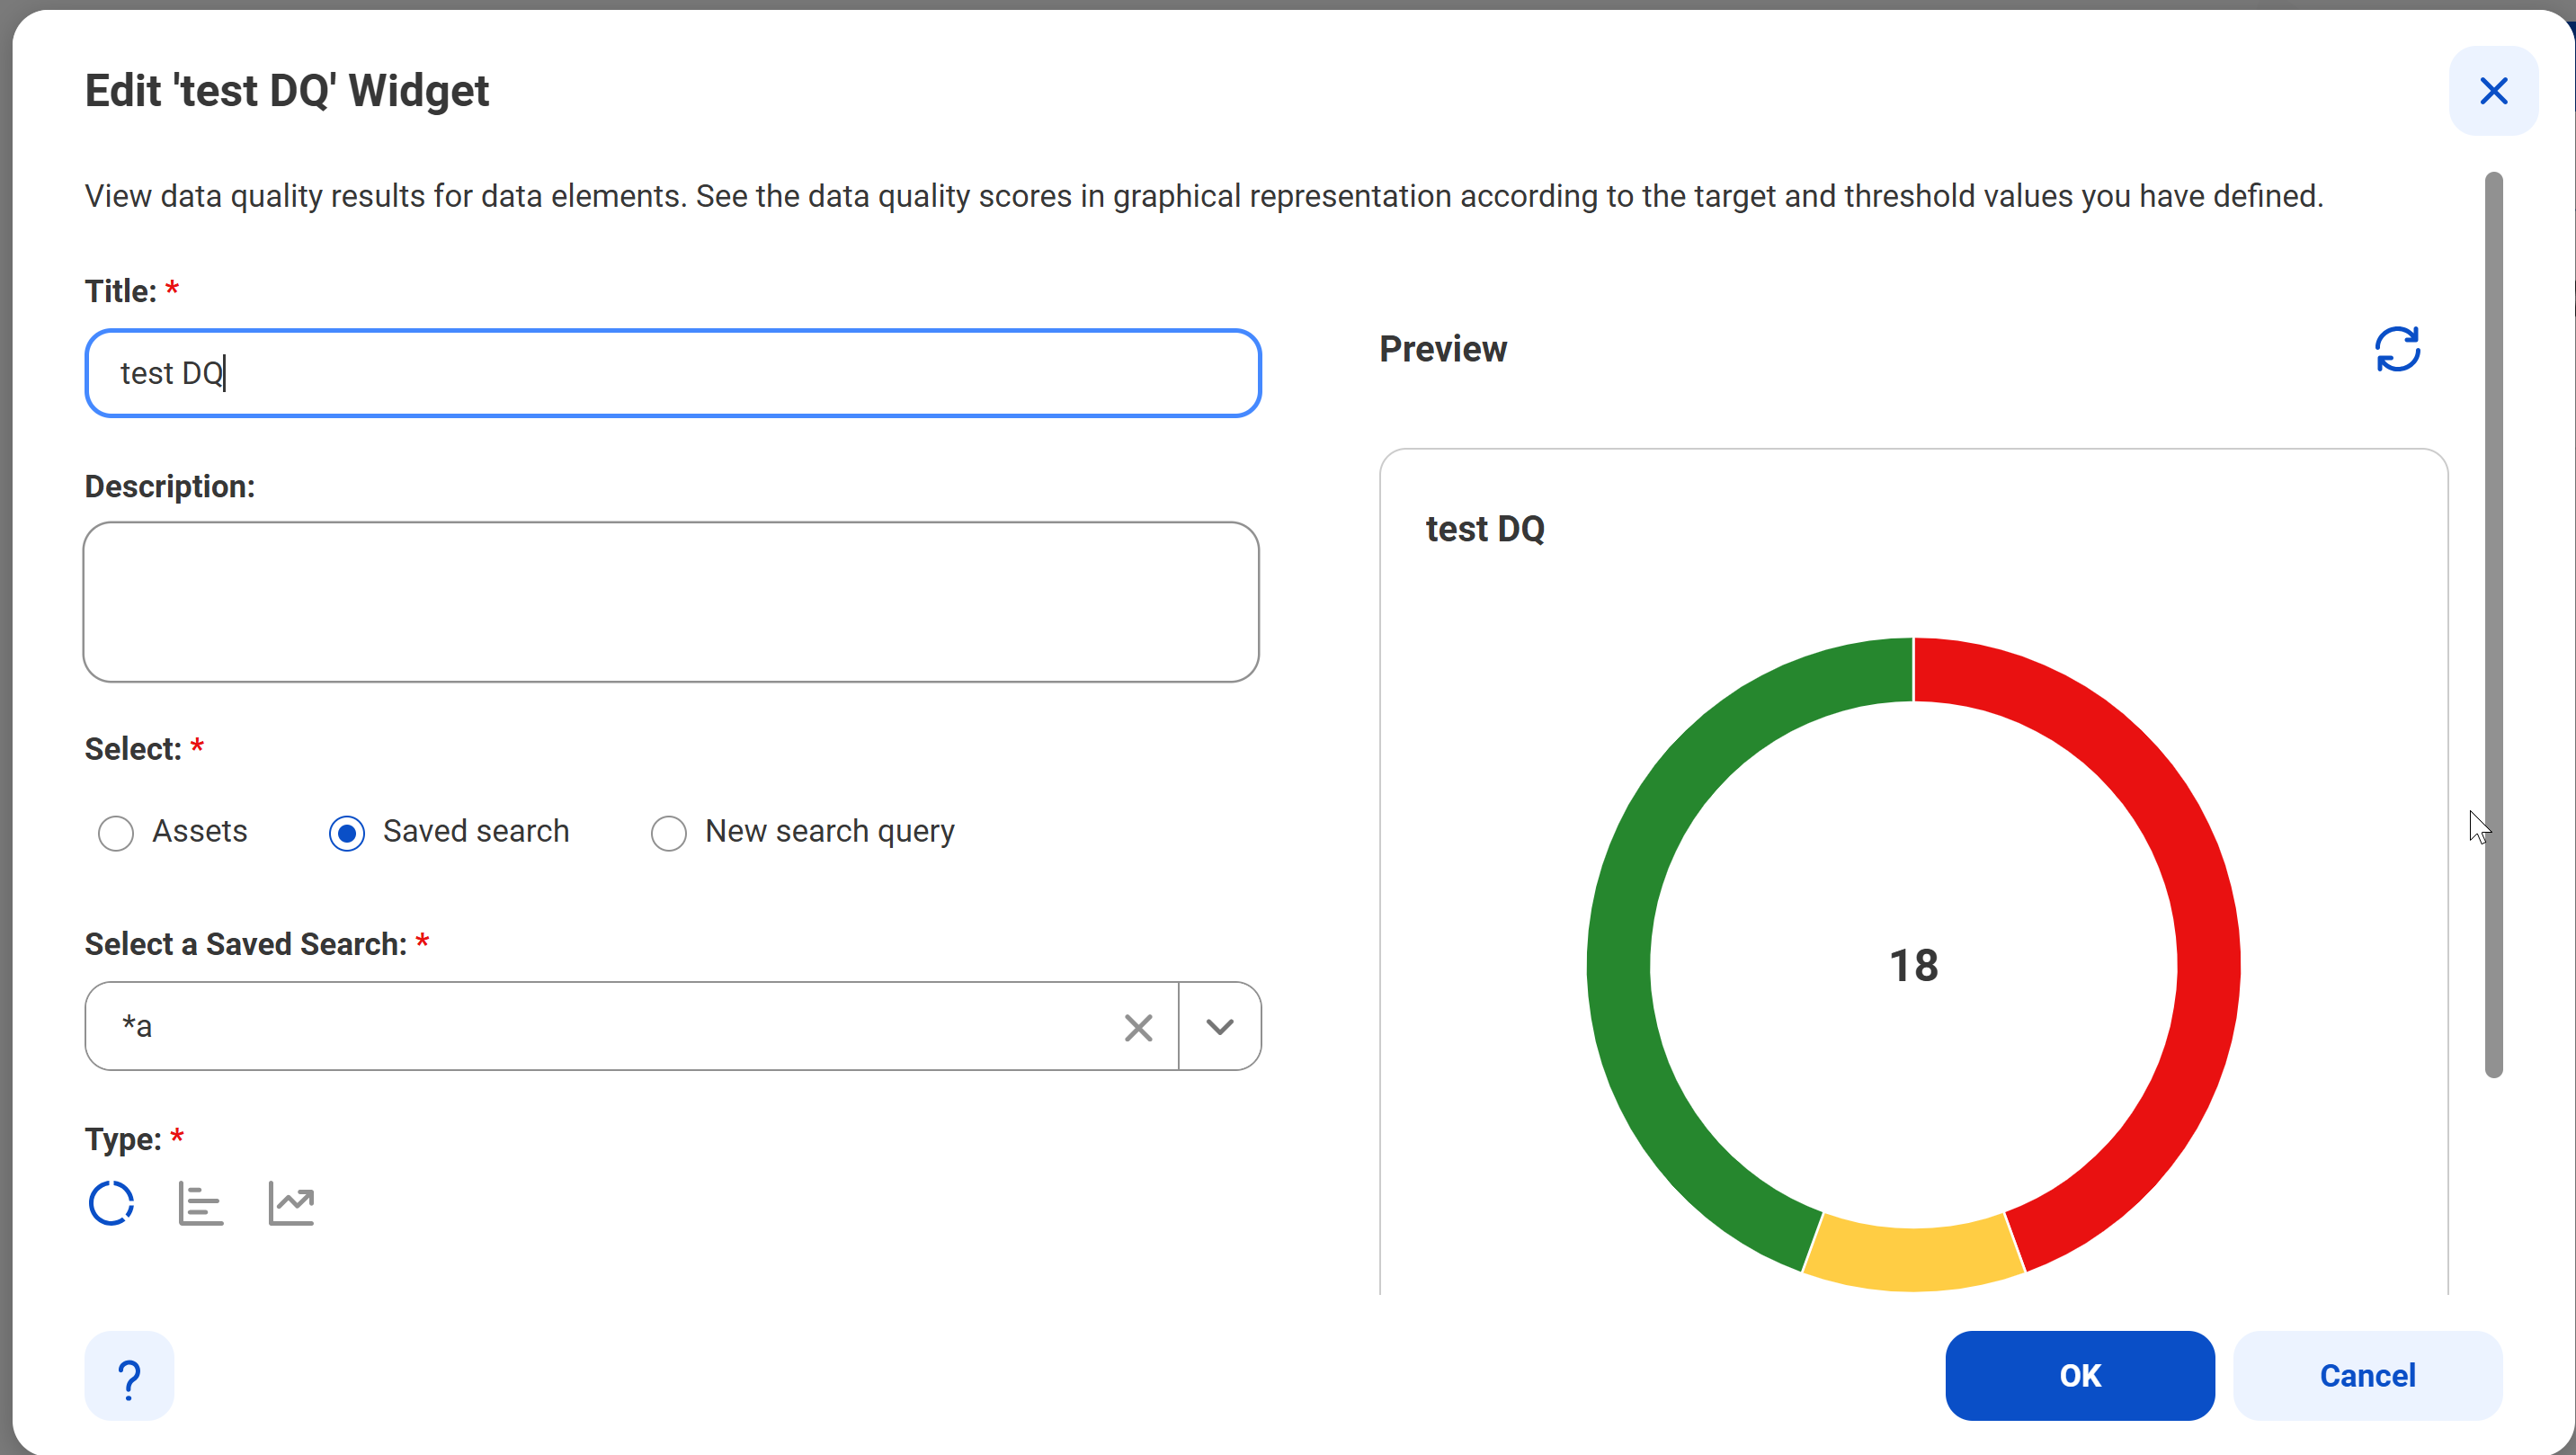
The Edit Widget dialog box appears.
5In the Edit Widget dialog box, modify the properties of the widget. To understand the fields in the dialog box, see Widget properties.
6Click OK to update the widget.
7Click Save to publish your changes.
Arranging widgets on a dashboard
You can change the layout of your dashboard by modifying widget sizes and rearranging the position of widgets. You can enlarge the most important widgets and move them to the top of the dashboard. Move less significant widgets to the bottom of the page.
1On a dashboard, click the action menu icon.
The action menu appears.
2Select Edit Dashboard.
3To resize a widget, click and hold the handles of the widget to drag its edge to a desired size.
4To drag widgets, click and hold the widget to drag and drop at the desired location.
5Click Save to save the layout of the widgets on your dashboard.
Viewing widget information
Depending on the type of widget that you add to the dashboard, you can view different sippets of data on the widget.
1Select the widget and expand the About section to see the details of the widget.
2To narrow the information you see in the widget, click the Filter icon and add filters and based on the selected asset type. For example, for a search-based widget type, you can filter the list of assets by asset type.
3For the donut chart type for any widget, you can click the legend or the acceptance score color to view the value or score for the filter you select.
The following image shows the clickable legends:
4To switch to another widget, select a widget from the drop-down list to view the widget. The Find option appears only if there are more than five dashboards. Enter the widget name to find a widget.
Cloning or deleting widgets
If you want to create a widget that is similar to an existing widget, you can clone the existing widget and modify its properties. If a widget is no longer required or not relevant, you can remove the widget from the dashboard.
1To create a copy of an existing widget, click the Action menu icon for the widget, and select Clone.
2In the Clone Widget dialog box, modify the properties of the widget. To understand the fields in the dialog box, see Widget properties.
3Click OK to save your changes and pin the widget to the dashboard.
4To delete a widget, click the Action menu icon for the widget, and select Delete.
5In the Delete Widget dialog box, click Yes to delete the widget from the dashboard.
You can choose to manually rearrange the remaining widgets or have them rearranged automatically.
Exporting assets from widgets
If you expand a widget, you can export the assets of the corresponding search results. Before you export, you can apply additional filters to curate the selected assets. You can export assets as a Microsoft Excel file or a CSV file.
1On the dashboard, click the widget title to expand the widget.
The widget page appears.
2Click the Export Assets icon at the top right corner.
The Export Dashboard Widget dialog box appears.
3Select the type of assets to export from the Asset Types menu.
Note:
By default, all assets of the widget are selected for export.
4Optionally, select the following check boxes to include additional information about the exported assets:
- Include Asset Details. Export the custom attributes and stakeholder details of all assets and additional details of technical assets.
Note:
If you select the Include Asset Details option, the export file for technical assets includes sheets where changes are restricted. To curate assets, use the editable columns in the Technical Data Set and Technical Data Element sheets.
- Include Hierarchy. Export all assets in the hierarchy of the search results.
- Include Relationships. Export the relationships between business assets and between business assets and technical assets.
The Export Assets dialog box displays the Include Relationships check box if the search results contain business assets.
5In the Choose File Format field, specify whether to export the assets as a Microsoft Excel file (.xlsx or .xls) or as a CSV file.
6In the File Name field, enter a new file name or retain the system-generated file name.
7Click Start Export to export the selected assets from the search results.
This triggers an export job that you can monitor on the Job Status panel.
The Job Status panel appears.
8Click Open Job on the Job Status panel to view the job.
The Job Status page appears.
9After the export job is complete, click Download Export File to download the exported file.
Note:
A Microsoft Excel export file can contain a maximum of 50,000 assets. If the search results contain more than 50,000 assets, the export operation creates additional Microsoft Excel files and compresses the files into a .zip file for export.
Summary of CLAIRE activities
You can see a summary of CLAIRE® recommendations across assets in Data Governance and Catalog. The CLAIRE® widget shows the recommendations that CLAIRE® has made to help you better govern your assets.
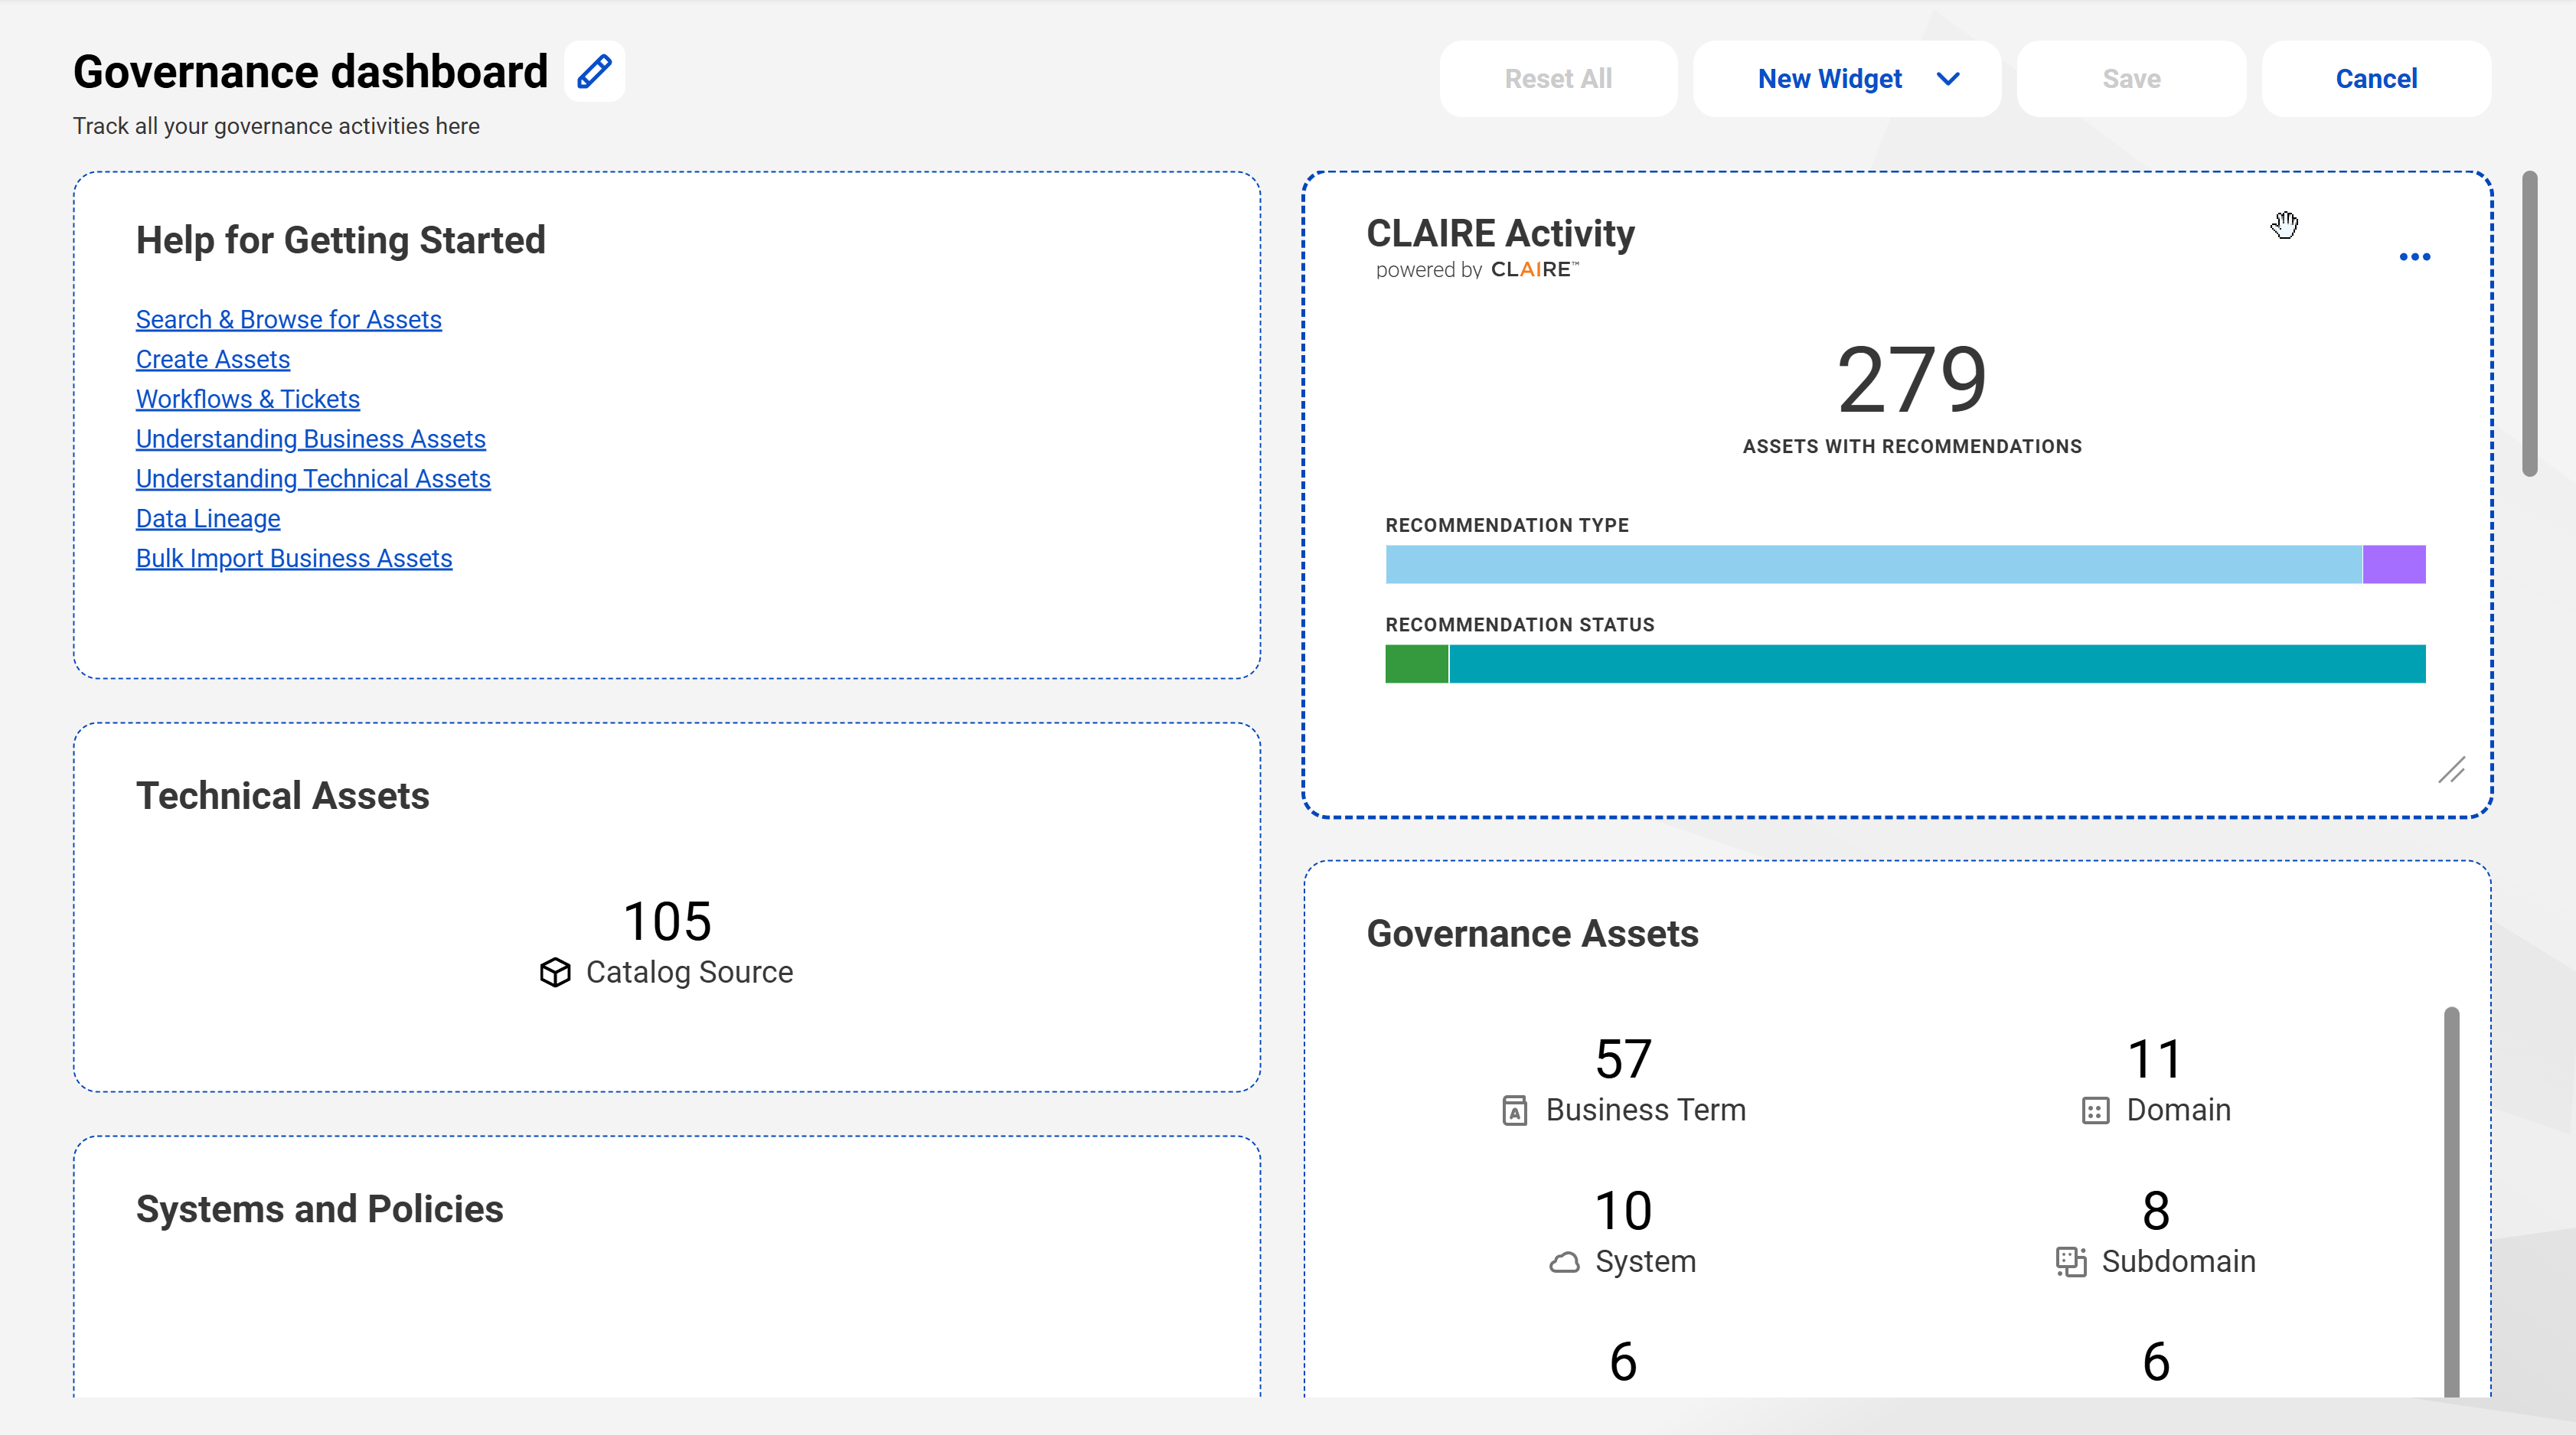
To see more information about the CLAIRE® widget, click any CLAIRE® widget in the Home page.
The following image shows a few CLAIRE® widgets that you can click:
The following image shows more information about the 'CLAIRE Activity' widget:
Use the CLAIRE® widget to understand the intelligent recommendations that Data Governance and Catalog has provided, and take action on pending items. Filter the information by recommendation type, recommendation status, and catalog sources. If there is an asset on which you must act, click on the asset name to open it in a new page.
For more information about configuring CLAIRE® widgets on a dashboard, see CLAIRE Activity widget.