Part 1: Starting a New Process
You can use Process Developer to design a process using top-down or bottom-up techniques. In the top-down technique, you sketch out your process by dropping down activities within a bounding box that automatically contains sequenced activities. You then add all the necessary information to bind the activities to an implementation and add decision-making to make your sketch a working process. In the bottom-up technique, you use the definitions of the implementation that are available when you begin process creation. This tutorial covers both design techniques.
After completing Part 1 of the tutorial, you will be able to:
- •Create a new orchestration project.
- •Understand the nature of an orchestration project.
- •Create a new process document in the Tutorial orchestration project.
- •Familiarize yourself with the Process Developer tools that help you create a valid process.
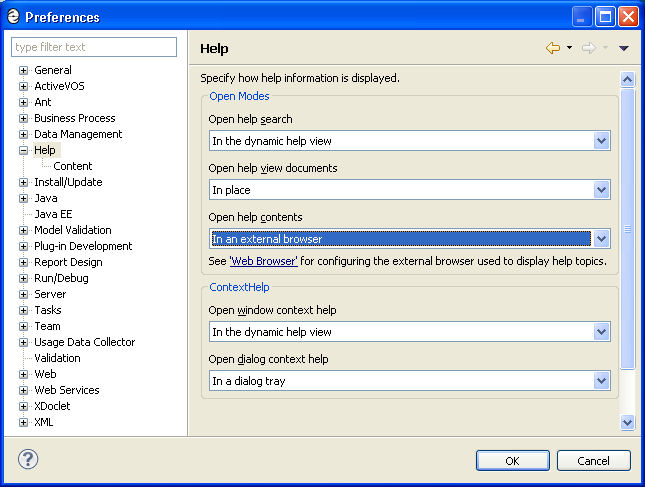
Tip: Set a Help Preference to display Help in an external browser. This lets you see this tutorial at all times, especially when a modal dialog is open. To set a Help Preference, select Window > Preferences > Help. Next, select In an external browser within the "Open help contents" picklist, as shown in the following illustration.
Note: The illustrations of dialog boxes and wizards (for example, font and button color) that you will see in this tutorial can look different from one version of Eclipse to another and your operating system may also display them differently than are shown here.
Step 1: Create the Tutorial Orchestration Project
You will create an Orchestration Project in this tutorial. An "orchestration project" is an Eclipse project with a special nature for including the resources required for composing BPEL processes. These resources include WSDL, schema, deployment files, and other specialized resources like Service References. In addition to folders, an Orchestration Project has builders, which ensure that all orchestration files are valid, helping you to complete error-free orchestrations.
Like all Eclipse projects, an orchestration project is a container to store files, and it resides in your default location, the Workspace folder selected when Process Developer was installed. Orchestration projects are also created in the same Workspace location in the file system.
- 1. Select File > New > Orchestration Project.
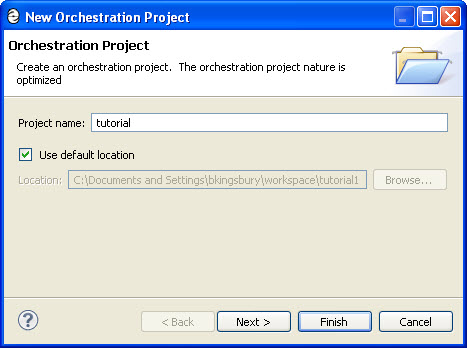
- 2. Type in Tutorial for a project name, as shown.
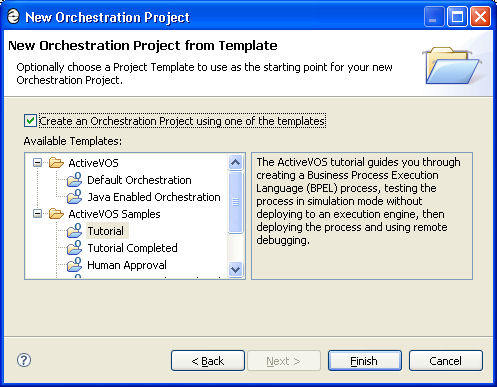
- 3. Click Next and select the Tutorial template.
- 4. Click Finish.
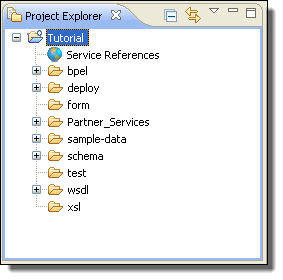
Your Project Explorer view should look like the following illustration. Notice that Process Developer created folders to contain the resources needed for a BPEL-based orchestration. As you proceed through the tutorial, you will be using each of these folders in the Tutorial project.
Step 2: Create a New Process File in the Tutorial/bpel Folder
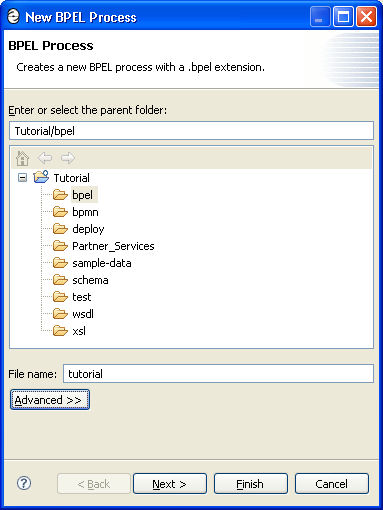
- 1. Select File > New > BPEL Process.
- 2. Select the bpel folder.
- 3. In the file name field, type in tutorial for your BPEL file. The .bpel extension is automatically added.
Notice the Advanced button. Pressing this button displays settings that override defaults that you can set in Preferences. It won't be used in this Tutorial, but you may want to press it to see what's there.
- 4. Click Finish.
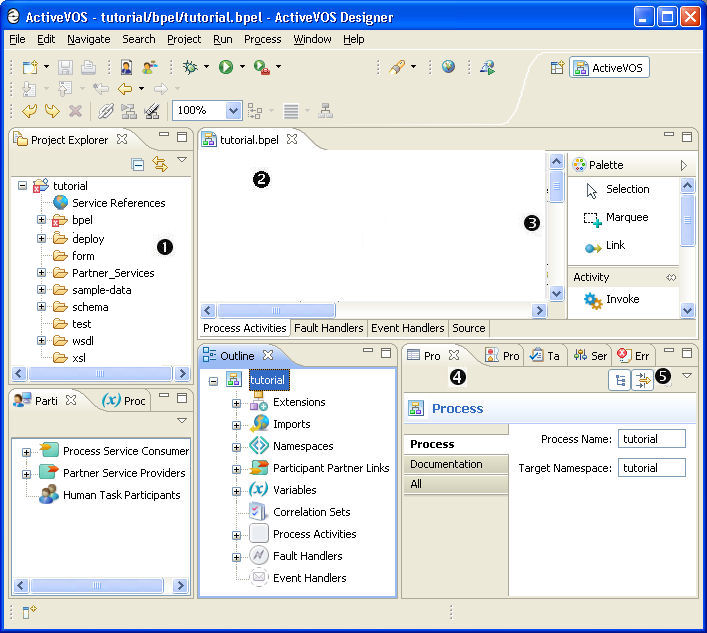
Your new file opens as a blank document in the Process Editor, as shown in the following illustration.
Notice the following user interface features:
1 | Process file are listed in the Project Explorer view. Double-click on a Project Explorer file to open it. |
2 | A newly created process file is opened automatically in the Process Editor. The Process Editor canvas is blank to begin with. When you open multiple files, they are displayed as different tabs. To switch between open files, click on a tab. |
3 | To create a process, you will use the palette. Each palette group contains a set of icons, such as the Task group. You can select a palette icon and drop it onto the canvas. The palette is closed by default. Rest your mouse on the palette bar to auto-open it, or select the Show Palette arrow to open it. |
4 | The Properties view displays the attributes for the object in focus. In the illustration above, the tutorial.bpel process is in focus in the Process Editor. If a file is selected in the Project Explorer, a different set of attributes is displayed. |
5 | The tabs along the top of a view indicate that several views are stacked together. Select a tab to display a view. Tip: You can close (hide), minimize, maximize, move, and rearrange views as desired. |
If you select the Problems tab, you may see two error messages. One says, "No activity designated to create instance" and "Container /process is missing a required activity." These messages are part of BPEL validation. You can ignore them for now.
Note: The Tutorial orchestration project includes a Cheat Sheet. A default project does not. The Cheat Sheet view is usually closed.
