Service Programmer Interface
Guide Designer is configured by XML files that are deployed as part of a contribution to the Process Server catalog. These metadata files describe the application's custom components; for example, objects, service all steps, data types, services, and so on. These components are available to guide designers in the editor environment. The files are discovered by searching the Process Server catalog using the document's XML namespace.
Application Configuration
This Guide Designer configuration metadata is the entry point for the guide editor and runtime components. Configuring Guide Designer for your environment requires that you deploy this metadata file, which will later be discovered when a guide editor is opened or a guide begins execution.
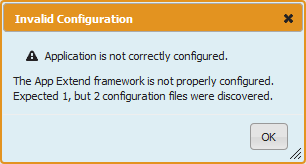
Note: If you deploy a project more than once and each has its own app-config.xml file, your users will see the following error message:
If this error occurs, you will need to go to the Process Console (usually running at localhost:8080/activevos), select Catalog | Contributions, click on a contribution's link, then select the Offline button.
Sample Configuration
The following is a sample configuration file:
<screenflowConfig xmlns="http://schemas.activevos.com/
appmodules/screenflow/2012/09/
avosScreenflowConfiguration.xsd">
<global hostRuntimeService="runtimeService"
currentUserEntity="CurrentUserEntity"
entityIndex="project:/app/entityList.xml"
applicationName="Custom Application">
<features>
<feature name="polymorphism" enabled="false"/>
<feature name="runAsUser" enabled="false"/>
</features>
<helpLink>./help.html</helpLink>
</global>
<designer>
<helpLink>../editor/help.html</helpLink>
</designer>
</screenflowConfig>
In this sample, notice the following:
- •The global element that has configuration properties common to the editor and run-time environments.
- •The features element either enables or disables features supported by Guide Designer that may or may not be supported by your host provider.
- •The optional helpLink attribute is a text node whose value should be a URI that points to a help document. The URI may be relative, an absolute HTTP, or a project:/ path.
Global Properties
The follow table describes the properties of the global element. These are configured as attributes.
Property | Required | Description |
|---|
applicationName | No | Parameter used for debugging purposes, and whose default value is "Socrates". |
currentUserEntity | No | If your host supports an entity to provide additional details about the currently logged in user, configure this field to provide the object's name. This name should exist in the entity index. |
entityIndex | No | Either a project:/ path to an entity index resource or a service name of a BPEL process that can create an entity index and get entity details for an entity by name. The default value is avHostEnvironmentService, which is a Process Designer-provided process to discover entities deployed to the Process Console catalog. |
helpLink | No | (optional) A text node whose value should be a URI that points to a help document. The URI may be relative, an absolute HTTP, or project:/ path |
hostRuntimeService | Yes | The name of the service deployed for the BPEL process that makes, creates, reads, updates, and queries requests to the host application. |
Features
The following features are currently supported by Guide Designer. However, your host run-time may not support them.
Feature | Description |
|---|
guidePermissions | Guides within a project can be restricted by role or group using a tab displayed in the Settings dialog invoked from the Guide toolbar on the Home page. When this property is set to true, a Permissions tab appears within this dialog. |
handleRedirectOnDone | Guides can redirect to another URL when they are done, and the redirect onDone feature allows the hosting application to override the default redirect behavior with its own. The default behavior is to navigate the current window to the URL defined by the guide. When this feature is enabled, Guide Designer will no longer do the redirect; instead it will execute an aesf-done window event, which your application can listen for and act upon. The event data will be a string having the following format: aesf-done | [reference: | url:] data Examples are: aesf-done|url:http://active-endpoints.comaesf-done|url:active-endpoints.com aesf-done|reference:50c7f76e-0f86-49d1-8e1d-ee9478f9b54d The sample project contains an example that shows listening for window events in the guideExplorer.js file in the subscribeToAeSfDoneMessages function. |
polymorphism | If enabled, the user can choose more than one object as a "reference to". If set to true, service call steps and the data service may receive space-delimited object names as a referenceTo value. Only set this to true if your host supports polymorphic relationships. |
runAsUser | If your host supports data access and modification requests at an elevated user, enable this feature. By default, all requests to service call steps and the data service include a runAsUser element set to $current. When this is enabled, the guide developer sees an option for setting the runAsUser value to $system, indicating that a guide can create or modify objects in the host that they may not normally have the permissions for. |
redirectToObject | This feature affects End steps and determines the behaviors guide developers can set when a guide is done. If disabled, the only on done behavior is the ability to go to a URL. However, if your host supports URLs for the object in the host and if this feature is enabled, guide developers can choose: - - Refresh Current Object
- - Go to Other Object
- - URL
|
showEmbedLink | An HTTP link for embedding the guide is displayed. |
Note: If you deploy a project more than once and each has its own app-config.xml file, your users will see the following error message:
If this occurs, you will need to go to the Process Console (usually running at localhost:8080/activevos), select Catalog | Contributions, click on a contribution's link, then select the Offline button.
Permissions
Permissions determine who can see guides when information within the Forms, Designs, and Report panes. (Reports are not available in Process Designer.) Each is set independently; that is, the permissions that you set for one pane do not affect the permissions in the other. An application configuration file sets permissions for the Designs pane and an .avcconfig file sets them for the Forms pane. For example, if you set permissions for access in the Designs pane, these settings do not affect what users can see in the Forms pane.
Setting Permissions in an Application Configuration file
When you create an application configuration file with a
Sample Configuration element, setting
globalPermissions to
true tells Guide Designer to display a Permissions tab within the guide designer's
Settings dialog. Here is an example of setting the
globalPermissions feature:
<screenflowConfig ...>
<global ...>
<features>
<feature name="guidePermissions" enabled="true"/>
...
</features>
...
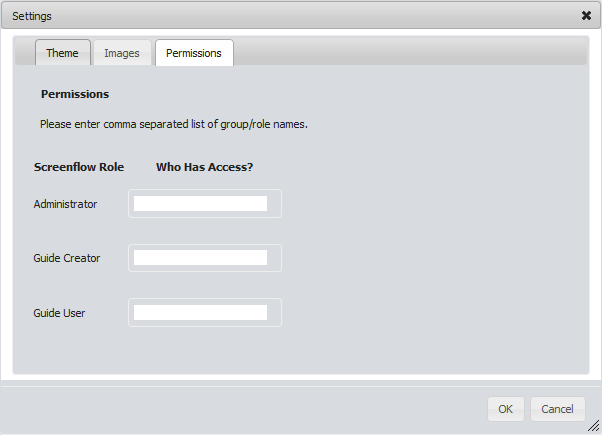
Now that this is set, users will see the following dialog when displaying the Settings dialog from the guide designer's toolbar.
Any user who has access to Process Designer will then be able to make changes here that affect the privileges that a user has for guides.
The permissions allow the following access:
- •Administrator: Has full access to guides; that is, an administrator can create and run guides, and can see and use this Permissions tab. Only administrators can see and use the Terminate Running Guides button that appears when a guide is selected in the upper-right panel displayed when the Designs pane is being displayed.
- •Guide Creator: Can create and run guides; however, users in this role do not see the Permissions tab.
- •Guide User: Can only run guides.
The settings made by users in this dialog do not affect permissions for accessing guides in the Forms pane.
Setting Permissions in an .avcconfig File
When you add an .avcconfig file that is associated with forms, you can set roles for who can access information. Here's an example that allows users in the three named roles to access forms.
<tns:requestCategoryDefs>
<tns:requestCategoryDef id="requestcategory_guides_launchpad"
name="${requestcategory_guides_launchpad}">
<avccom:requestDef id="hello-world" name="Guide In Form">
<avccom:allowedRoles>
<avccom:role>abAdmin</avccom:role>
<avccom:role>abDeveloper</avccom:role>
<avccom:role>loanreps</avccom:role>
</avccom:allowedRoles>
...
The settings made by users in this dialog do not affect permissions for accessing guides in the Forms pane.
An application can have more than one .avcconfig file. For example, you may have a second one that defines permissions for information in the Reports pane.
The order in which the Process Server uses the information in .avcconfig files is alphabetical. This means that the elements in one file can overwrite elements in another. You can see this order by selecting Catalog | Resources | Central Configs from within the Process Console. If one of your files is inadvertently overriding another, you will need to change the file's name to change the execution order.
Designer Properties
The designer element allows for configuration of designer-specific properties. Currently, the only child element that you can use is helpLink. The text node value of helpLink should be a URI that points to a help document. The URI may be relative, an absolute HTTP, or project:/ path.
Object Descriptions
The objects in your host application must be described to Guide Designer in order for their fields to be rendered. Each object is described in an entityDetail document as described by the XML schema provided by the Process Designer SDK. There can be an entityList document that acts as an index for each object you describe.
If you do not deploy an entityList, and use the default host environment service, an entityList document is generated dynamically at runtime by discovering all deployed entityDetail documents in the catalog. If you override the entityIndex global configuration property with a project: value, you must use an entityList.
An object detail contains information about:
- •The name of the object in the host
- •Labels used to present the object to guide creators
- •The object's fields
- •Any relationships between the object and other objects on the host
The objects and entities named in this paragraph are highlighted in bold in the code example that follows.
The sample account object (which is the next example) defines an object named accounts which is displayed to guide designers as Account or Accounts, and has a primary key field called AccountId. In addition, the account object has two additional fields besides the primary key called Name and AccountNumber. Finally, this object has a relationship with another object named contacts.
Code Example: Sample Account Object
<host:entityDetail
xmlns:host=
"http://schemas.active-endpoints.com/appmodules/
screenflow/2011/06/avosHostEnvironment.xsd"
xmlns:comm="http://schemas.active-endpoints.com/
appmodules/screenflow/2011/07/avosCommon.xsd"
name="accounts"label="Account"labelPlural="Accounts"
objectIdField="AccountId">
<host:detail>
<host:childRelationship childSObject="contacts"
field="AccountId" relationshipName="ctct_to_acct" />
<host:field label="AccountId" name="AccountId"
required="true" type="id">
<host:options>
<host:option name="length">36</host:option>
</host:options>
</host:field>
<host:field label="Name" name="Name" required="false"
type="string">
<host:options>
<host:option name="length">45</host:option>
</host:options>
</host:field>
<host:field label="AccountNumber" name="AccountNumber"
required="false" type="string">
<host:options>
<host:option name="length">10</host:option>
</host:options>
</host:field>
</host:detail>
</host:entityDetail>
Code Example: Sample Index
The following code example shows how an entityList document could be created to index all deployed objects. This index provides the minimal amount of metadata about each entity so that all entities are not required to be loaded by the client until they are actually used in a guide.
Each entity element in the index contains all the same attributes as is found in each entityDetail element in the entity detail document in this code example. There is an additional attribute: objectLocation. It provides a URI to the detail document that defines the entire object. If the objectLocation attribute is missing, the entity detail must exist in the same directory as the entityList and the filename must be the entity name with an .xml extension; for example, accounts.xml.
<host:entityList
xmlns:host="http://schemas.active-endpoints.com/
appmodules/screenflow/2012/09/avosObjectDiscovery.xsd">
<host:entity name="accounts" label="Account"
labelPlural="Accounts"
updateable="true" objectIdField="AccountId"
objectLocation="./accounts_detail.xml">
</host:entity>
<host:entity name="contacts" label="Contact"
labelPlural="Contacts" updateable="true"
objectIdField="ContactId"
objectLocation="./contacts_detail.xml">
</host:entity>
</host:entityList>
Entity Relationships
Defining relationships allows guide designers to read and update data from objects related to the object they are currently operating on. In order for the Guide Designer editor to display these relationships, they must be defined in the entity detail. In the following code example, the childRelationship element defines the inverse side of the relationship; in contrast, the owning side of the relationship defines a reference to the relationship by defining a field with a type of reference and using its options to define referenceTo and relationshipName.
Code Example: Sample Contact Object
<host:entityDetail
xmlns:host="http://schemas.active-endpoints.com/
appmodules/screenflow/2011/06/avosHostEnvironment.xsd"
xmlns:comm="http://schemas.active-endpoints.com/appmodules/
screenflow/2011/07/avosCommon.xsd" name="contacts"
label="Contact" labelPlural="Contacts"
objectIdField="ContactId">
<host:detail>
<host:field label="ContactId" name="ContactId"
required="true" type="id">
<host:options>
<host:option name="length">36</host:option>
</host:options>
</host:field>
<host:field label="Name" name="Name" required="false"
type="string">
<host:options>
<host:option name="length">45</host:option>
</host:options>
</host:field>
<host:field label="AccountId" name="AccountId"
required="true" type="reference">
<host:options>
<host:option name="referenceTo">Account</host:option>
<host:option
name="relationshipName">ctct_to_acct</host:option>
</host:options>
</host:field>
</host:detail>
</host:entityDetail>
If this accounts object was mapped to an SQL database, the contacts table would define the foreign key in which contacts AccountId references the accounts table's AccountId column.
At runtime, requests for data from the data services can contain relationship names as part of the field name using the period character as a delimiter between the relationship and field name. For example, a request for a field for an object might be relationshipName1, in which case the host provider will need to resolve relationshipName1 to an object reference and perform a join in order to file the name value. There may be more then one relationship name in the requested field; for example, relationship1.relationship2.phoneNumber.
Data Services
The data services layer is where Process Designer interacts with the objects in your host application. It has five basic operations: create, read, update, delete (CRUD), and query. These must be implemented by a host provider so that the guides can operate on objects during runtime. These data services are only used at guide runtime to read and alter data.
Process Designer only attempts to call read, update, and query operations upon your data service.
Note: We recommend that you implement all five operations as they are implemented in future releases of Process Designer in addition to providing your service call steps and search services a single point of execution for invoking create or delete of objects.
The data service supports batch requests for each operation in order to optimize the number of hits against the host application.
A core concept for objects is that each object instance has an ObjectId that uniquely identifies it, and it may have an ObjectName that is used to render it on the screen in place of the ObjectId. In the sample message shown in the Read and Query operation discussions, you'll notice that the ObjectName is always returned regardless of whether the request message specified that the field should be returned.
Create
Create is currently not used by the Process Designer framework. However, it is reserved for future use. We recommend that customers implement this operation for use by their custom create services.
The create operation is called when an entity needs to be created in the host. A create request specifies the type of object, the field name, and a value for each field in the object. Only fields in the entity detail marked as required are required to create an entity. An example input message is provided in the Create Message code example. The response from a create request (the create response message code example) is simply an element with an attribute defining the object ID of the newly created object. Optionally in the response, there can be child elements with rollback details.
Code Example: Create Message
<types1:create objectType="account_tasks">
<types1:fieldValue name="Assigned To ID">
4de025c6-354e-481e-84b9-fbf315486d26</types1:fieldValue>
<types1:fieldValue name="Subject">Task assigned by </types1:fieldValue>
<types1:fieldValue name="Description">sfd</types1:fieldValue>
<types1:fieldValue name="Due Date">2012-10-29T16:00:00Z
</types1:fieldValue>
<types1:fieldValue name="Status">Not Started</types1:fieldValue>
<types1:fieldValue name="Priority">Normal</types1:fieldValue>
</types1:create>
Code Example: Create Response Message
<types1:createResponse
id="24db9f6f-2f66-4a19-915e-c9002faf0a11"
objectType="account_tasks"/>
Read
The read operation reads an entity using its object Id and object type. This operation can only return a result of a single object for the ID supplied. In addition, only the fields requested in the read request are returned in the read response. The following code example provides a simple read request message where the FirstName, LastName, and referenced AccountName fields are requested for a single contact from the contacts objectType.
Code Example: Read Message
<avosHost:read name="$default" objectType="contacts">
<avosHost:id>925cdc8b-f8e5-467e-ad1b-9270afb97b8f
</avosHost:id>
<avosHost:field>FirstName</avosHost:field>
<avosHost:field>LastName</avosHost:field>
<avosHost:field>AccountId2.Name</avosHost:field>
</avosHost:read>
In the case of the sample project, this request is to the following SQL statement:
SELECT c.FirstName, c.BusinessPhone, a.Name
FROM contacts c
INNER JOIN accounts a on c.AccountId = a.AccountId
WHERE c.ContactId = '925cdc8b-f8e5-467e-ad1b-9270afb97b8f'
Code Example: Read Response Message
The response message shown in the next code example returns the requested fields along with the objectId of the object that was read. Each fieldValue specifies the name of the field along with the field value as a text node. fieldValue elements can supply a displayName attribute with a Boolean value specifying if the field can be used in place of the ObjectId when rendering the object on screen. If the metadata description for the object being read defines a fieldForDisplay attribute, the read response should return a fieldValue with the displayName field's attribute
<types1:readResponse id="925cdc8b-f8e5-467e-ad1b-9270afb97b8f"
name="$default" objectType="contacts">
<types1:fieldValue
name="FirstName">Mark</types1:fieldValue>
<types1:fieldValue
name="BusinessPhone">111-222-5555</types1:fieldValue>
<types1:fieldValue displayName="true"
name="LastName">Ford</types1:fieldValue>
<types1:fieldValue
name="AccountId2.Name">Acme Inc.</types1:fieldValue>
</types1:readResponse>
Update
Update requests are issued by guides during runtime for each updateable field on a guide screen. The request contains the ID of the object being updated in addition to the fields and values being updated.
Code Example: Update Message
<host:update objectType="contacts"
xmlns:host="http://schemas.active-endpoints.com/
appmodules/screenflow/2011/06/avosHostEnvironment.xsd">
<host:id >925cdc8b-f8e5-467e-ad1b-9270afb97b8f</host:id>
<host:fieldValue name="FirstName">Mark</host:fieldValue>
<host:fieldValue name="LastName">Lords</host:fieldValue>
<host:fieldValue name="Email">mark@myemail.com</host:fieldValue>
</host:update>
The response for an update message is simply an empty updateResponse element. Optionally, it can have rollback instructions.
Query
A query operation is essentially a read operation on the host provider; however, it isn't limited to reading a single object. Query requests can provide complex WHERE clause statements that filter objects by any of the object's field. Other query options, besides a WHERE clause, can query by the ObjectName or a collection of object Ids.
Code Example: Query Response
The following example queries for the first and last name of the three objects defined in the id element. The response for this query request will result in three items returned.
<ns:query limit="100" name="Object Query" objectType="contacts"
xmlns:ns="http://schemas.active-endpoints.com/appmodules/
screenflow/2011/06/avosHostEnvironment.xsd">
<ns:field>FirstName</ns:field>
<ns:field>LastName</ns:field>
<ns:id>925cdc8b-f8e5-467e-ad1b-9270afb97b8f</ns:id>
<ns:id>b6f0f0b2-9f38-4771-8365-58eb4f7b7d41</ns:id>
<ns:id>d75e2a5e-6ae2-44e2-b3df-ea10b6b17d82</ns:id>
</ns:query>
The following query request looks for contacts objects that contain a "D" in their display name.
<ns:query limit="100" name="Object Query" objectType="contacts"
xmlns:ns="http://schemas.active-endpoints.com/appmodules/
screenflow/2011/06/avosHostEnvironment.xsd">
<ns:field>FirstName</ns:field>
<ns:field>LastName</ns:field>
<ns:name exactMatch='false'>D</ns:name>
</ns:query>
The following query looks for contacts with a first name property containing "B" and which is associated with AccountId 13.
<ns:query limit="100" name="Object Query" objectType="contacts"
xmlns:ns="http://schemas.active-endpoints.com/appmodules/
screenflow/2011/06/avosHostEnvironment.xsd">
<ns:field>FirstName</ns:field>
<ns:field>LastName</ns:field>
<ns:where>FirstName like '%B%' and AccountId = 13</ns:where>
</ns:query>
Code Example: Query Response Return
The response for the queries in the three previous code examples return response messages that looks something like what is shown in the next code example. Each entry in the query returns a fieldValue for each field requested and additionally marks the fieldValue that serves as the ObjectName with a displayName attribute of true.
<types1:queryResponse name="Object Query" objectType="contacts">
<types1:entry id="925cdc8b-f8e5-467e-ad1b-9270afb97b8f">
<types1:fieldValue
name="FirstName">Mark</types1:fieldValue>
<types1:fieldValue displayName="true"
name="LastName">Ford</types1:fieldValue>
</types1:entry>
<types1:entry id="b6f0f0b2-9f38-4771-8365-58eb4f7b7d41">
<types1:fieldValue
name="FirstName">John</types1:fieldValue>
<types1:fieldValue displayName="true"
name="LastName">Acme</types1:fieldValue>
</types1:entry>
<types1:entry id="d75e2a5e-6ae2-44e2-b3df-ea10b6b17d82">
<types1:fieldValue
name="FirstName">Joe</types1:fieldValue>
<types1:fieldValue displayName="true"
name="LastName">Biden</types1:fieldValue>
</types1:entry>
</types1:queryResponse>
Rollbacks
A rollback undoes the changes made to objects when a guide user navigates back to the step that made the change. For example, if the first step changes the name field of an object, the object is updated as soon as the user navigates to the second step. If the user goes back to the first screen, a rollback reverses the name change.
The operations that support rollbacks are those that mutate objects: create, update, and delete. The rollback segment of rollback response messages allows a custom user-defined service to be named to undo work already done.
The Process Designer framework does not automatically handle rollback segment creation. This means that it does not call a delete on your data server to undo a create operation.
Code Example: Rollback
Items in bold text are discussed in the paragraph following this example.
<aetgt:createResponseWrapper
xmlns:aetgt="http://schemas.active-endpoints.com/
appmodules/screenflow/2011/06/avosHostEnvironment.xsd"
xmlns:types1="http://schemas.active-endpoints.com/
appmodules/screenflow/2011/06/avosHostEnvironment.xsd"
xmlns:xsd1="http://schemas.active-endpoints.com/
appmodules/screenflow/2010/10/avosScreenflow.xsd">
<types1:createResponse
id="24db9f6f-2f66-4a19-915e-c9002faf0a11"
objectType="account_tasks">
<xsd1:onRollback deleteCount="1">
<xsd1:serviceName>dbDeleteAnyEntityService
</xsd1:serviceName>
<xsd1:avosServiceName>dbDeleteAnyEntityService
</xsd1:avosServiceName>
<xsd1:runAsUser/>
<aesf:hostContext
xmlns:aesf="http://schemas.active-endpoints.com/
appmodules/screenflow/2010/10/avosScreenflow.xsd"
xmlns:aetgt="http://schemas.active-endpoints.com/
appmodules/screenflow/2010/10/avosScreenflow.xsd"
xmlns:sf="http://schemas.active-endpoints.com/
appmodules/screenflow/2010/10/avosScreenflow.xsd">
<aesf:arg name="ObjectType">contacts</aesf:arg>
<aesf:arg name="ObjectId">
925cdc8b-f8e5-467e-ad1b-9270afb97b8f</aesf:arg>
</aesf:hostContext>
<xsd1:parameters>
<xsd1:parameter
name="ObjectType">account_tasks</xsd1:parameter>
<xsd1:parameter
name="ObjectId">24db9f6f-2f66-4a19-915e-c9002faf0a11
</xsd1:parameter>
</xsd1:parameters>
</xsd1:onRollback>
</types1:createResponse>
</aetgt:createResponseWrapper>
This example declares that the Process Designer framework will execute the dbDeleteAnyEntityService service provided in the sample, and delete the account_tasks ObjectType where the account_task object has an ObjectId of "24db9f6f-2f66-4a19-915e-c9002faf0a11". The host context arguments and the runAsUser element is additional metadata that can be used by your service when executing the delete.
Automated Steps
Service Call steps can interact with systems using data provided by guide during guide runtime. These steps have no visual component to them during runtime.
See the Service Call documentation elsewhere in this help.
Search Services
Search services can dynamically populate data (for users to choose from) on the screen, at runtime. They only apply to updateable fields on the screen. Most often, search services fill picklists and tables with values that the user will choose from. They can also be used for fields that accept a single value or those that accept multiple values.
Search services are especially useful if the list of values to choose depends on other user choices on the same screen. For example, say you want two fields on the screen: one to pick a state and one to pick a city. In this case, when a user selects a state, the list of cities within the state can be dynamically populated by a search service.
Creating a Search Service
A few search services are provided with Process Designer. A search service can be implemented using a BPEL process.
A search service is defined in an XML file (typically services.xml) indicating the service name, input and output parameters, and a few other details.
<searchService name="service:/avosObjectQuerySearchService">
<displayName>Object Query</displayName>
<description>Querying of objects is done by specifying zero or more
<expressions as a WHERE clause. The results of the query are displayed
<as a table or as a dropdown, depending on the number of display
<columns used.</description>
<mode name="modes" />
<input>
<parameter
name="Where Clause"
type="whereclause"
required="false"
description="A description for the search service." />
<parameter name="Domain" required="false" type="string"
description="QC Domain"/>
</parameter>
</input>
<searchOutput type="reference">
<options>
<option name="referenceTo"></option>
</options>
</searchOutput>
</searchService>
Here are definitions of elements you can use:
- •mode element: Indicates when the search service should be invoked. If it is not specified, the search service is only used or invoked at runtime. However, if the search service can also be used at design time for populating input parameters in the editor or used when simulating or previewing the guide, add this element. Supported modes are designtime. simulation, preview, and runtime.
- •input section: Describes the parameters expected by the search service.
- •searchOutput section: Describes the data type for which the search service is applicable. This allows for showing a filtered list of search services at design time.
- •reference type: The search service should support the display-options parameter. It could contain a list of columns for which search values are returned.
Implementing a Search Service Using a BPEL Process
To implement a search service using a BPEL process, create a process using the Guide Designer List system service which has the List Operations WSDL interface and a list operation. As easy way to get started is to look at the sample search service in the starter project.
The name of the search service should be the Guide Designer process service name having a service:/ prefix.
Implementing a Search Service Using a REST Service
TBD.
Built-in Search Services
The search services included with Process Server are:
- •Object Query: Used to query for objects using a WHERE clause. This search service can be used for fields of type reference.
- •Advanced Query: Used to query for any arbitrary list of values. This search service can be used for fields of type reference.
- •List Child Objects: If your data model supports parent-child relationships, this search service can retrieve list of children of a specified type. This search service can be used for fields of type reference.
Data Types and the Repository API
This section describes the following:
- •Built-In Data Types
- •Custom Data Types
- •Process Designer Repository API
Built-In Data Types
Process Designer ships with a variety of supported data types along with a default renderer for each. Data types can be customized with a variety of options that affect how a field is rendered and validated.
Type: boolean
The boolean data type supports rendering of true/false data in either a check box control or a pair of radio buttons with the labels Yes/No or No/Yes. Options are as follows:
Option Name | Description |
boolean_show_as | Choose how the boolean is rendered. Choices are: - - Checkbox
- - Yes/No
- - No/Yes
|
Type: currency
The currency data type extends the base type double and inherits all the options supported by double. It also has the following options:
Option Name | Description |
scale | The maximum number of digits to the right of the decimal point. If you enter 0, there cannot be digits to the right of the decimal point. The default is 2 |
Type: date
The date data type renders a date picker control to choose a date that does not have a time component. There are no options to this data type.
Type: datetime
The datetime data type renders a date/time picker control to choose a date and time. There are no options to this data type.
Type: double
The double data type can contain fractional portions. Options are as follows:
Option Name | Description |
precision | Total number of digits, including those to the left and the right of the decimal place |
scale | Maximum number of digits to the right of the decimal place |
hover_text | Tool tip value displayed when a user hovers over the control |
min | The minimum value allowed |
max | The maximum value allowed |
Type: email
An email data type contains an email address.
Type: formatted string
The formattedString data type has a base type of string so it inherits all of its options. It also has the following options:
Option Name | Description |
format | A custom format; see http://digitalbush.coojects/masked-input-plugin/ for supported formatting syntax |
Type: id
The id type is used to for ObjectId fields. This type extends the base string type, so it inherits all of its options. It also has the following options:
Option Name | Description |
referenceTo | The "name" of the object defining the ID field. |
display_as_name | Boolean value indicating if the ObjectId or object name is rendered on screen. |
Type: int
The int data type contains numbers with no fractional portion. Options are as follows:
Option Name | Description |
digits | The maximum number of digits that an integer can have |
hover_text | Tool tip value displayed when a user hovers over the control |
min | The minimum value allowed |
max | The maximum value allowed |
Type: multipicklist
The multipicklist data type is a picklist from which one or more values can be selected and includes a set of enumerated values. This type extends picklist. Options are as follows:
Option Name | Description |
multiSelect | When set to true, multiselection within picklists can be used |
Type: objectlist
An objectlist data type represents one or more object reference. It extends the base type picklist. It also has the following options:
Option Name | Description |
referenceTo | The name of the object the ObjectList will reference |
display-options | A complex JSON structure that contains columns to display and any pagination and filtering options when references are stored in a data table. |
multiSelect | When set to true (which is the default), multiple values can be selected from the picklist |
Type: percent
The percent data type extends the base type double and inherits all the options supported by double. It also has the following options:
Option Name | Description |
precision | The maximum number of digits in the number. The default: 5. |
scale | The maximum number of digits to the right of the decimal point. If you enter 0, there are no digits to the right of the decimal point. The default: 2. |
min | The minimum percent value. The default: 0 |
max | The maximum percent value. The default: 100 |
Type: phone
The phone data type contains phone numbers, which can include alphabetic characters. A guide's designer is responsible for phone number formatting.
Type: picklist
The picklist data type is a list or choice that is rendered as an HTML option list. The picklist type extends the string base type. It also has the following options:
Option Name | Description |
values | Picklist values in the form of the picklist element type. This is a comma-separated list of the items in the list. |
Type: reference
The reference data type is used when a field refers to the ObjectId of another object, which makes the referenceTo option required and the value will be the name of the object being referred to. The base type of reference is id, so it inherits all of the id and string options plus those shown in the following table:
Option Name | Description |
display-options | A complex JSON structure that contains columns to display and any pagination and filtering options when references are stored in a data table |
Type: richtextarea
A richtextarea data type extends the base textarea type and supports rich formatting of text. It also has the following options:
Option Name | Description |
text_width | The width of the text area relative to the guide's width. |
text_height | The number of rows within the area the guide displays into which the user can type text. |
length | The maximum number of characters that can be entered in the text area. |
text_size | The size of the displayed text. |
Type: string
Character strings are of data type string and contain text. Some have length restrictions, depending upon the data being stored. Options are as follows:
Option Name | Description |
text_size | Font size of the text on the screen |
hover_text | Tool tip value displayed when a user hovers over the control |
length | The number of characters in the string |
Type: textarea
A textarea type extends the base string type, so it inherits all of the string option. It also has the options shown in the following table:
Option Name | Description |
text_width | The width of the text area relative to the guide's width. |
text_height | The number of rows within the area the guide displays into which the user can type text. |
length | The maximum number of characters that can be entered in the text area. |
text_size | Font size of the text on the screen |
Type: time
A time data type handles time values.
Type: url
A url data type contains a URL. Options are as follows:
Option Name | Description |
urlDisplayReadonlyAs | Your choices are Link, Button, or IFrame |
urlDisplayReadOnlyLabel | Text that identifies the contents of the field. |
frame_height | The height of the area in which the URL's target is displayed. |
frame_width | The width of the area in which the URL's target is displayed. |
Custom Data Types
Custom data types allow for custom rendering of fields in your entity. They also allow Process Designer to do type matching; this provides the guide developer more appropriate choices when mapping data to fields. For example, if the input to a service call step requires an email type, the Guide Designer editor will only show you options for the email type.
The sample project has an example of creating a custom type with a custom renderer. If you want to use an existing renderer with a new data type, override a base type and do not add a renderer. This means that your new data type inherits the renderer from its base type.
The following is an example of specifying an accountNumber type that has a base type of string. Even though this new type will render as a string during design time, guide developers will have more relevant data mappings for it.
Code Example: Sample Custom Data Type
<tns:type name="accountNumber" base="string"
label="Account Number">
<tns:description>Account Number</tns:description>
</tns:type>
ScreenFlow Repository API
The sample project has a sample that uses the repository JavaScript API to query Process Designer for guides, and which are then displayed to your end users so they can choose one to execute. This repository API is useful if your application needs to dynamically present users with a list of available guides in menu form.
The following sample function queries for all guides using the getEntries() activevos.socrates.screenflow.central.repository.AeScreenFlowRepository function. getEntries() takes two arguments:
- •filter, which is currently not implemented.
- •A callback function that is called when the Ajax request completes. It receives an array of Item objects whose properties are shown in the Sample Item Object code sample.
Code Example: Query for Guides
function() {
var repo = new activevos.socrates.screenflow.central.
repository.AeScreenFlowRepository();
var filter = null; // currently not used
repo.getEntries(filter,
function(aSuccess, aItemList) {
if (aSuccess) {
for (var i = 0; i < aItemList.length; i++) {
var item = aItemList[i];
}
}
});
};
Code Example: Sample Item Object
{
"Item" : {
"EntryId" : { "$t" : "" },
"Name" : { "$t" : "" },
"MimeType" : { "$t" : "" },
"Description" : { },
"AppliesTo" : { "$t" : "" },
"Tags" : { },
"VersionLabel" : { "$t" : "" },
"State" : { "$t" : "" },
"ProcessGroup" : { },
"CreatedBy" : { "$t" : "" },
"CreationDate" : { "$t" : "" },
"ModifiedBy" : { "$t" : "" },
"ModificationDate" : { "$t" : "" },
"PublishedBy" : { "$t" : "" },
"PublicationDate" : { "$t" : "" },
"PublishedContributionId" : { "$t" : "" },
"AutosaveExists" : { "$t" : "" }
}
}
Image Resources
If you wish to provide images to guide designers, you must package them into the contribution being deployed along with a screenflowContribution metadata file. In the following code example, the metadata file is providing a single image with a display name of "Image 1" located in the same directory as the metadata file. The image resource content-type is also specified with the type attribute.
Code Example: Image Metadata
<tns:screenflowContribution
xmlns:tns="http://schemas.active-endpoints.com/
appmodules/screenflow/2011/07/avosResourceDiscovery.xsd">
<tns:resource name="image-1.jpg" type="image/jpg">
<tns:displayName>Image 1</tns:displayName>
<tns:resourceURI>image-1.jpg</tns:resourceURI>
</tns:resource>
</tns:screenflowContribution>
Guide Embedding and the Forms Viewer
Embedding a guide into your application involves adding an HTML IFrame with the source attribute set to the URL for your guide. The guide URL will include query string arguments that allow for the hosting application to provide additional parameters about the current guide user, the object the guide will execute upon, and even the hosting application itself.
The URL for the guide runtime is:
http://localhost:8080/activevos-central/avc/formviewer/
project:/com.activevos.socrates.central/web/viewer.html
You should replace replace localhost and port 8080 with those used by your servert
You can add query string parameters to this URL. For example the following adds the avsf_sflow_uri parameter that names the location of a published guide whose location is project:/sf.Custom_Guide/Custom_Guide.xml.
The full URL will look like:
http://localhost/activevos-central/avc/formviewer/project:
/com.activevos.socrates.central/web/
viewer.html?avsf_sflow_uri=project:
/sf.Custom_Guide/Custom_Guide.xml
You can add additional query string arguments to ensure that users can only have one running instance of a guide for an object and to provide context about the hosting application.
Here is a description of all query string parameters that the viewer application uses:
- •avsf_sflow_uri: The URL-encoded value of guide's published contribution URI, as was shown in the example.
- •correlationId: An optional correlation ID for the guide. The ID is a value the application developer provides. It can have any unique string value. If you do not specify one, the server will create and use one. For example, Cloud Extend (an implementation that runs within Salesforce) uses the following formula:
correlationId = Salesforce org ID + object id (for example, an account) + guide ID (or name)
After a guide is launched, you can reuse this correlation ID (since it can be recalculated) to select the same guide instance when the user reloads or revisits the web page.
- •host-ObjectType: The host entity type such as an account or contact.
- •host-ObjectId: The object (for example, an account or a contact) ID or a primary key.
- •host-UserId: The currently logged in username. In Process Server, you can use the JavaScript AE_ACTIVEVOS_PRINCIPAL_NAME global.
Guide Correlation
You may want to prevent a user from starting more than one guide that operates upon on a single object at a time. Use correlation to ensure that a user will rejoin any existing executing guides for the object. By setting the correlationId query string argument to a value, you can ensure that a user will always re-enter an existing executing guide. A good correlation is one that can reliably be reconstructed even if the user logs out and back into the host system.
Host Context Locale and Time Zone
The host context is data provided by the host application that is accessible to the Guide Designer framework and is passed to all Service Call steps, as well as data provider and search service processes.
Setting Up the Host Context
This host context data is essentially a key/value pair of strings that contain additional data about the host application, guide user, embedding application, and so on. These parameters are provided to a guide during runtime by adding a host- prefix (notice the hyphen used as a suffix) to the parameter's name and passing them as query string arguments on the guide URL. For example, if your host provider implementation requires an argument for embedding an application ID named AppId, you would add the following to the guide URL: host-AppId=someValue.
Three host context parameters names are reserved by Guide Designer and may be required when embedding or executing your guide.
Name | Description |
|---|
ObjectType | This is required if your guide applies to an object. It is not required if your guide applies to any object (that is, it is not directly associated with an object). The value is the name of the object. |
ObjectId | This is required if your guide applies to an object. It is not required if your guide applies to any object. The value is the ID of the object the guide will execute on. |
UserId | This is optional, but may be used to set the Current User for the current guide. This may be useful if the ID for the embedding application needs to be translated to something else for guide execution. |
ExtraInfo | Additional metadata made available to reports for filtering or sorting. |
So to set the ObjectType to contacts, your embedded URL would contain a query string argument like host-ObjectType=contacts. At runtime, the hostContext element would contain an arg element with a name attribute of ObjectType and a text node value of contacts.
Setting the User's Locale
You can set user locale information to your application by using the host-UserLocale URL parameter; for example:
host-UserLocale=en_US
The arguments to host-UserLocale are those defined in the ISO 639 standard.
Setting the User's Time Zone
You can set the time zone for your application by using the host-UserTimeZone URL parameter; for example:
host-UserTimeZone=America/Los_Angeles
The arguments to host-UserTimeZone are those defined within the tz_database; see http://en.wikipedia.org/wiki/List_of_tz_database_time_zones for more information.
Setting Business Days in a Calendar
When setting a dates, you may want your users to set date intervals using business days rather than normal calendar days. While Guide Designer does understand that a business week differs from a normal week in that it only has five days, it doesn't know what holidays your company offers. Set your company's holidays using a HolidayCalendar element. Here's an example:
<HolidayCalendar xmlns="http://schemas.active-endpoints.com/appmodules/screenflow/2012/12/avosHostCalendar.xsd">
<WeekendDay name="Saturday" dayOfWeek="Saturday" endDate=""/>
<WeekendDay name="Sunday" dayOfWeek="Sunday"/>
<AnnualMonthDayHoliday name="New Year's Day" month="January" day="1" weekendMoveToNext="Monday"/>
<AnnualDayOfWeekInMonthHoliday name="President's Day" month="February" dayOfWeek="Monday" occurance="Third"/>
<AnnualDayOfWeekInMonthHoliday name="Memorial Day" month="May" dayOfWeek="Monday" occurance="Last"/>
<AnnualMonthDayHoliday name="Independence Day" month="July" day="4" weekendMoveToNext="Monday"/>
<SpecificDateHoliday name="Day After Independence Day" startDate="2013-07-05"/>
<AnnualDayOfWeekInMonthHoliday name="Labor Day" month="September" dayOfWeek="Monday" occurance="First"/>
<AnnualDayOfWeekInMonthHoliday name="Columbus Day" month="October" dayOfWeek="Monday" occurance="Second"/>
<AnnualDayOfWeekInMonthHoliday name="Thanksgiving" month="November" dayOfWeek="Thursday" occurance="Fourth"/>
<AnnualDayOfWeekInMonthHoliday name="Day After Thanksgiving" month="November" dayOfWeek="Friday" occurance="Fourth"/>
<AnnualMonthDayHoliday name="Christmas Day" month="December" day="25"/>
</HolidayCalendar>
Notice the avosHostCalendar.xsd namespace. If this isn't declared, Guide Designer will not know that this is a calendar file.
After you deploy your XML file, Guide Designer will understand your company's holidays.
Object Linking to Host Application
If your host application has landing pages for the objects in the application, you may want to provide HTML links in the guide to the objects page in the host application. For example, an object whose ObjectId is 123 can be accessed in the hosting application using the following URL: http://hostapp.net/objects/123. This link would then appear in the guide.
You will need to create a JavaScript function that can build a URLs from the Object Id. The following code examples shows uses the Object Id to build and return the URL. The getLinkToObject function is also passed the host context in case additional information about the host is needed to build the URL.
Code Example: Link Builder Sample
You must assign your builder to activevos.socrates.screenflow.data.renderers.provider so that it can be discovered at runtime. This is shown in the second to last line in the following example.
(function($){
activevos.util.createAvosPackage("hostapp.link.generator");
function MyLinkBuilderUtil() {
this.getLinkToObject = function(aHostContext, aId) {
return "http://hostapp.net/objects/" + aId;
};
}
activevos.socrates.screenflow.data.renderers.provider =
new MyLinkBuilderUtil();
})(jQuery);
Code Example: Configuration to Deploy Link Builder
The following is an example of the Process Central configuration file required to deploy your custom JavaScript function into a guide.
<tns:avosCentralConfiguration
xmlns:tns="http://schemas.active-endpoints.com/avc/
2009/07/avoscentral-config.xsd" >
<tns:centralIncludes>
<script xmlns="http://www.w3.org/1999/xhtml"
src="link-builder.js"></script>
</tns:centralIncludes>
</tns:avosCentralConfiguration>
Embedding Guide Designer
An HTML IFrame can also be used to embed the Guide Designer into your application using the following URL:
https://localhost:8080/activevos-central/avc/avc.jsp
By default, this URL embeds all of Process Central with all of Central's additional UI components. Use the aeembed=true query string parameter to remove the Central header. If you wish to remove Human Task, Forms, and Reports from Central set the aemgrs=socrates query string parameter.
Sample Project Guides
The sample project models a CRM that is similar to Salesforce.com that uses an SQL database as the host application in which Process Designer operates. All guides operate on one or more entities that are contained within database tables. Here is the schema for these entities:
Desktop Set
- •Sales Call with Contact Prompt: Prompts the user for a contact and then runs the Sales Call Follow-up (Mobile) embedded guide.
- •Sales Call Follow-up: After a meeting ends, users can enter new action items, notes, contacts, and opportunities. They can also set follow-up action items for themselves and others.
Logging into Guide Designer
You can access Process Designer from Process Central. Start the Process Server and then open Process Designer by typing a URL into a browser that supports HTML 5--most modern browsers except for Internet Explorer 7 and 8 do.
http://[host]:[port]/activevos-central
The default is http://localhost:8080/activevos-central.
Log in with a user name and password defined in your identity service. For example in the server embedded in Process Developer, you can log in with loanrep1/loanrep1.
Process Designer editors are accessed using the Designs pane.
Note: Every guide developer must be assigned to the abTaskClient security role. If the Process Server is secured, users must also be assigned to the abServiceConsumer security role. If your server is secured and you do not have this role, Process Server displays a 403 transport error and you will see network errors from avMetaInfoAccessService and avThemeDiscovery. Also, an administrator can change the guidePermissions feature element within app-config.xml so to set permissions. When set to true, the Settings dialog box within the Design Home toolbar has a Permissions tab.
What is a Guide Designer Automated Step
A Guide Designer guide is built with steps. There are only a few step types, such as a screen step in which there is a prompt and answers that automatically create new steps.
A Service Call step is another step type. This is described in the Service Call discussion elsewhere in this help. This topic looks at creating services using Process Developer.
The steps for creating an a service call step are:
- 1. Create a new BPEL process.
- 2. In the Participants view, create a new Process Service Consumer based on the Process Designer system service.
- 3. Build the process to do something required by a guide. A process's requirements include:
- - Defining the input for the service. This can be required and user-defined data, and it can either be simple or complex. Process Designer editors can add their own data by defining fields in the Properties dialog.
- - Setting response messages from the service.
- - Naming the resources the guide will use, such as images.
- - Creating the HTML renderings for complex data types.
- 4. Create the services.xml file for the service all step service descriptor.
Note: For additional getting started resources, create a new orchestration project and select the Guide Designer Customization Starter template.
Using the Automated Step Request Response and Fault Messages
Your first step is to create a Process Service Consumer with the service call system service, as follows:
- 1. In the Participants view, create a new Process Service Consumer.
- 2. Select System Services from the Interfaces tree.
- 3. Select Guide Designer Automated Step.
- 4. Drag the automatedStep operation to the canvas to create a receive-reply pair of activities.
Request Message
Note: In earlier releases, service call steps were called automated steps.
The following sample data shows an example of the request message:
<xsd1:automatedStepRequest
xmlns:xsd1="http://schemas.active-endpoints.com/appmodules/
screenflow/2010/10/avosScreenflow.xsd">
<xsd1:userId>string</xsd1:userId>
<xsd1:correlationId>string</xsd1:correlationId>
<xsd1:serviceName>string</xsd1:serviceName>
<!--Optional:-->
<xsd1:avosServiceName>string</xsd1:avosServiceName>
<!--Optional:-->
<xsd1:avosStepTitle>string</xsd1:avosStepTitle>
<!--Optional:-->
<xsd1:hostContext>
<!--Optional:-->
<xsd1:arg name="string"/>
</xsd1:hostContext>
<!--Optional:-->
<xsd1:parameters>
<!--Optional:-->
<xsd1:parameter name="string"/>
</xsd1:parameters>
<!--Optional:-->
<xsd1:guideData>
<!--Optional:-->
<xsd1:parameter name="string"/>
</xsd1:guideData>
</xsd1:automatedStepRequest>
The elements of the message are as follows:
automatedStepRequest input element | Description |
|---|
avosServiceName | The actual Process Server service name that is used to call the service. Except for advanced cases, this name is usually the same as serviceName. This element is usually not needed by service call steps. |
avosStepTitle | The title given by the user when creating a step that executes this service call. This is useful for formatting error messages. |
correlationId | Generated ID for the running guide instance. You can also create parameters that can be added for the URL for a running guide. |
guideData | Contains the complete set of input and output fields in the running guide. It is only passed if the service call describes itself as wanting it by setting the attribute passAllData="true" in the service element for the service call in the services.xml file. Additionally when using passAllData, the service can modify the data and return changes in the guideData element of the response. |
hostContext | Provides information used when the Process Designer system is operating in a host data mode. This is normally not used by service call steps. |
parameter | Contains the name/value pairs for the input parameters that describe this service call in services.xml. |
parameters | This is the most important part of the code. It has name/values pairs that were described as input to this service call in services.xml. |
serviceName | The service name used to describe this service in the services.xml file. This name can be different than the Process Server service name. This lets you reuse the same service, presenting different service call step information to the user. This is an advanced capability not used by most service call steps. |
userId | Process Central login name of the user running the guide calling this step. |
Reply Message
Note: In earlier releases, a service call step was called a Service Call step.
The following sample data shows an example of the reply message:
<xsd1:automatedStepResponse
xmlns:xsd1="http://schemas.active-endpoints.com/appmodules/
screenflow/2010/10/avosScreenflow.xsd">
<!--Optional:-->
<xsd1:fields>
<!--Optional:-->
<xsd1:field name="string"/>
</xsd1:fields>
<!--Optional:-->
<xsd1:guideData>
<!--Optional:-->
<xsd1:parameter name="string"/>
</xsd1:guideData>
</xsd1:automatedStepResponse>
The elements of the message are described in the following table:
automatedStepResponse output element | Description |
|---|
fields | Contains the data described as output fields for the service call step. They are name/value pairs where the name is in the attribute name and the value is the data under the element. For both input and output, the field can be defined as complex (attribute complex="true") in the services.xml file on the parameter or field). In that case, the value can be arbitrary XML that can be used in a renderer. See the Starter project example for a simple example used in Hello World. |
guideData | Contains the new data to be set for the guide context data if the service has passAllData="true" in the services.xml file |
Example Using Complex-typed Data
You can use complex-typed data in a service call step. In the Starter project, refer to the renderings and service-contribs files as one example.
The HTML Rendering File for Complex Data
In order to display the above data in a guide, you must provide an HTML file that renders XML message data into HTML.
Note: Be sure to see the Project Orchestration template for the Guide Designer Customization Starter project, which provides a starting point for creating rendering and theme files. Also, note that the rendering file is deployed as part of the service call step's deployment contribution.
Data can also be rendered with a rendering hint based on a JSON object literal.
Fault Handling
A guide's developer should not have to think about fault handling when building service call steps. Your process can handle two fault types by using the automatedStep operation's fault messages in callback responses. You do not need to add process or scope fault handlers to your process. Use a Reply with Fault for fault handling. An internal Process Designer service catches the fault and presents an error to the user.
The two fault messages are:
- • automatedStepValidationFault with a fault name of invalidData
You can add programming logic to your BPEL process to check for invalid data items in the request message. You can also create a callback response containing an error message that indicates missing or invalid data. Doing this lets the user correct the request data and resubmit it. Essentially, an internal service catches the fault and presents an error screen to the user. See the example below of using the reply with fault handler. A sample fault message looks like this:
<xsd1:invalidData
xmlns:xsd1="http://schemas.active-endpoints.com/
appmodules/screenflow/2010/10/avosScreenflow.xsd">
<xsd1:field name="Customer Id"
reason="Incorrect number of digits" required="true"/>
</xsd1:invalidData>
where
- - field name: The data field
- - reason: The string describing the problem
- - required: A Boolean indicating true for required and false for optional. If the field is required, the user is not allowed to advance to the next screen without valid data entered.
- • automatedStepFault with a fault name of fault.
This fault is similar to the invalid data fault, but allows you to create an error message that tells the user to make corrections; for example, the user cannot schedule a Saturday delivery to the address entered. This fault can also handle cases where a new version of the BPEL process is deployed with new required fields after a guide is published.
A sample fault message looks like the following:
<xsd1:screenFlowFaultResponse
xmlns:xsd1="http://schemas.active-endpoints.com/
appmodules/screenflow/2010/10/avosScreenflow.xsd">
<xsd1:reason>string</xsd1:reason>
</xsd1:screenFlowFaultResponse>
The following illustration shows an example of creating a reply with fault activity to check for invalid data. The link to the callback reply contains a transition condition that checks for invalid data.
Providing Rendering Hints for Guide Data
The Using the Automated Step Request, Response, and Fault Messages topic described how you can provide a rendering file and rendering file parameters for data items.
The formatting types of rendering hints are based on JavaScript Object Notation (JSON). JSON is an extensible format that allows you to configure rendering parameters. Using JSON lets you reuse the same data type different ways. For an introduction to JSON, see Customizing Task and Form Scripts: An Introduction elsewhere in this help.
Basic JSON format
A rendering file is described as a JSON object literal with a property named form. This property holds the rendering location of an HTML page deployed to the Process Server. The page can contain JavaScript code to describe how to render XML message data into HTML format, such as a video, interactive map, or product order. You provide a rendering file as part of the contribution.
The JSON format basic configuration is shown in the following example:
<tns:dataDef name="Customer Address Formatted" type="complex">
<tns:description>Customer address formatted with rendering
</tns:description>
<tns:renderingHint> {
"form" : "project:/address-rendering.html"
}
</tns:renderingHint></tns:dataDef>
Note: The curly braces and the form parameter are required.
In addition to this basic configuration, you can use additional Guide Designer parameters and you can provide your own, which is described in sections following this one.
Multi-line edit (textarea) for strings
You can enable textarea HTML controls for strings by adding rows and cols JSON rendering hints that are built-into Process Server. For example:
<tns:dataDef name="Email Message" type="string">
<tns:description>Large text area for email messages</tns:description>
<tns:renderingHint>{ "rows" : 3, "cols" : 40}
</tns:renderingHint>
</tns:dataDef>
Additional Format Options for Strings
You can add a JSON format as a rendering hint for strings. For example, a U.S. telephone number can have a rendering hint such as:
<tns:renderingHint>
{ format : "(999) 999-9999" }
</tns:renderingHint>
The format consists of the following special characters:
- •a: Represents an alphabetic character (A-Z,a-z)
- •9: Represents a numeric character (0-9)
- •*: Represents an alphanumeric character (A-Z,a-z,0-9)
Some example formats are:
- •"(999) 999-9999" (U.S. phone number)
- •"999aaa" (an Id with three digits and three letters)
Adding Customizations
As part of a rendering hint, you can add your own custom parameters. The parameters are those that you have created in your rendering file.
In the following example, a myBoolean parameter in email-rendering.html can have two different values, such as myCheckbox or myRadioButtons. For the rendering hint, the myCheckbox value is selected:
<tns:dataDef name="Email Short Form" type="complex">
<tns:description>Comments area</tns:description>
<tns:renderingHint>
{ "form" : "project:/email-rendering.html",
myBoolean : myCheckbox
}
</tns:renderingHint>
</tns:dataDef>
This rendering description is only used for displaying data in a guide. No formatting changes are made to the underlying data.
Creating the Automated Step Service Descriptor
Note: In earlier releases, a service call step was called an automated step.
You must add a services.xml file to the deployment package for a service call step. This file contains the configuration details added to Process Designer that make the service call available and describe how data is used.
The file is based on the avosServiceDiscovery.xsd schema located in the com.activevos.socrates.repository.services\schema plugin.
The elements you need to define are shown in the following table:
Schema element | Description |
|---|
description | Description of what the service call does. It also provides instructions about required input. You can write an extensive description, if desired, to help a guide or process designer understand what the service call step does. |
displayName | Name that appears in the list of service calls steps in the guide and process designers. |
iconLocation | Project path to an icon file that appears in the service call step in the guide. The size should be 32 x 32 pixels. |
input parameters | The data used by this service. |
largeIconLocation | Project path to an icon file that appears in the service call step properties dialog, if available. Otherwise, the smaller icon or default is used. |
output fields and options | Output fields are name/value pairs where name is in the attribute name and value is the data under the element. |
service name | The name of the service, which can be the real service name of a deployed process. If it is different, define an avosServiceName value. |
showForObject | For future implementation. |
Here is an example of a services.xml file
<tns:screenflowContribution
xmlns:tns="http://schemas.active-endpoints.com/
appmodules/screenflow/2010/10/avosServiceDiscovery.xsd">
<tns:service name="HelloWorldAutomatedStep">
<tns:displayName>Hello World</tns:displayName>
<tns:description>Service Call step that accepts a user name
and replies with a complex type value to greet the user.
</tns:description>
<tns:input>
<tns:parameter name="Hello Name" type="string" required="true"/>
</tns:input>
<tns:output>
<tns:field name="Greeting" type="TimeOfDayGreeting" />
</tns:output>
</tns:service>
</tns:screenflowContribution>
Creating a Theme
When a guide runs, the default background colors, button styles, and other style elements are defined in HTML/CSS format in files deployed to the Process Server and made available to Guide Designer. You can modify the default theme or create new themes. In Guide Designer, the contributed themes are listed in the Settings dialog.
To create and deploy your own theme:
- 1. View a running or simulated guide to see the default look and feel.
- 2. In the guide designer, open the Settings dialog to see the default runtime and optional preview themes.
Note that when you are trying out different themes at the guide level, you do not have to save the guide to see the new theme in action. Just start a simulation by clicking the Simulate button.
- 3. For ideas on what to add to a theme, view the Guide Designer Customization Starter orchestration project, which contains themes files.
- 4. Create your theme HTML/CSS files.
- 5. Create a themes.xml deployment descriptor. The default descriptor is in the Process Server catalog.
The themes.xml schema is avosThemeDiscovery.xsd., which is located in the com.activevos.socrates.repository.services\schema Process Developer plugin. Refer to the documentation within the schema for hints on using images and descriptions.
- 6. Deploy the theme files and descriptor to the server as a deployment contribution. Refer to Creating and Deploying a Business Process Archive Contribution elsewhere in this help.
Replacing Guides From a Server Location
Guides within a project can be edited either on the server or within Process Developer.
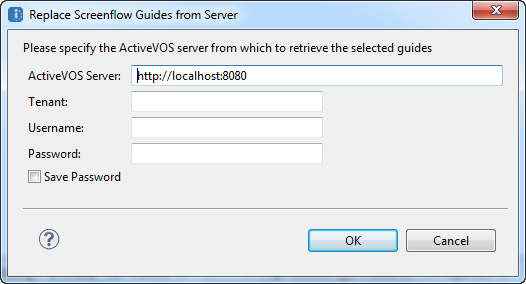
When you are ready to replace or update a guide, select guides in the Project Explorer, right-click on it, then click Replace Guides from Server. Project Developer displays the following dialog:
After selecting this command, the existing guide is overwritten.
Project Files
Project Files
Create a new orchestration project, and on the Create Project from Template page, select Guide Designer Demo. The folders and files in this project are described in the following table.
Project Files | Description |
|---|
bpel |
CalendarReminder.bpel | Creates a human task notification as the Set Reminder service call step in the Sell New Services guide. The input is the date entered in the preceding screen step. This illustrates the use of a People activity in conjunction with guides. |
CrunchbaseAPIUntyped.bpel | Accepts input parameters such as firstname, lastname, and company and uses them to make a request to the CrunchBase API. It returns an XML response. If the search succeeded, it returns matched companies or persons. If it doesn't, the result is empty. |
CrunchbaseAutomatedStep.bpel | Checks input parameters and if they are correct, it makes a request using CrunchbaseAPIUntyped and it returns the results. |
EmailSender.bpel | Uses the Process Server Email Service. |
GoogleMap.bpel | Displays a Google map as the Check area for service outage service call step in the Customer Connection Problems guide. The map is rendered using the power outages parameter, which is a complex type using the googlemap-rendering.html rendering discussed below. |
InstallAppointment.bpel | Creates a human task as the Install Appointment service call step in the Sell New Services guide. This illustrates the use of a People activity in conjunction with guides. |
LookupCustomerAddress.bpel | Creates the Look up customer address service call step in the Customer Connection Problems guide. This illustrates how to use input data in an service call step. |
LookUpCustomerRecord.bpel | Creates the Look up customer record process used by the Customer Connection Problems guide. This illustrates how to use input data in an service call step. |
LookUpServiceProvider.bpel | Creates the Look up provider by phone number service call step in the Sell New Services guide. Input is a phone number provided in the step's instructions. This illustrates how to use input data in an service call step. |
PingModem.bpel | Creates the Ping modem service call step in the Customer Connection Problems guide. Input is a phone number provided in the step's instructions. This illustrates how to use input data in an service call step. |
guides |
* Start Here | A tutorial guide describing the basics of creating a guide. |
Crunchbase service test | A small guide that extracts information from the Crunchbase database. Use it to validate that Guide Designer is connecting to it. |
Customer Connection Problems | A guide that diagnoses network connection problems for a customer by checking for service outages in the customer's area, pinging their modem, and doing other tests. This illustrates using several service call steps as well as other step types, including screen, jump to, and end steps. |
Double check | A simple application used as an embedded guide in the Start Here tutorial. |
Email and URL Links Demonstration | A guide that demonstrates how to incorporate email and to how to use an external service (this example lets you search Google from within a guide). |
Installation Checklist | Creates an installation checklist that runs as a guide inside a human task. This shows an example of how to use the Embed Code for a published guide. |
Sell New Services | Creates a sales discussion with a customer and uses the Create Appointment guide as an embedded guide. This illustrates the use of an embedded guide. |
Guide Designer\renderings |
googlemap rendering files | The files in this area display a Google map in the Customer Connection Problems guide that is based on an address. These files contain options for displaying the map. |
Guide Designer\service-contribs |
services.xml | Contains the service descriptor details for service call steps. This is a required file for service call step deployments. |
Importing the Demo Guides into Guide Designer
Note: In previous releases, a service call step was called an automated step.
The guide designer uses the JIT spacetree technology to allow any user (not necessarily a developer) to create a web application called a "guide". Typically, a user is a domain expert who can design a tree-based application for such applications as technical support calls, sales calls, or organizational business processes. A guide is an application with a single starting point, branching to steps that have different outcomes.
In the Guide Designer Demo project (see the Guide Designer Automated Step Demo Sample Project), there are several guides as well as their support files that you can import to examine how to implement a guide.
To import all demo files into Guide Designer:
- 1. Create the Service Call Step Service template, described in the Guide Designer Automated Step Demo Sample Project.
- 2. Start the server and deploy the BPR.
- 3. Log in to Process Central.
- 4. On the Guide Designer Home page, select Import and from the file system, import all guides from the guides folder in the sample project. You can import multiple guides in an archive file.
Note: Ensure that you import all guides. Some guides have a dependency on others.
For additional details, select Help in the Process Designer.