Using Swimlanes
You can provide a graphical representation of the participants in your process by adding a pool with swimlanes. The concept of a pool and swimlane is part of the BPMN specification. A pool represents a process and a swimlane represents a participant.
In Process Developer, you add swimlanes to the Process Editor canvas, typically to show each participant's activities. However, you can drag and drop activities into different lanes, using links to show the relationship between swimlane activities. There is only one pool for the process as a whole.
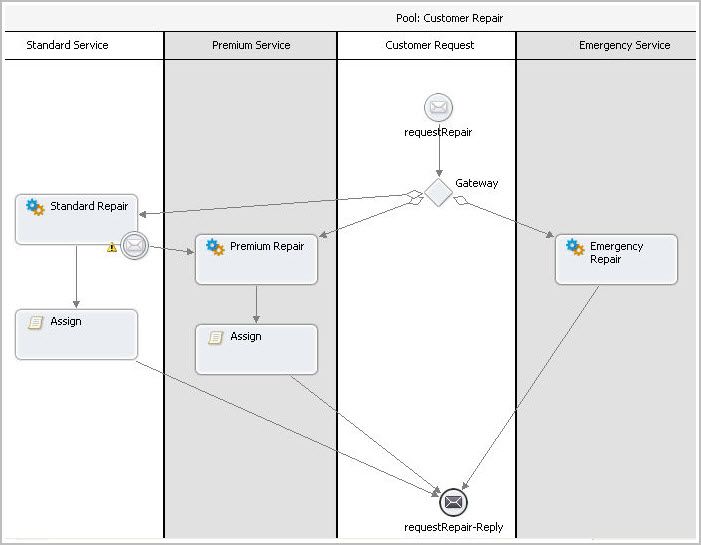
The following illustration shows an example of a process pool with four swimlanes, one for each process participant.
To add and use swimlanes:
- 1. Right-mouse click on the BPMN Editor canvas and select Add > Annotation > Swimlane.
- 2. Notice that a pool and one swimlane is created. The pool name is the process name, and the swimlane is untitled.
- 3. Do one of the following:
- - To add an additional swimlane to the left (or top) of the first one, right-mouse click on the left (or top) side of the process, and select Add > Annotation > Swimlane.
- - To add a swimlane to the right (or bottom) of the first one, right-mouse click to the right (or bottom) of the first one and select Add > Annotation > Swimlane.
- 4. To name a swimlane, select the swimlane titlebar and display Properties view. In the Text field, replace Untitled with your text.
If you want to change swimlane colors, you must first turn off zebra stripping.
Tips on working with swimlanes:
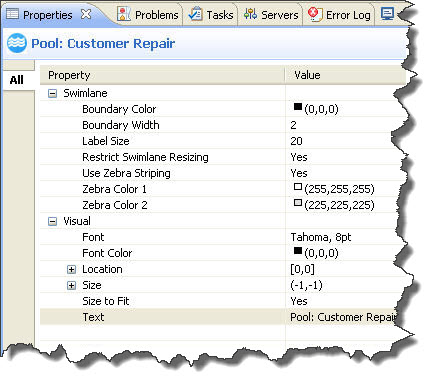
- •By default, swimlanes are displayed in bands of white and gray, called zebra striping. To disable zebra striping and enable individual colors for each swimlane, select the title bar of the pool and open the Properties view. Set properties as desired:
- •To delete a swimlane, right-mouse click on the swimlane and select Delete. Delete all swimlanes to delete the pool.
- •Swimlanes have only visual properties: You must manually arrange all activities within swimlanes.
- •You can add a swimlane from the Annotation drawer of the palette
- •Swimlanes can be used on the main canvas, not on the drill-down view of a collapsed container, nor on the fault or event handler tabs
Resizing Swimlanes
To make a swimlane grow or shrink, to accommodate the activities you add or delete, move a swimlane border either left or right in horizontal orientation (up or down in vertical orientation). By default, a resizing restriction is set on swimlanes to disallow a swimlane from being too small to accommodate an activity. The Restrict Swimlane Resizing property in the Pool is set to Yes. For flexibility in resizing a swimlane, set this property to No.