Step 2. Create a workspace
Create a workspace using PC to Cloud Conversion.
1Log in to Informatica Intelligent Cloud Services as a user with the Admin or Designer role.
2On the My Services page, select PC to Cloud Conversion.
3Click New.
The Create Workspace panel appears.
4Enter a workspace name and description.
5Click Save.
The newly created workspace appears on the dashboard.
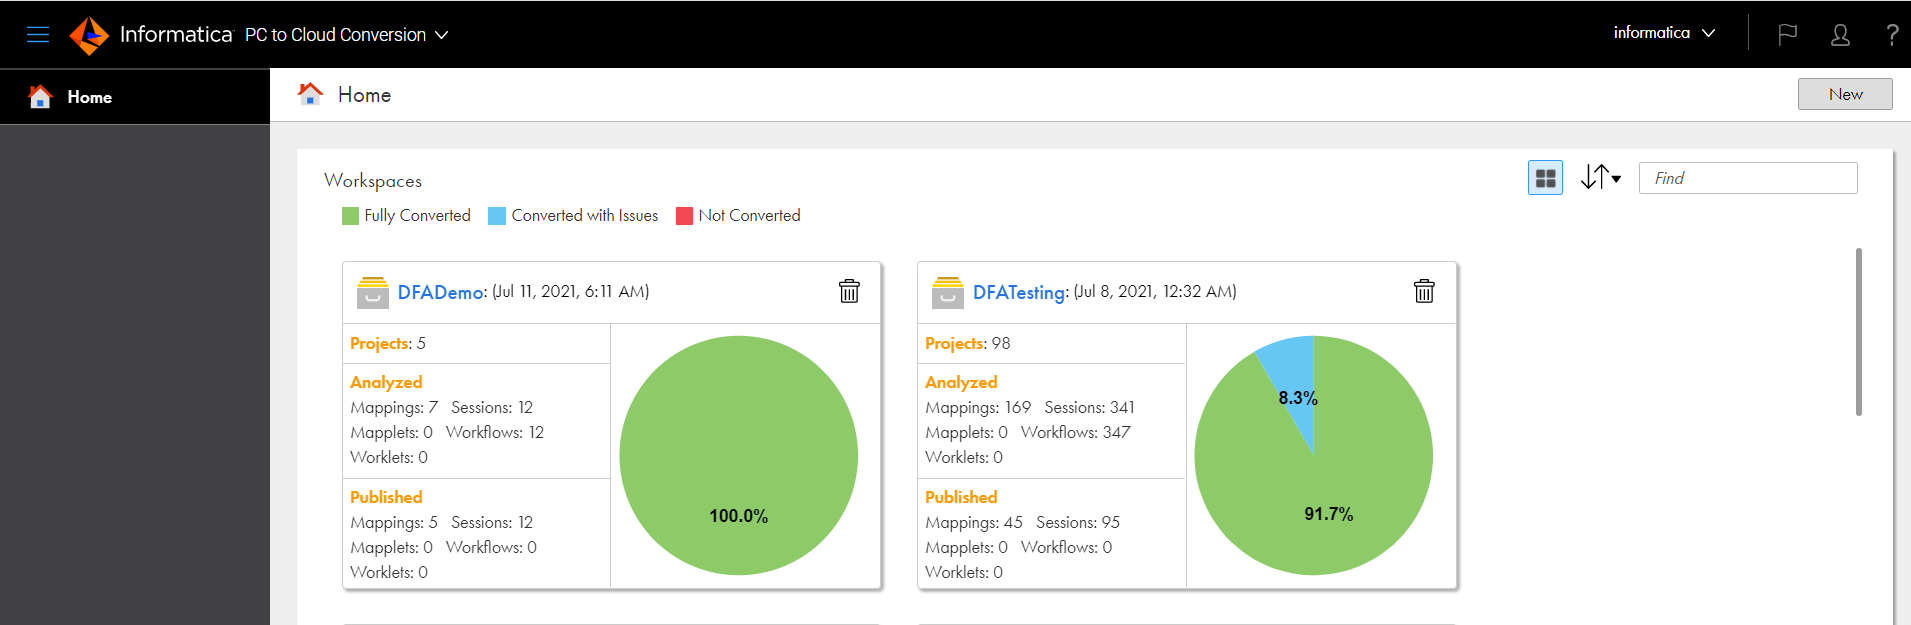
The following figure shows the sample workspace dashboard with the number of projects within each workspace and includes the cumulative statistics of the analyzed and published assets:
In the Workspaces summary dashboard image, you can see the number of projects within a workspace. You can view the cumulative statistics of the analyzed and published assets of all the projects.
You can perform the following actions within a workspace:
- Switch between the panel and list views.
- To switch between the default panel view and the list view, click the Card View icon.
- Search for a workspace.
- To search for a workspace, enter all or part of the workspace name in the Find field.
- Move a workspace.
- To move projects to a different workspace of your choice, right-click the project within the workspace and click Move. In the Move Project window, select the new workspace and click Save.
- Delete a workspace.
- To delete a workspace, ensure that the workspace does not contain any projects within it. To delete a workspace, click the Delete icon in the workspace panel or right-click the panel and select Delete.
- View details for a specific workspace.
- To view details for a specific workspace, click the workspace name.