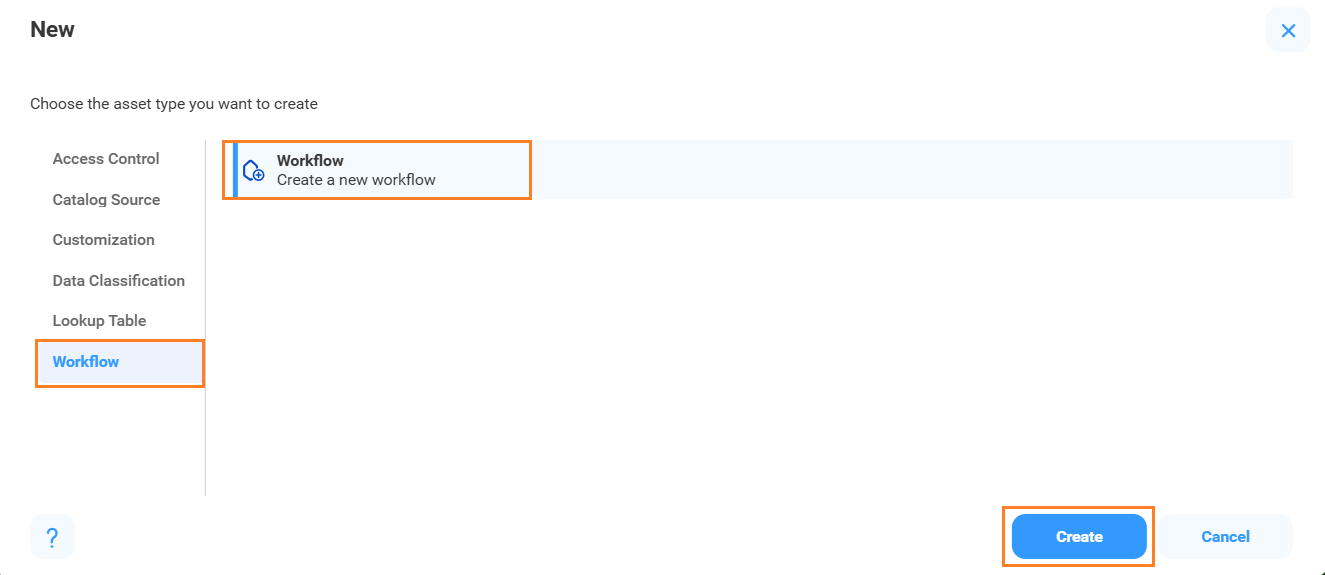
1In Metadata Command Center, click New.
2Select Workflow from the list of asset types.
3Select Workflow and click Create.
The New dialog box appears.
4In the Workflow Details dialog box, enter a name and an optional description for the workflow.
The Workflow Details dialog box appears.
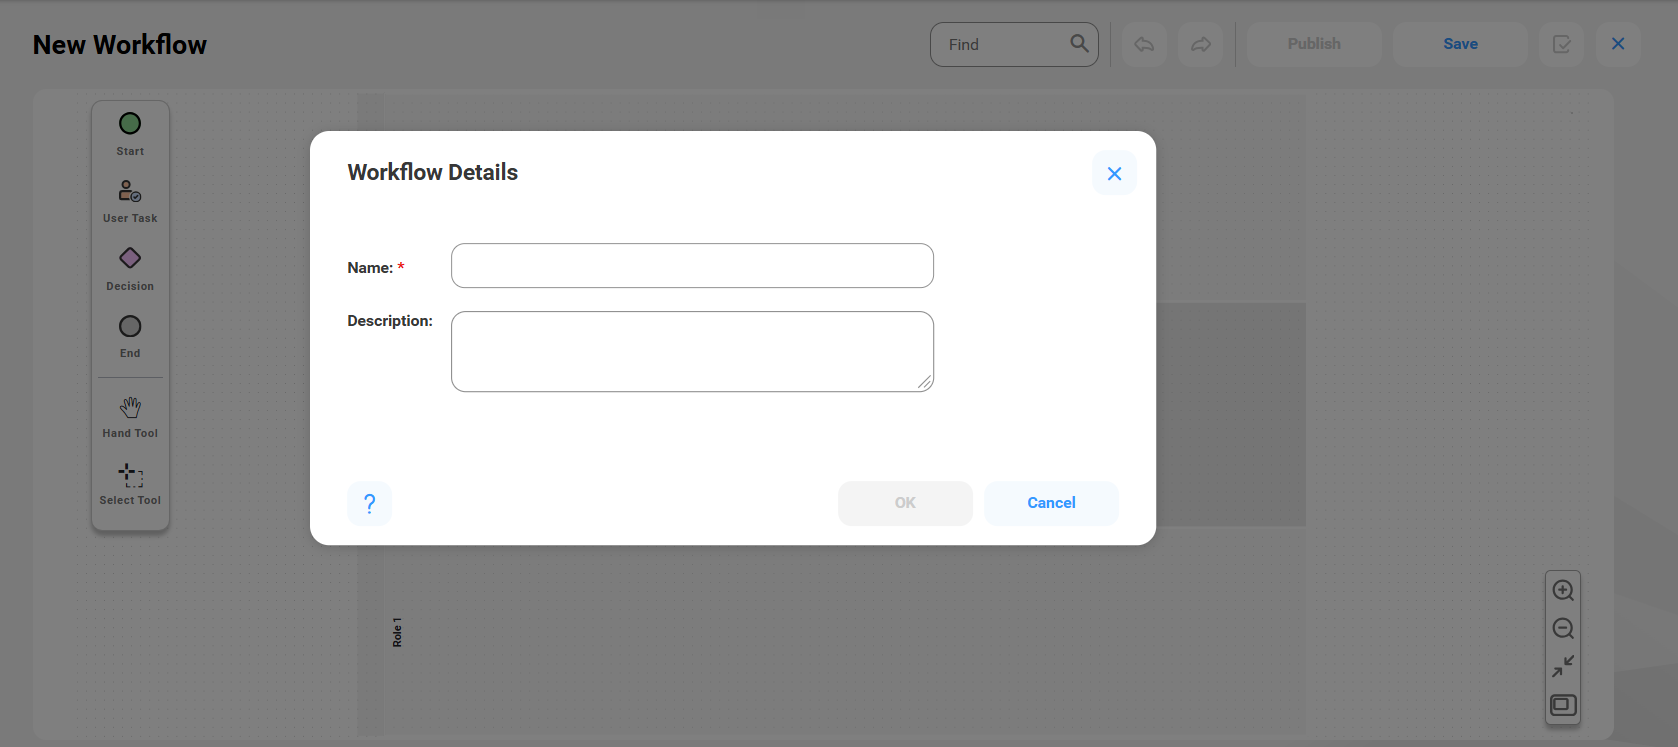
5Click OK to design a BPMN-based workflow.
6Select a swimlane to enter a name and an optional description on the Properties tab.
By default, there are three swimlanes named Role 1, Role 2, and Role 3. You can add and delete swimlanes.
7Drag and drop the Start component from the palette to a swimlane on the canvas.
You can add components to a swimlane in one of the following ways:
- - Drag the required components from the palette on the left onto the swimlane.
- - Select an existing component on the swimlane and choose the next component.
When you add an component, you can also define its properties. You can delete, cut, copy, and paste components. You can also undo, redo, and find components in a workflow.
8Select the Start component to enter a name and an optional description.
9Add the User Task component to include a human decision in a workflow.
Note: Workflows must include at least one user task.
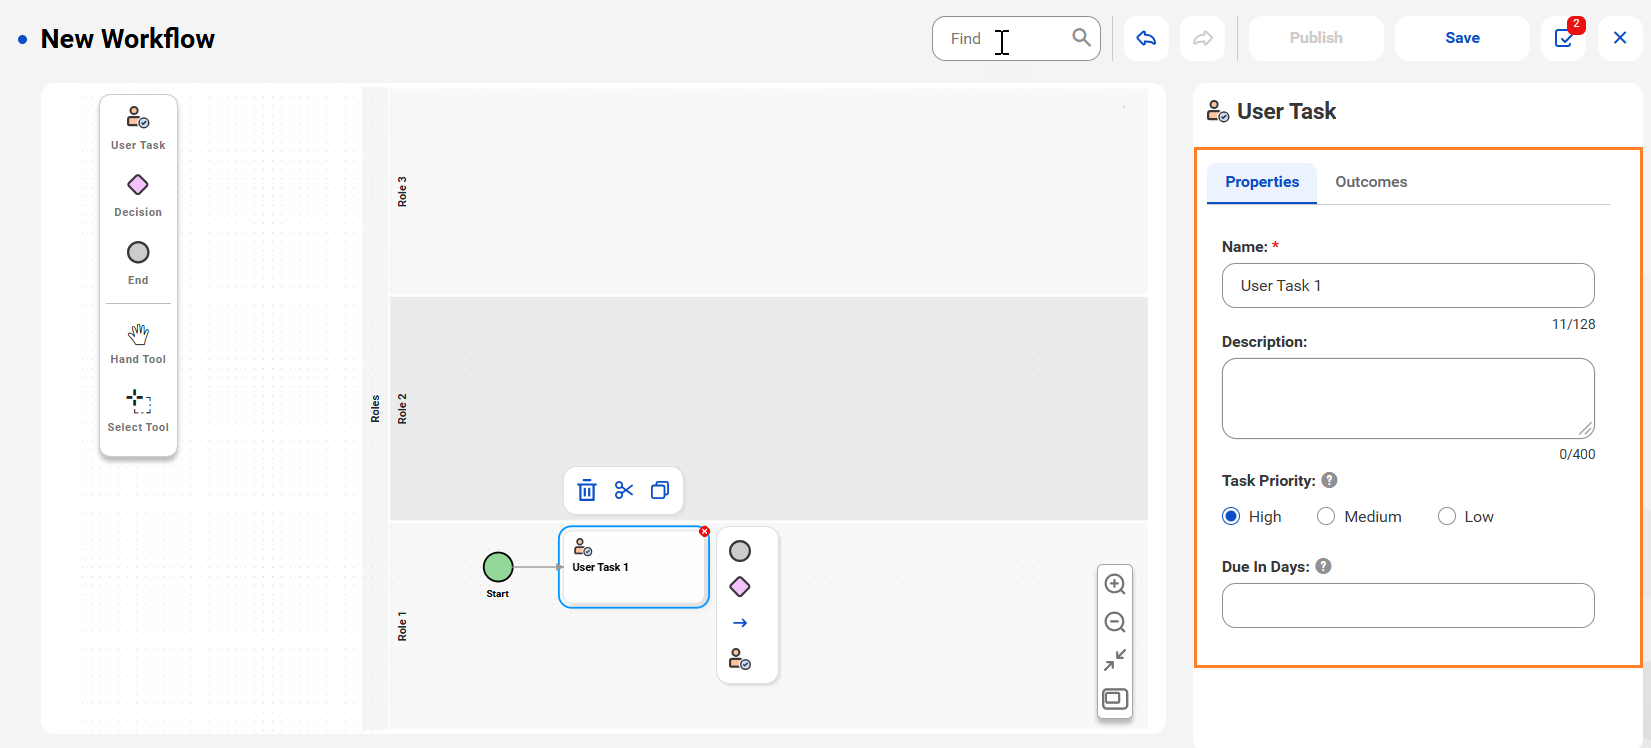
10Select the User Task component to enter the basic properties of the user task.
The following table describes the properties that you can enter for a user task:
Property | Description |
|---|---|
Name | Enter a name for the user task. |
Description | Enter a description for the user task. |
Task Priority | Select the priority of the user task. |
Due In Days | Enter the number of days in which the task is due. If the user doesn't complete the task within the period, the task remains in an overdue and incomplete status. You must specify a value for each user task. Maximum value is 14. |
The Properties tab of a user task appears.
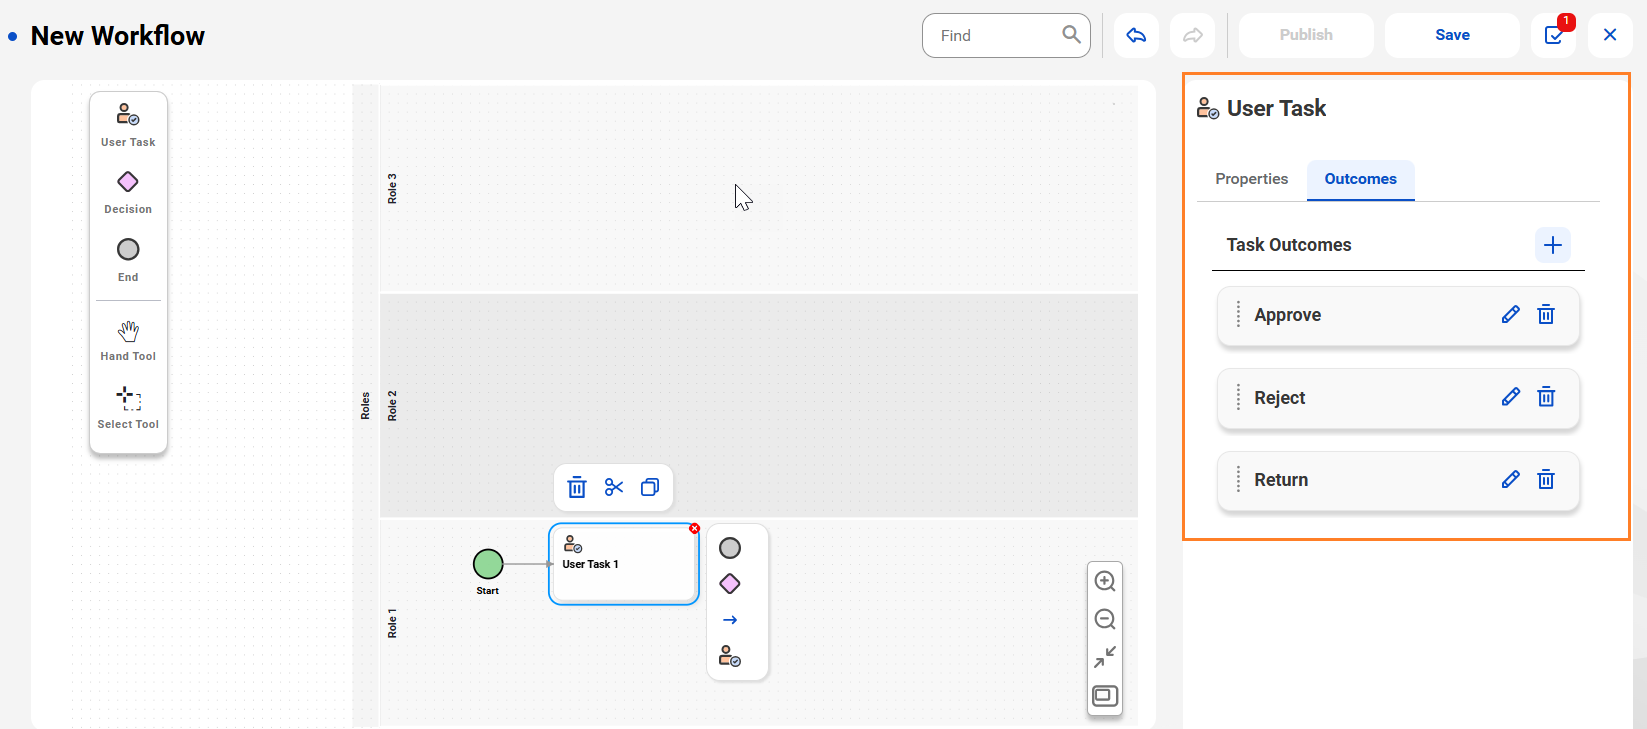
11On the Outcomes tab of the user task, specify how the task must be completed. Click Add to add a task outcome and enter a name.
You can create a list of possible decisions that a task owner can take on the task. For example, you can add Approve, Reject, and Return as possible outcomes for a task. Task owners who need to approve a request can evaluate the request raised, make a decision, and take necessary action. They can approve the request if it meets the requirements, reject if not, or return if more information is required. If a request is returned, then a user task can be added to re-evaluate the request and to resubmit the request if it meets the requirements, or discard if not.
Note: User tasks in the workflow must have at least one task outcome. You can't use workflows that include human tasks without outcomes when you configure workflow events in Metadata Command Center. Outcomes defined in each user task appear as actions of workflow tickets in Data Governance and Catalog.
The Outcomes tab of a user task appears.
12Add the Decision component. Use the Decision component to allow a workflow to take different paths.
The workflow takes a decision based on the previous task outcomes you select.
13Select the Decision component to enter a name and an optional description.
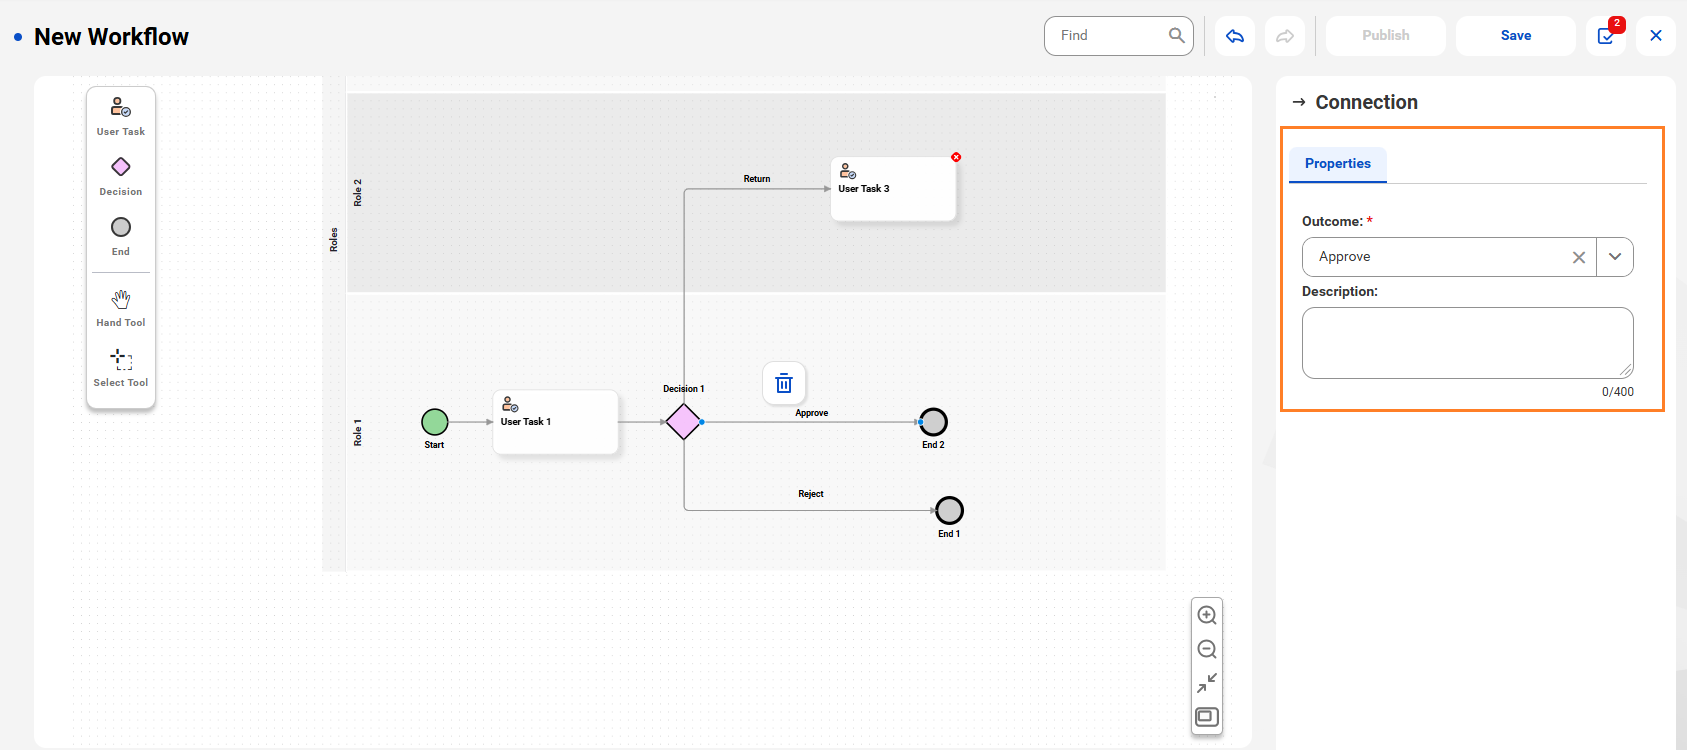
14Select the outgoing connections from the Decision component and select task outcomes and enter optional descriptions.
The task outcomes defined in the user task appear here as lists.
The Properties tab of an outgoing connection from the Decision component appears.
15To add multiple levels of approvals, continue to add user tasks and decisions based on your business requirement.
You can validate and then save and publish the workflow.