Multi-channel preview creation
How to create preview templates - best practices, possibilities and limitations, customizings
Introduction
This document is intended for consultants which want additional information about how preview templates can be used. It is recommended to read the user manual before reading this document to get an overview and a short look into the intention of the preview templates. This document contains more technical details which are useful for the creation of specialized preview. In addition it contains limitations and solution recommendations for a proper usage of the preview functionality. This should prevent an ineffective or inadequate use which can lead to unexpected or bad behavior.
The reader should be familiar with the export and its capabilities and functions.
Further and related information can be found in the Export Manual.
The multi-channel preview idea
There are several ideas behind the concept of a multi-channel preview.
The first idea is to give the person who is responsible for the data maintenance a quick view how his data will be displayed in the respective channel, without having to trigger a full export into the system (e.g the webshop). A specific emphasis is set in this case on the usability for the end user, he can select a predefined template via right click and doesn't need to adjust any settings.
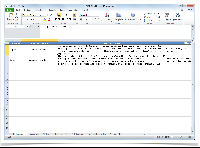
The user can see all relevant information like long descriptions, images or prices in their destinated places, and all errors and missing fields will quickly come to his attention. Also the preview functionality can be used to give the user a full view on the item or product with all relevant fields like references, all languages and additional fields, which are easily customizable.
The preview can also be used to display a list of items with selected columns, e.g a price list, which is well formated an can easily be passed on, e.g via email or as a printed sheet.
The templates are also easy customizable for consultants or partners and additional to the intended HTML templates other previews can be created as well, like office documents, e.g Excel, Word or Power point.
The standard templates, including their purpose and capabilities, are described in the Sample Data and Master Templates Documentation
Multi-channel previews in the HPM client
Previews are offered in all table and tree structures, which display item, product or structure group data.
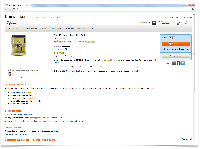
Via right click on one, or on a selection of objects the context menu "Generate preview" displays all available previews for this type and number of selected objects.
The selected preview is generated, transfered to the client, and opened with the default application for this file extension. For the detailed process see chapter Standard process.
Multi-channel preview export templates - special export templates
What is the difference between a normal export format template and a preview format template? There are four differences:
Preview data type
The preview data type specifies the object type a preview export template is available for. It is determined automatically during export template validation, e.g. loading and saving. If an export template complies with the requirements, the preview data type is automatically saved to the export template.
An export template is available as preview template if it provides exactly one editable parameter that can receive the list of objects selected to create the preview for.
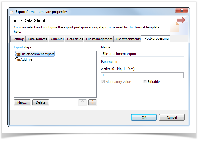
Purpose
If you want to use an export template as preview template you have to set the purpose value to "Preview" / "Vorschau". These preview templates are still available for normal exports and quality checks and, additionally, provided in preview template list.
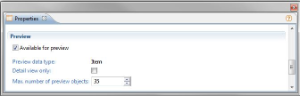
Detail view only
You can limit the use of a preview template to detail preview only by activating the "Detail view only" / "Einzelansicht" field. Such single preview export emplates are not provided in preview template lists for multiple object selection.
Max. number of preview objects
Dependend on the complexity of an export template and the preview data you can limit the maximum number of objects a preview template can be used for.
Preconditions
This chapter contains a few things which have to be considered before creating multi-channel previews.
The creator of the preview template needs the normal rights which are needed to create a normal export template, which are in particular create and edit export format templates. Of cause he needs the "professional export" license as well.
A user is allowed to start a preview generation using the "Generate preview" right mouse click context menu if
he has the "professional export" license
the type of the selected objects is supported by preview generator, that means selected objects are of a "ArticleType" or "StructureGroupType" based repository entity. These entities are:
Items
Products
Structure groups
The list of displayed preview templates is filtered by object rights of the current user
At the moment, there's no action right that affects preview generation. That means, every user having "professional export" license can start a preview generation.
As in all export processes, also in preview generation there's no data access restrictions by configured field rights of the current user. So each user could export data or display it via export preview, that he's not allowed to display in HPM client. That's why it's essential to limit access to preview templates for user groups by using object rights.
Limitations
The multi-channel preview is - as their name suggests - a preview functionality and therefore should not be used to perform full and long taking exports. The functionality is intended for previews which will happen in a time rage of few seconds, therefore it is a synchronous operation and the client waits and can't be used until the preview is generated. Previews are generated on-the-fly and can't be scheduled like normal exports.
The number of objects selectable for a preview is dependent on the complexity of the preview template, so it should be no problem to create a csv preview template with e.g. 5 defined fields, which is performant for a hundred items. However if a template is created which contains almost all entities and data (like references etc.) of an item, already a few objects could be too much. Also if a preview contains javascript or other interactive objects these often are not usable anymore for large number of objects.
Therefore the number of allowed objects must be defined by the creator of the preview, and should be tested by him. The number of objects should be typically below 200, the default border is 100.
Also it has to be made sure that this number of objects can be exported in a short time range without hitting the time out.
Typical number of objects can be seen at the sample data and master template. If these are not enough for a customer request several settings can be adjusted, however caution is needed and it is not recommended.
If a user needs to create a preview for several hundred/thousand items, he can use the preview template for a normal export, where the limitations (limited no of objects and timeout) are not existent. However in this case he has to extract zip files manually.
Of cause the limits of the processing applications have to be regarded as well, e.g. the file size for the browsers, text-editing or office application.
The standard export creates and opens one file, therefore it is not possible to create HTML files which contain frames/iframes or create zipped file formats (like xls). However post export steps can be used as well to customize the functionality of the export.
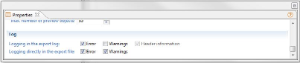
Error handling
For immediate preview generation without time delay, we have omitted some features that are available in quality checks and exports. There's no export protocol, export files will not be archived. This means that errors during the export process cannot be detected directly, e.g. errors during export function execution. But in case of export termination caused by an unexpected exception the error is displayed in a dialog.To be able to analyse such runtime errors, you can use each preview template also for a normal export or quality check.
Settings
Restriction settings
The maximum number of allowed objects can be defined in a plugin_customization setting.
# Maximum count of objects a preview creation is allowed for# default: 100com.heiler.ppm.export.core/preview.maximumObjectCount=100Also the time out, which defines the time a preview creation may take, can be adjusted in the plugin_customization file
# default timeout in seconds for preview creations# default: 20com.heiler.ppm.export.core/preview.timeout=20Data provider, variables, parameters
Preview templates are special export templates. You should consider some things to create valid preview templates.
Which data providers are available?
You can use all data providers for preview templates that provide a parameter "object list", e.g. item assortment, product assortment, structure group list.
Which settings must (not) be editable, mandatory? Which additional settings are necessary?
A preview template must have exactly one editable parameter that expects the object list, it can be a mandatory or an optional parameter. This is the parameter the selection will be assigned to.
Currently, there's a bug regarding item assortment parameters. You have to mark the mandatory "Catalog" parameter as editable if you want to use the optional "Assortment" parameter. Otherwise preview generation aborts with an exception.
All other parameters (data provider parameters, post export step parameters, or variables) have to be
not editable or
optional, but not of a data type that supports an object list value or
mandatory, not empty, not of a data type that supports an object list value
Additionally, you have to classify the export template as preview template:
set its purpose to "Preview"
specify "Detail view only" setting if needed
adjust "Max. number of preview objects" value if needed
How can I see if the preview template is valid?
The preview template is valid if
it has no errors
it is classified as preview template
the preview data type is set. The preview data type is evaluated during every validation, it can be started manually ("run check" right mouse click menu on template's root node in the template tree view), and is done automatically when a template is opened or saved.
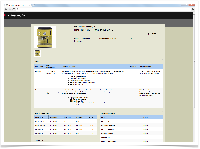
Examples
|
Preview for... |
Data provider |
Editable parameter |
Main module's |
other configuration |
Preview generation |
|
... all selected items |
Item list |
Catalog, Assortment |
Item |
- |
list of items |
|
... all selected products and their variants |
Product list |
Assortment |
Product |
Sub module: Variants |
list of products |
|
... all variants of a selected product |
Items by product |
Product assortment |
Item |
"Detail view only" is set |
single product |
|
... all products mapped to a selected structure group |
Structure group |
Structure group list |
Product |
Parameter "Assortment" |
single structure group |
Static files
Static files can be provided together with the created file, as well. In case of an HTML preview these files typically are css, js or image files which are used to lay out the preview or to add interaction to it.
To include such a file a post processing export step has to be added. In particular this is the step "Add file", by which it is possible to upload a file to the server. This file is on execution of the preview automatically provided to the same temporary location to which the preview is transfered.
If several files or a hierarchal folder structure is needed, this can be accomplished via a zip file. A zip file which is provided to the step "Add file" is automatically unzipped at the same location as the preview file.
Formats
In general all formats which are exportable by the standard export can be used for creating a preview template. In particular these are Textfiles, CSV files, XML files, and HTML files, but for this functionality HTML probably will be used the most. The files will be opened by the program which is registered to the respective file extension by windows.
It is also possible to use a different file extension, e.g. if a text file should be created, but not with the extention ".html", but for example ".htm". This approach is not preview-specific, therefore more information about this can be found as ?TODO LINK TO EXTENSION CHANGING DOCUMENT.
# Export files are named as specified, and get a file extension depending on the# output format: txt, csv, xml, html.# Sometimes text files have other extensions than "txt", e.g. "dat", "sql", ...# If you need such additional file extensions to be considered in export file # name check and creation, please specify it here separated by comma## example:# com.heiler.ppm.texttemplate.core/additional_file_extensions = dat,sqlcom.heiler.ppm.texttemplate.core/additional_file_extensions = htmBest practices
Creating multi-channel preview
While creating or adjusting a multi channel preview it makes sense to lock the preview for the time while it is edited, to make sure that it is not used or altered by other users.
To achieve this, the file can be restricted via ACL rights, which are set to the current user.
From an existing HTML site (e.g. webshop)
If you want to create a multi-channel preview which looks and behaves nearly as the target system of this particular channel, the easiest way to do so is to take the target system as the basis for the preview template.
The first decision you have to make is the representation of your object. Do you want a list of objects or a single object, a product, item or structure group?
Head to the target system ( e.g. your webshop) and identify a representative object, (product or item), in a typical category. Make sure the selected object has all relevant data you want to display, e.g. references, features, texts. Also make sure the static data, which is not filled by the PIM system is suiting your typical assortment, e.g. comments, links, ads, background images and so on. Also make sure you do not violate any rights or legal aspects.
Download the page, including all attached sources, like javascript, css and image files, and put them into a local folder.
Typically the HTML of the generated web shop page doesn't look too good, so you should use a "pretty print" tool to format it accordingly, so you won't loose the track.
Open your downloaded page and make sure it looks right. If not, you have to take care of src= links and point them to the local files with a relative link, instead of an absolute link (e.g. <img src="images/logo.gif"> instead of <img src="http://www.companyx.com/logo.gif"> ). The same has to be done for paths in the css and javascript files. You can use search and replace here and there.
You can also clean of your HTML file from scripts you don't need for your preview, e.g. price calculation, product comparison, shopping cart functionality and so on.
If your HTML is working, you can copy and paste it into the HPM into a new template.
Now you're ready to replace your static site content with the fields which are filled by the Heiler Enterprise PIM system. Since normally a webshop generated file has several thousand lines, this could be a difficult task. A good approach is to search for the content you want to replace, e.g. the product name or the description, and you will get to the relevant lines in your HTML file quickly.
If you want to export one-to-many data, e.g. all references, all features and so on, you have to create sub modules, which in many cases are used to create a new table row on each iteration. For this you have to insert your sub modules like <tr> <td>Feature Name</td> <td>Feature Value</td></tr>. You can also have a look at the sample preview templates.
To include images, you can use one of the approaches described in Include images of data objects. It's also sensible to use the IfNotEmpty functions, to handle the case if an image is not existent.
Set your template to "Detail view only", if you only want to preview one object at a time. Also add a reasonable number of maximum objects, if you want a list like preview, and make sure it works fine for this number.
The last step is to include the static files, which have to be zipped first. So the folder with the css and js files can be zipped and attached to the template as described in Static files.
Adapt existing templates
The easiest way to create a preview template is to use an existing preview template and adapt it to the needed functionality.
The standard preview templates have some variables in place, such as language, image quality etc. which can easily be changed. So it should be easy to change an english preview template to a german one by switching the language variable to german. The variables can be found at the properties > Variables.
If you want to change the layout or the Javascript functionality, you have to download the attached zip files and change the corresponding css or js files. Then you can attach your updated zip file again to the template. See also Static files.
Please make sure to adjust the number of maximum objects to a reasonable number for your preview template.
Importing an existing multi-channel preview
If you got a preview template
Open the Export perspective and go to the view menu of the main view and select "load format template from file".
Select your file from disk and open it.
Upload your static files (often a zip file) as described in Static files.
Check if you have to adjust your variables (e.g. if the media quality is not as expected if the template was created for HMM/Classic media provider) and if all values are available.
Set the maximum allowed objects for this preview template.
Save
The preview should be available in the respective context menu. If not, you can see chapter Identifying Problems.
Generating Microsoft Office Files
The concept of the multi-channel previews is not to generate and display Microsoft Office files, but it can be used for this use-case as well. However it is not supported by the standard product and the standard does not take care of changes of the Microsoft Office File file format.
If you only plan to do a simple table-like data sheet as a preview, the best way to do so is to create a csv file as preview template. Therefore you have to make sure that Excel is registered to the csv extension as the default program for automatically open the created csv file in Excel. The separator of the file (e.g "," or ";" ) however is dependent of the local version of Excel.
If you however plan to do a more sophisticated Excel spreadsheet, an alternative way is also possible via the Office XML file format. This has the advantage, that multiple Excel tabs can be created, and also formating of the file (font, colors) as well as fixation of specific rows or columns.
To achieve such a file the file extension should be a normal ".xml". However the xml-Extention has to be registered to the "Microsoft Office XML Editor" which is installed with Microsoft Office an can usually be found at "C:\Program Files\Common Files\Microsoft Shared\OFFICE14\MSOXMLED.EXE"
The following XML tag defines that the XML file is opened with Microsoft Excel, if the default application is the Office XML Editor.
<?mso-application progid="Excel.Sheet"?>
The Easiest way to create such an XML-based Excel file is to define the structure and formating directly in Excel and to save it as a "XML 2003 Spreadsheet". The source of this file can be copied and pasted into HPM.
The same approach should also work for Microsoft Power point or Microsoft Word XML files. An example Excel (Version 6.0) and Power point (for 6.5) file is delivered with the Sample Data and Master Templates Release.
Functions
All functions which are available for a normal export are available for the preview templates as well. Here are some examples which are particularly interesting in connection with the preview functionality.
Rich text formating
If your rich text data includes formating such as HTML tags they can be directly used for a HTML preview. Hereby however it is important to not encode these fields. The following function can be used for this purpose:
{?IfEmptyThenNotEnc "", {&Language-specific data.Long description}}For example: If this function is used, text which is formated like <b>bold</b> will directly displayed as bold without the HTML tags.
The format mapping tables can be used for formating replacement as well. For further information on this topic please have a look at the export manual.
Clientspecific Price formating
If your templates are used from clients which have different locales it can be sensible to also have a language/locale specific price formating. This can be achived with the function GetDecimalSeparator which returns the Decimal Separator in the locale of the client in which the preview is performed.
{?Calculate " 2 * {&Item.Price}", {?GetDecimalSeparator}, 2 }This Example returns the price dependent of the client locale, e.g. "2.00" or "2,00" respectively.
Modulo for zebra-table
For readability and layout reasons it can be of interest to display the rows of a table with different styles. If you for example want to format every second row of a table differently you can use the modulo function. Together with the DatasetCounter which returns the current number of the loop pass this can result in the desired behavior.
{?Modulo {?DatasetCounter}, 2, "class='odd'", ""}This example sets every second row to the css class odd, where an other layout is defined.
Prevent XSS attacks: escape field content
If you are using conditional functions like IfNotEmptyThenNotEnc to use HTML tags inside this function, each non-rich text field has to be escaped with EscapeValue function to prevent XSS attacks:
Example 1: Non-rich text field, EscapeValue function has to be used:
{?IfNotEmptyThenNotEnc "{&Language-specific data.Short description(1)}", <tr> <td style="width:auto" ><b>{?EscapeValue {&Language-specific data.Language}}</b></td> </tr>}Example 2: Rich text field, no additional EscapeValue function is needed here, because rich text fields contain formatting information and will be handled accordingly by output algorithm:
{?IfNotEmptyThenNotEnc "{&Language-specific data.Short description(1)}", <tr> <td style="width:auto" ><b>{&Language-specific data.Long description}</b></td> </tr>}Images
There are several options to include images into a multi-channel preview. First of all it has to be distinguished between images belonging to the page layout and images belonging to the previewed objects.
Include images of data objects
If you want to include images of your objects, e.g. a standard image for your item, there are two ways to do so. The first way is to export the images directly with the created preview file and drop them in the same folder, so that the images are physically available on the client side.
The other option is to not transfer the images to the client and only export the path to the location of the files on the server.
If the location of the images is reachable from the client, the second approch should be preferably be used, due to higher responsiveness. The sample preview templates however use the first approach because of broader applicability.
Export images itself
In order to export images physically, you have to implement 3 steps:
Use export function ExportMime respectively ExportMimeDerivate to mark the media asset for export
Activate the file name query with the multimedia server (export format template properties dialog)
Assign the post-processing step File attachment export to the export format template and activate it by setting Yes as value for its Active parameter
{?ExportMime {&Item.Media Asset.Document identifier}, {&Item.Media Asset.Quality}}Since the image is placed into the same folder as the HTML file, no slashes are needed in the path. A typical image would look like:
<img src="{?ExportMimeDerivate {&Item.Media Asset.Document identifier}, {&Item.Media Asset.Quality}}">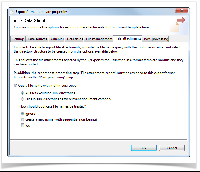
Export the path to the image location
If the location on the server where the images are placed is available to the client, the Images should only be included via a reference. This way the images dont have to be zipped, transfered to the client and unzipped again, which leads to a shorter execution time.
A dedicated function is available to achive this behavior.
{?MimeGetHtmlLink {&Item.Media Asset.Document identifier}, {Item.Media Asset.Quality}}The images can be included via <img src="">
Include static images
If your preview template contains static images such as background images, buttons etc. there are two ways to display them in the previews.
The first way is to place the images on a server or directly in the internet and just include the absolute link in the preview template.
When using this way it has to made sure that the (web-)server is reachable from the client performing the preview, and not behind a firewall.
The other way is to use a relative link to the images, therefore the images have to be included with the template to be transfered onto the client.
More information about this behavior can be found in chapter Static files .
Identifying Problems
If the preview template is not displayed for your object selection, you should
Check if there're object rights that restrict access to the preview template
Check if the template is configured as single preview and that's why not available for a multi object selection
Check if the template is a valid preview template, see How can I see if the preview template is valid?
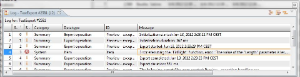
If the preview file doesn't show the data you expect, maybe there's a problem with the preview template or with the data to be exported. You can analyse the problem in different ways:
Configure the preview template to write out errors and warnings to the export file.

Start a normal export of the preview template, you can assign the data objects to an export template module by drag'n'drop. You can find all problems in the export protocol.
Standard process
The following diagramm shows how the preview generation works at runtime.
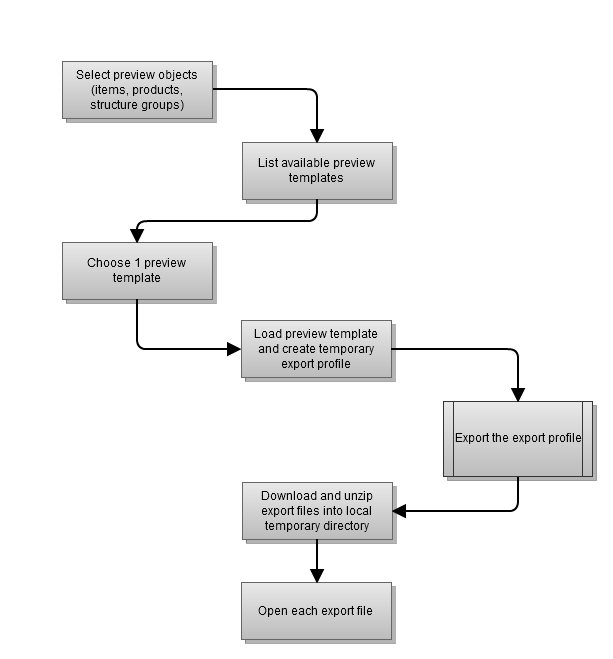
Select preview objects
In the first step, the user marks the objects for which he wants to create a preview. He can use all tables or tree views displaying items, products, or structure groups. The right mouse click context menu of these views provides the "Generate preview" entry which starts the preview creation for the selected objects.
All repository entities based on "ArticleType" or "StructureGroupType" repository entity types support preview generation, these are items, products, and structure groups.
Preview generation works for homogeneous object lists only, that means all selected objects have to be of the same type.
List available preview templates
Depending on the selected object type and the number of selected objects, the list of available preview templates is determined:
The data type of the preview template corresponds with the selected object type
In case of a multiple object selection the "detail preview only" preview templates are not provided
The assigned object rights for preview templates are considered
Create temporary export profile
A temporary export profile is created from the selected preview template, it is initialized with the selected objects list. This export profile is not stored permanently, it's only used as a container for the parameter values during preview creation. After preview creation is finished the export profile will be destroyed.
Export the export profile
To generate the export files, a normal server-side export is run, but without embedding in a server job process. I.e. neither the protocol nor the exported files are archived. This allows the preview generation to start immediately, the results are available directly.
Download export files
All export files and additionally attached static files as well as images are copied into a local directory, zipped files are unpacked. These file are deleted on the export file server.
The local temporary directory is cleared with every client restart in order to prevent the accumulation of a large data volume.
Open export file(s)
All export files are opened with the default application for the respective file extension. If there's no default application the dialog to choose an application is displayed.
Extension points
There're no special extension points for preview creation. But, of course, you can use all extension points available in export context:
ExportPostStep for additional export post step implementations
DataType to support more data types
Note: since HPM 6.0 there's no need to have own implementations for simple data types, see "Exportable repository entities" in HPM 6.0.00.00DataProvider for new data sorces
Function for new export functions