How to process higher-priority messages in message queue quickly
Use Case
All interactions from P360 to AVOS happens through P360_BPM queue. Thus all requests from various triggers are put into this queue. Also, all responses to AVOS from P360 are put into this queue.
Since we do not assign priority to any message, all messages on Message Queue has same default(NORMAL) priority. This can cause AVOS to wait too long for responses when there is high load of request messages, causing delay in workflows to progress to its next step.
Solution
This can be solved very easily(without going into complexity of assigning priority to different types of messages) by creating multiple queues for interaction between P360 and AVOS instead of single P360_BPM queue.
We can have one separate queue for responses(like P360_BPM_Responses) and use existing P360_BPM queue for only putting requests generated by triggers to AVOS.
Or we can define multiple queues based on the type of request. For example :
P360_BPM_DQ : Queue dedicated for all responses of type Data Quality from P360 to AVOS.
P360_BPM_ServiceAPI : Queue dedicated for all responses from Service API to AVOS.
P360_BPM_TriggerFramework : Queue dedicated for all requests from trigger framework to AVOS.
This way AVOS user has complete freedom on how to setup queues based on their requirement.
Changes required in P360
To add additional queue to PIM, changes are only required in server.properties. An example for adding a new queue, say dedicated for all responses from P360 to AVOS is presented here.
The queue id used here is 'bpm_response'.
Format of naming properties : queue.{queueId}.property.
queue.bpm_response.type = ${queue.default.type}queue.bpm_response.writer.count = ${queue.default.writer.count}queue.bpm_response.consumer.count = ${queue.default.consumer.count}queue.bpm_response.url = ${queue.default.url}queue.bpm_response.username = ${queue.default.username}queue.bpm_response.password = ${queue.default.password}queue.bpm_response.message.format = XMLqueue.bpm_response.name = P360_BPM_RESPONSEqueue.bpm_response.label = BPM_RESPONSEqueue.bpm_response.delivery.delay = ${queue.default.delivery.delay}Values set for above parameter like queue name and label can be changed appropriately.
bpm_response in above sample properties(like queue.bpm_response.type) is just an example name. It can be added with any name, but just make sure to set that name in header parameter 'ResponseQueueId' of workflow while sending request to P360 from AVOS.
Similarly, any number of queues can be added.
Once server.properties is updated, server restart is required after which we will see all queues gets created.
Changes required in AVOS
To handle multiple queues for request and response:
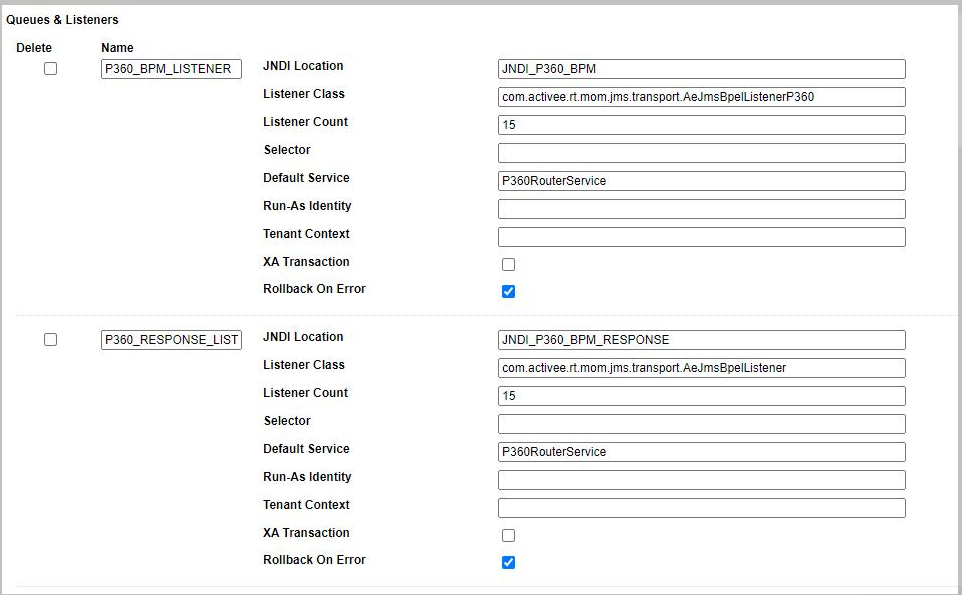
First, we need to create listeners for all the response queues on AVOS that were created in the above step like it's already done for P360_BPM queue.
Apart from that, we need to change workflow to have 'ResponseQueueId' header with appropriate value of newly created request/response queue. This queue id should match with one mentioned in server.properties file (bpm_response in example shown above).
Example of headers according to sample queueId.
<abx:param name="User" value="{ $p360User }"/><abx:param name="Password" value="{ $p360Password }"/><abx:param name="ResponseQueueID" value="bpm_response"/><abx:param name="MessageFormat" value="XML"/><abx:param name="SuccessTargetService" value="CallDataQuality-Result"/><abx:param name="ErrorTargetService" value="CallDataQuality-Error"/><abx:param name="P360Url" value="rest/V1.0/manage/merge"/><abx:param name="JMSCorrelationID" value="{ $correlationId }"/>