Operations: Export Templates
Export template parameters
Export template parameters can be parameters of data sources, parameters of export post steps or variables. Furthermore variables can in turn be used as parameters of data sources or export post steps.
There are a lot of parameters you can configure in the export templates. All of them can be assigned to one of the following two categories:
Identify
Each of the export templates has two (GDSN) or three (IM) mandatory parameters needed for the communication with the GDSN pool. It is recommended to set the correct values and make those parameters invisible.
"Information provider" and "Information provider GLN" respectively
This is the supplier representing your own GLN"Recipient" and "Recipient GLN" respectively
This is the customer representing the 1WorldSync pool GLN"User Id"
IM only: This is the user id to authenticate yourself against the IM pool
The "Information provider" and the "Recipient" have to exist in Product 360, otherwise the answers from the pool will not be written back to Product 360. Make sure you created the values like described in the section about the creation of supplier and customer.
Select data
Most parameters are used to qualify which data should be exported.
First of all, there is a catalog and an item assortment to determine which items are to be exported.
In addition to that, the target market, a language, a price type, etc. specify which details of items are to be exported.
Export data source configuration
IM:
All IM export templates use the "Item list" as data source.
"Changed and new items"
If you want to schedule repeated export jobs, you usually want to send only new and changed items to the pool. That is why you have to change the data source of the corresponding export template.
To change the data source to "Changed and new items" you need to do following steps:
Open the properties dialog of your export format template and go to the "Data sources" tab
Press the "New..." button and choose the "Changed and new items" data source. Then close the property dialog by pressing "OK"
Open the "Items" module of your export format template by double click
Change the data source from "Item list" to "Changed and new items" in the property view of the module
Go back to properties dialog and open "Data sources" tab
Select data source "Item list" and press "Delete" button
Standard GDSN:
Most Standard GDSN export templates use a form of the hierarchy of new and changed items data provider as data source. If you want to schedule repeated export jobs, you usually want to send only new and changed items to the pool.
Both:
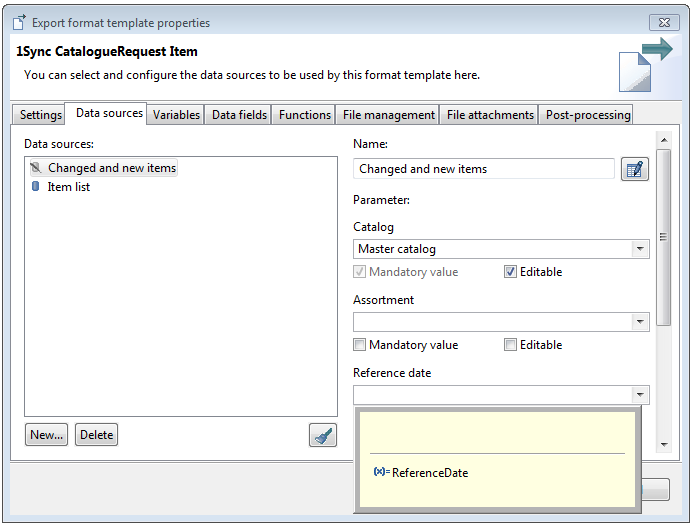
The following settings are recommended for the data source:
|
Setting |
Value |
Editable |
|
Catalog |
Master catalog |
true |
|
Assortment |
<empty> |
true |
|
Reference date |
Variable "ReferenceDate", see next chapter |
true |
|
Type of change |
New and changed items |
false |
|
Update assortment |
<empty> |
true |
|
Version |
Working version |
false |
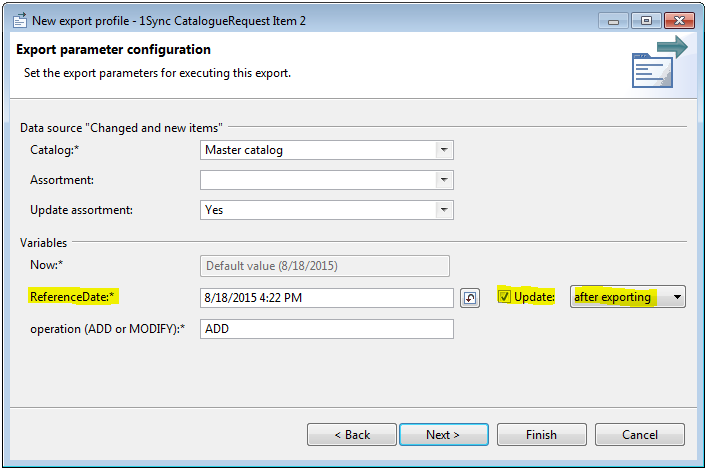
You can specify appropriate values for the visible parameters in the export profiles you create from the export templates.
It is recommended to set the "Update assortment" value to "true" for scheduled export jobs, but if you want to start a single export it may not be necessary to update the assortment.
"Items by new or changed publication status" (IM)
The export template for creating publication messages also uses the "Item list" data source by default. If you want to use the recommended publication process (see Publication), you should use another item data source for the corresponding publication export template (see Export templates for IM), the "Items by new or changed publication status" data source. The reason is that items are not changed when they are marked for publication and therefore are not picked up by the "Changed and new items" data source. The "Items by new or changed publication status" data source checks the publication status entries of items and processes all items that have new publication markings.
To change the data source to "Items by new or changed publication status" you need to do following steps:
Open the properties dialog of your export format template and go to the "Data sources" tab
Press the "New..." button and choose the "Items by new or changed publication status" data source. Then close the property dialog by pressing "OK"
Open the "Documents" module of your export format template by double click
Change the data source from "Item list" to "Items by new or changed publication status" in the property view of the module
Go back to properties dialog and open "Data sources" tab
Select data source "Item list" and press "Delete" button
The following settings are recommended for the "Items by new or changed publication status" data source:
|
Setting |
Value |
Editable |
|
Catalog |
Master catalog |
true |
|
Assortment |
<empty> |
true |
|
Reference date |
Variable "ReferenceDate", see next chapter |
true |
|
Update assortment |
empty |
true |
|
Version |
Working version |
false |
You can specify appropriate values for the visible parameters in the export profiles you create from the export templates.
It is recommended to set the "Update assortment" value to "true" for scheduled export jobs, but if you want to start a single export it may not be necessary to update the assortment.
Parameters
Most parameters of the export template have to have fixed values. You should set those values to the export templates and switch the corresponding parameters to "Not editable" to hide them for further use.
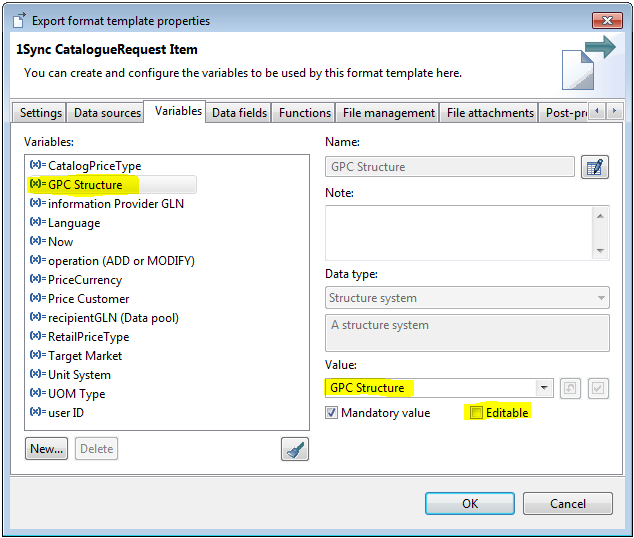
Hide a mandatory parameter: set a value, switch to not editable
If you then use an export template to create an export profile, you will see only parameters that are really needed to be configured, for example the operation "ADD" or "MODIFY" in the export profile.
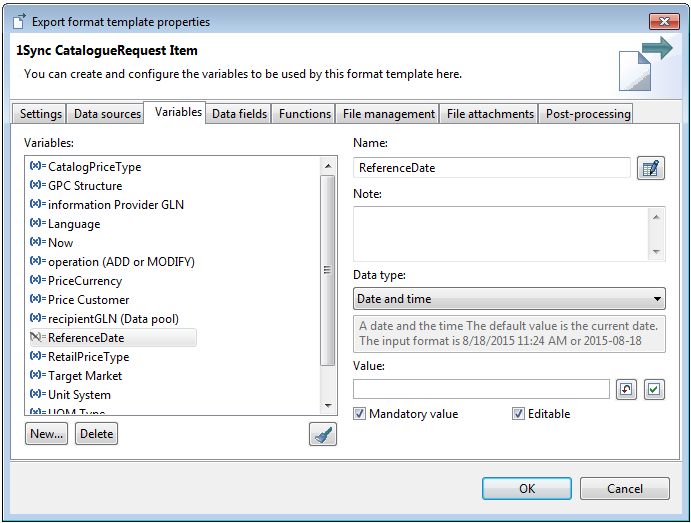
Reference date
If you want a scheduled export job to export all items that have been created or updated after the last run, you can use a variable that gets updated with the corresponding date and time for every export job run.
First, you create a variable of type "Date and time". Then you assign this variable as value for the "Reference date" parameter of the "Changed and new items" data source. The last step is to configure the variable in an export profile: select "Update" and "after exporting" for the variable.
XSD schema files (Standard GDSN)
For DSE all available XSD schema files for all GDSN modules are delivered although only some of them are supported out of the box and so are really needed.
They are provided to make it easier for IPS or partners to extend the datamodel with new modules and have a consistent set of XSD files. This is also important because B2B has the same set of XSD schema files and they have to match to guarantee a working process.
Please note that B2B also has the full XSD schema file set which means there is nothing to do on B2B side when adding new modules or attributes.
Informatica B2B DX receive endpoint directory
The path to the B2B DX receive endpoint directory is set by the value for "Target directory" of the "Copy export file" export post step. As this is a fixed value you should set this parameter to not editable.
Use export templates
After you have configured the export templates you can use them to create export profiles for manual export or for scheduled export jobs.
The manual export can also be triggered by an immediate export. Therefore your template must match the needs of the immediate export:
The purpose "Available for immediate export" must be set in the template
The export format template for the immediate export must contain the value "Editable" in the data sources for the "Catalog" and "Assortment" parameters.
Post processing
Validate
All created XML files by the export will be validated against the corresponding XSD file. The "Validate XML file(s)" export post step will cancel the export if the validation fails.
Export post step name: Validate XML file(s)
Parameter name: Cancel export in case of error
Transfer
After an export has been finished successfully, the created XML file will be transferred to B2B DX or OpenAS2. The path to that folder is a parameter of the "Copy export file" export post step.
As this is a fixed value you should set this parameter to not editable.
Export post step name: Copy export file
Parameter name: Target directory
For usage with B2B set the parameter to the B2B DX receive endpoint directory.
For usage with OpenAS2, have a look in the OpenAS2 config.xml and search for the attribute 'outboxdir' in the tag processor/module
Example:
<openas2> ... <processor ...> <module classname="org.openas2.processor.receiver.AS2DirectoryPollingModule" outboxdir="$properties.storageBaseDir$/toAtrify" errordir="$properties.storageBaseDir$/toAtrify/error" ... /> ... </processor> ...</openas2>resolving to something like this: C:/Informatica/OpenAS2/data/toAtrify