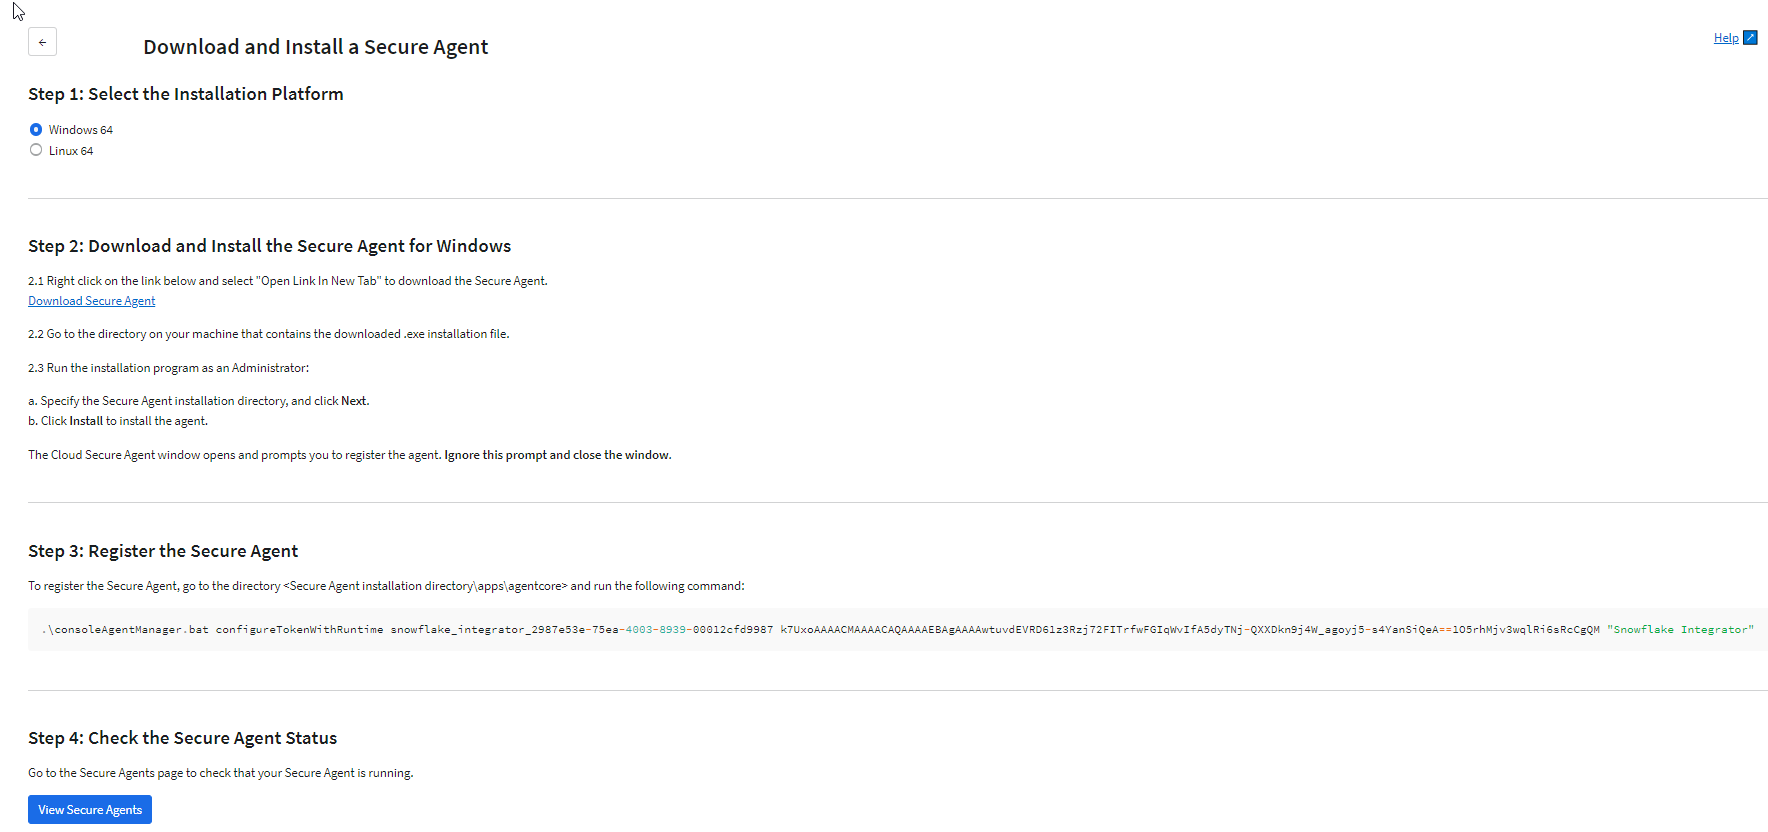
You must have at least one Secure Agent. A Secure Agent is a lightweight program that runs tasks and enables secure communication across the firewall. If a Secure Agent has not been installed, you'll need to add one.
1On the Complete Initial Setup page, click Install a Secure Agent.
If a Secure Agent is already installed, the Manage Secure Agents button is displayed instead. To add another Secure Agent, click Manage Secure Agents > Add Secure Agent and then continue with the following steps.
2 In the Step 1 section, select one of the following installation platforms:
- Windows 64-bit
- Linux 64-bit
Note: If you install more than one Secure Agent, all of the agents must run on the same platform type.
3In the Step 2 section, complete the steps to download and install the Secure Agent on your installation platform:
4In the Step 3 section, register the Secure Agent. To do so, open a command prompt locally, navigate to the Secure Agent installation directory, and run the command that is displayed in Step 3, for example:
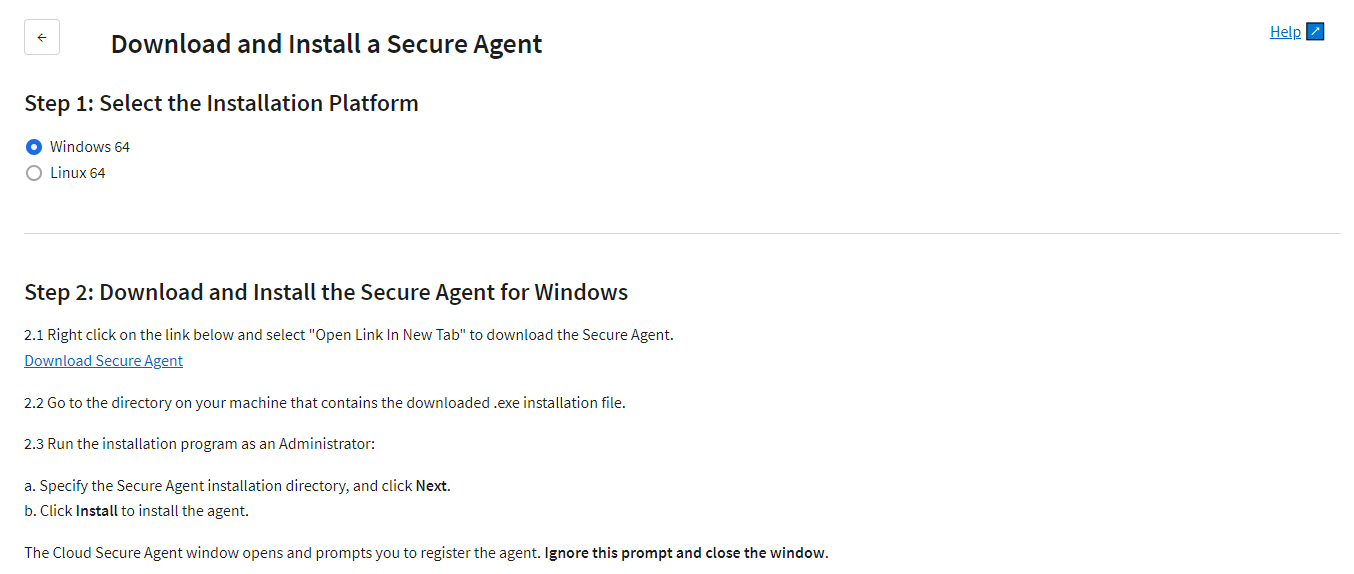
After you select Windows as the installation platform, continue to Step 2 and complete the following steps to download and install a Secure Agent locally:
1After you select Windows as the installation platform, continue to Step 2.
2To download the Secure Agent installation file, right-click the Download Secure Agent link and select Open Link in New Tab.
The installation file is downloaded locally.
3Right-click the downloaded .exe installation file and select Run as administrator.
4In the installer, complete the following steps:
aSpecify a local directory where you want to install the Secure Agent if you do not want to use the default location. Then click Next.
Note: Install the Secure Agent on a computer that is usually running and connected to the network.
bReview pre-installation summary information and disk space requirements.
cClick Install to start installing.
When installation is done, the Cloud Secure Agent window opens and prompts you to register the agent. Ignore this prompt and close the window.
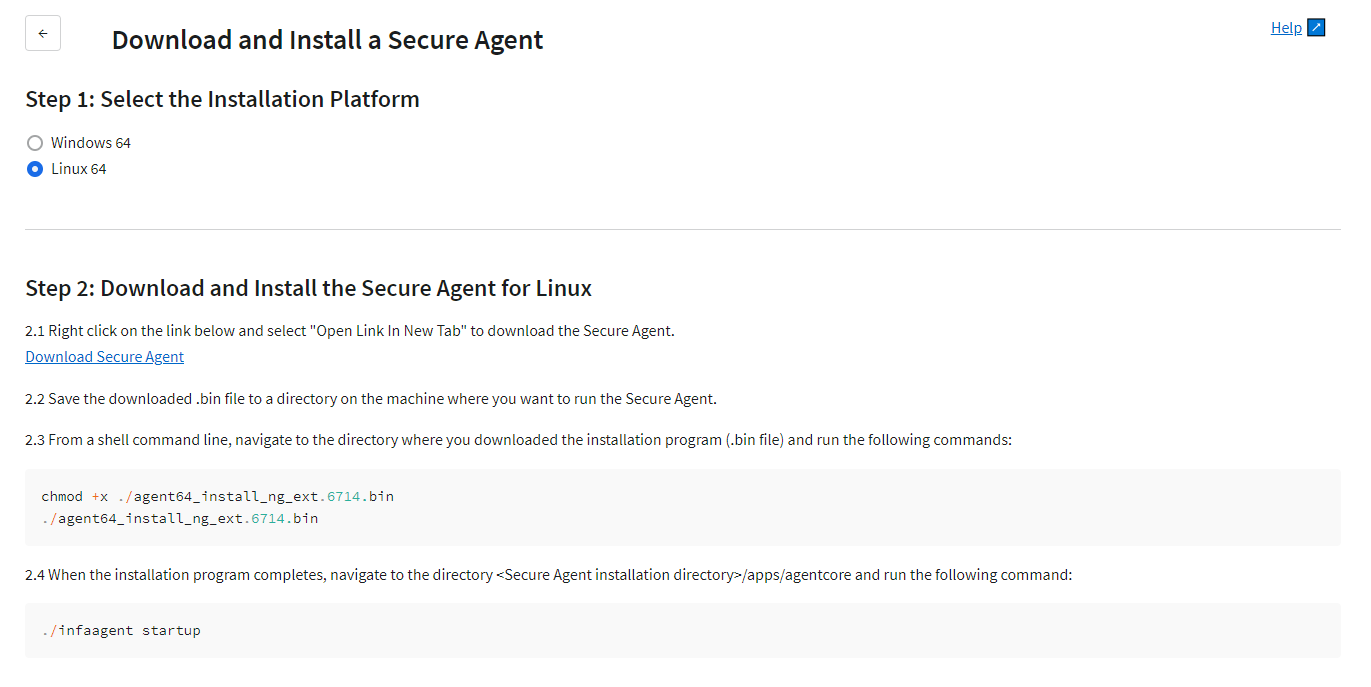
If you selected Linux as the installation platform, complete the following steps to download and install a Secure Agent on a Linux machine:
1After you select Linux as the installation platform, continue to Step 2.
2To download the Secure Agent installation file, right-click the Download Secure Agent link and select Open Link in New Tab.
3Save the downloaded .bin installation file to a directory on the machine where you want to run the Secure Agent.
4From a shell command line, navigate to the directory that contains the downloaded installation file and then enter the following command to run the installation program:
5When the installation program completes, navigate to <Secure Agent installation directory>/apps/agentcore. Then enter the following command to start the agent: